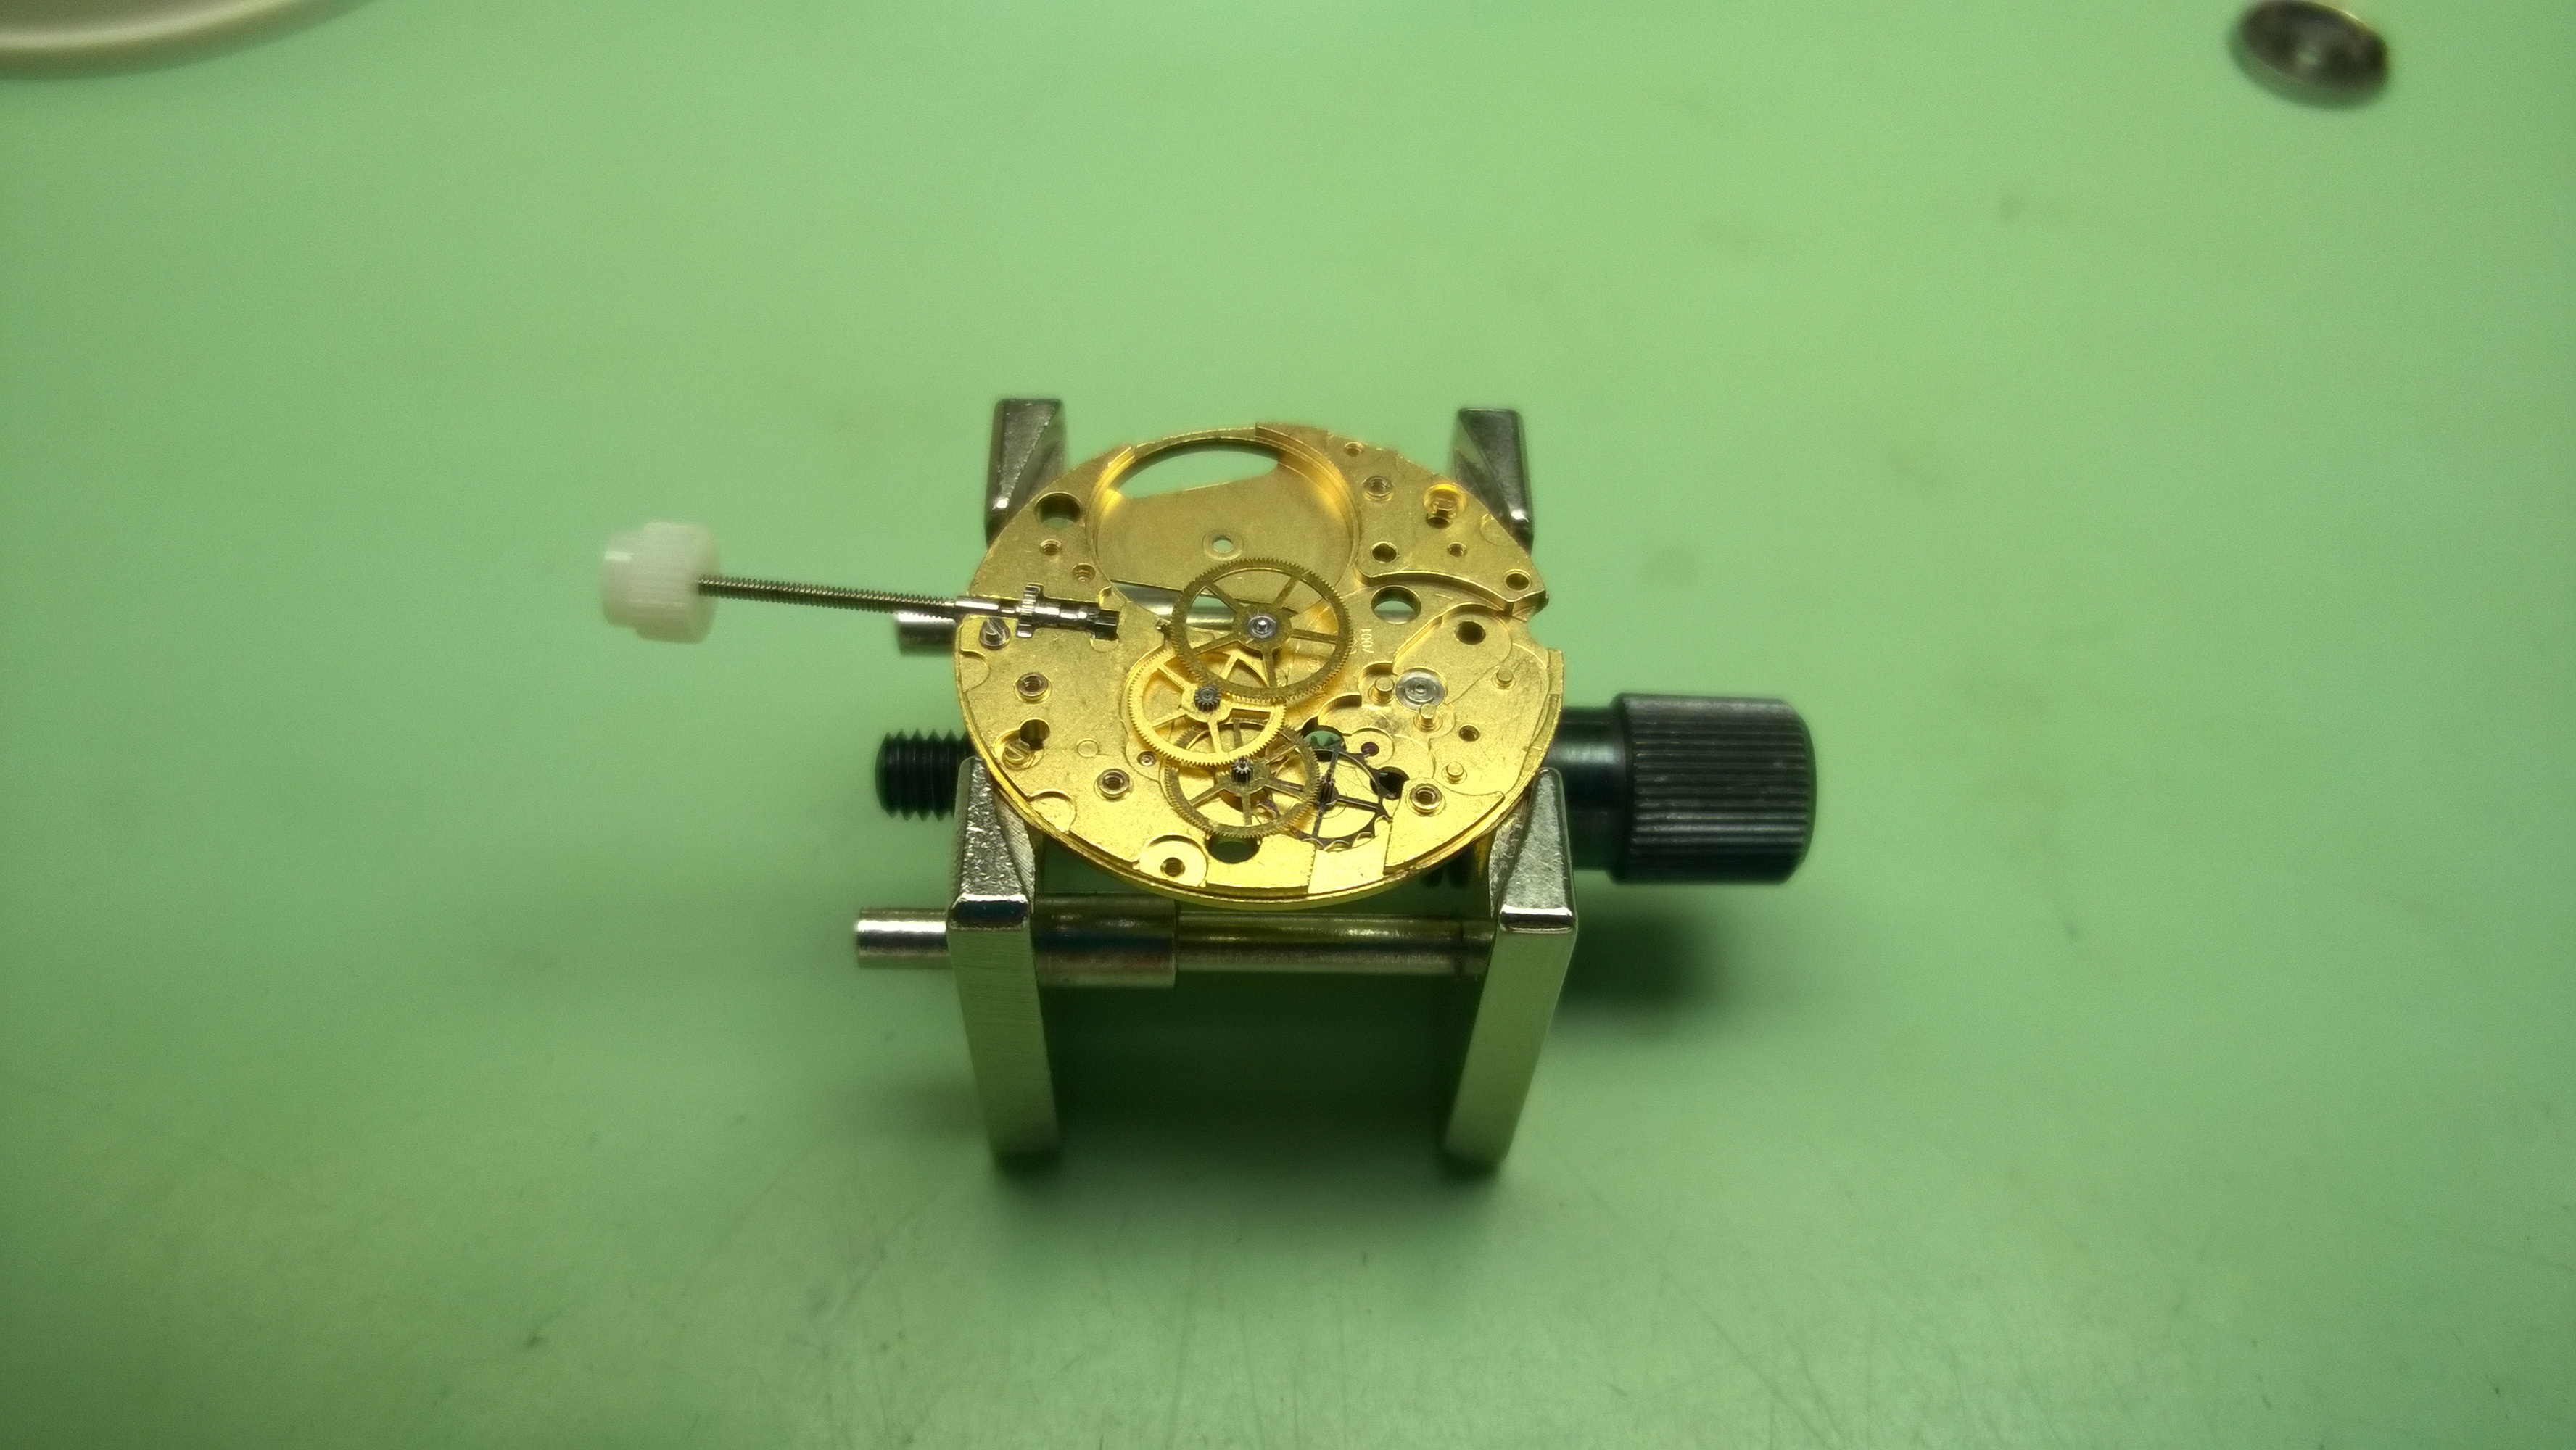
Monday was a pretty good day for me. I was able to get the ETA-7001 fully disassembled and cleaned without any issue. It is definitely a nice movement, one that I wouldn’t mind if it crossed my bench “in the wild.” Say what you will about ETA movements, but so far, they have been a pleasure to work on.
As an aside, for those of you reading who don’t stay up to date with the highs and lows of… watch snobbery, ETA is a company that specializes in ebauches (essentially a pre-made movement that a watch assembly company can purchase and put in a case). There are multiple companies that specialize in ebauches, but ETA continually raises the ire of many watch aficionados due to a few reasons:
- ETA movements could be routinely found in watches that MSRP’s for $500 and the same movement in a watch that MSRP’s for $5000 (Hamilton Jazzmaster and Bell & Ross WWII Military Heritage). While that isn’t caused by ETA, people get upset about it. ETA doesn’t recommend or suggest pricing to companies who use their movements-if someone wants to buy an ETA ebauche for $100 and sell it in a watch that they price at $10000, and people buy it, it is priced at what the market will bear.
- ETA is cutting off supply of their ebauches to non-Swatch Group companies by 2019 (the date keeps changing, but I last read 2019) as well as eventually cutting off parts supplies sometime around/after that date. I am not going to dip my toe in these waters. Yet. I have roughly a year before I need to figure out what the implications of this will be for me or the industry as a whole. I will say that there are companies out there (Sellita, Soprod, Miyota and others) that make movements that are similar to ETA’s, and there will be a market/need for a manufacturer to make spare parts to replace stocks that are “drying up.”
- ETA movements are, well, ETA movements. They aren’t sexy, etc. While I am the first to admit that an ETA-6497 or ETA-7001 isn’t “sexy” in terms of complications, it was designed well, accurate, and ridiculously easy to work on. Not every watch needs to have a minute repeater-but it does need to be able to tell time well and reliably.

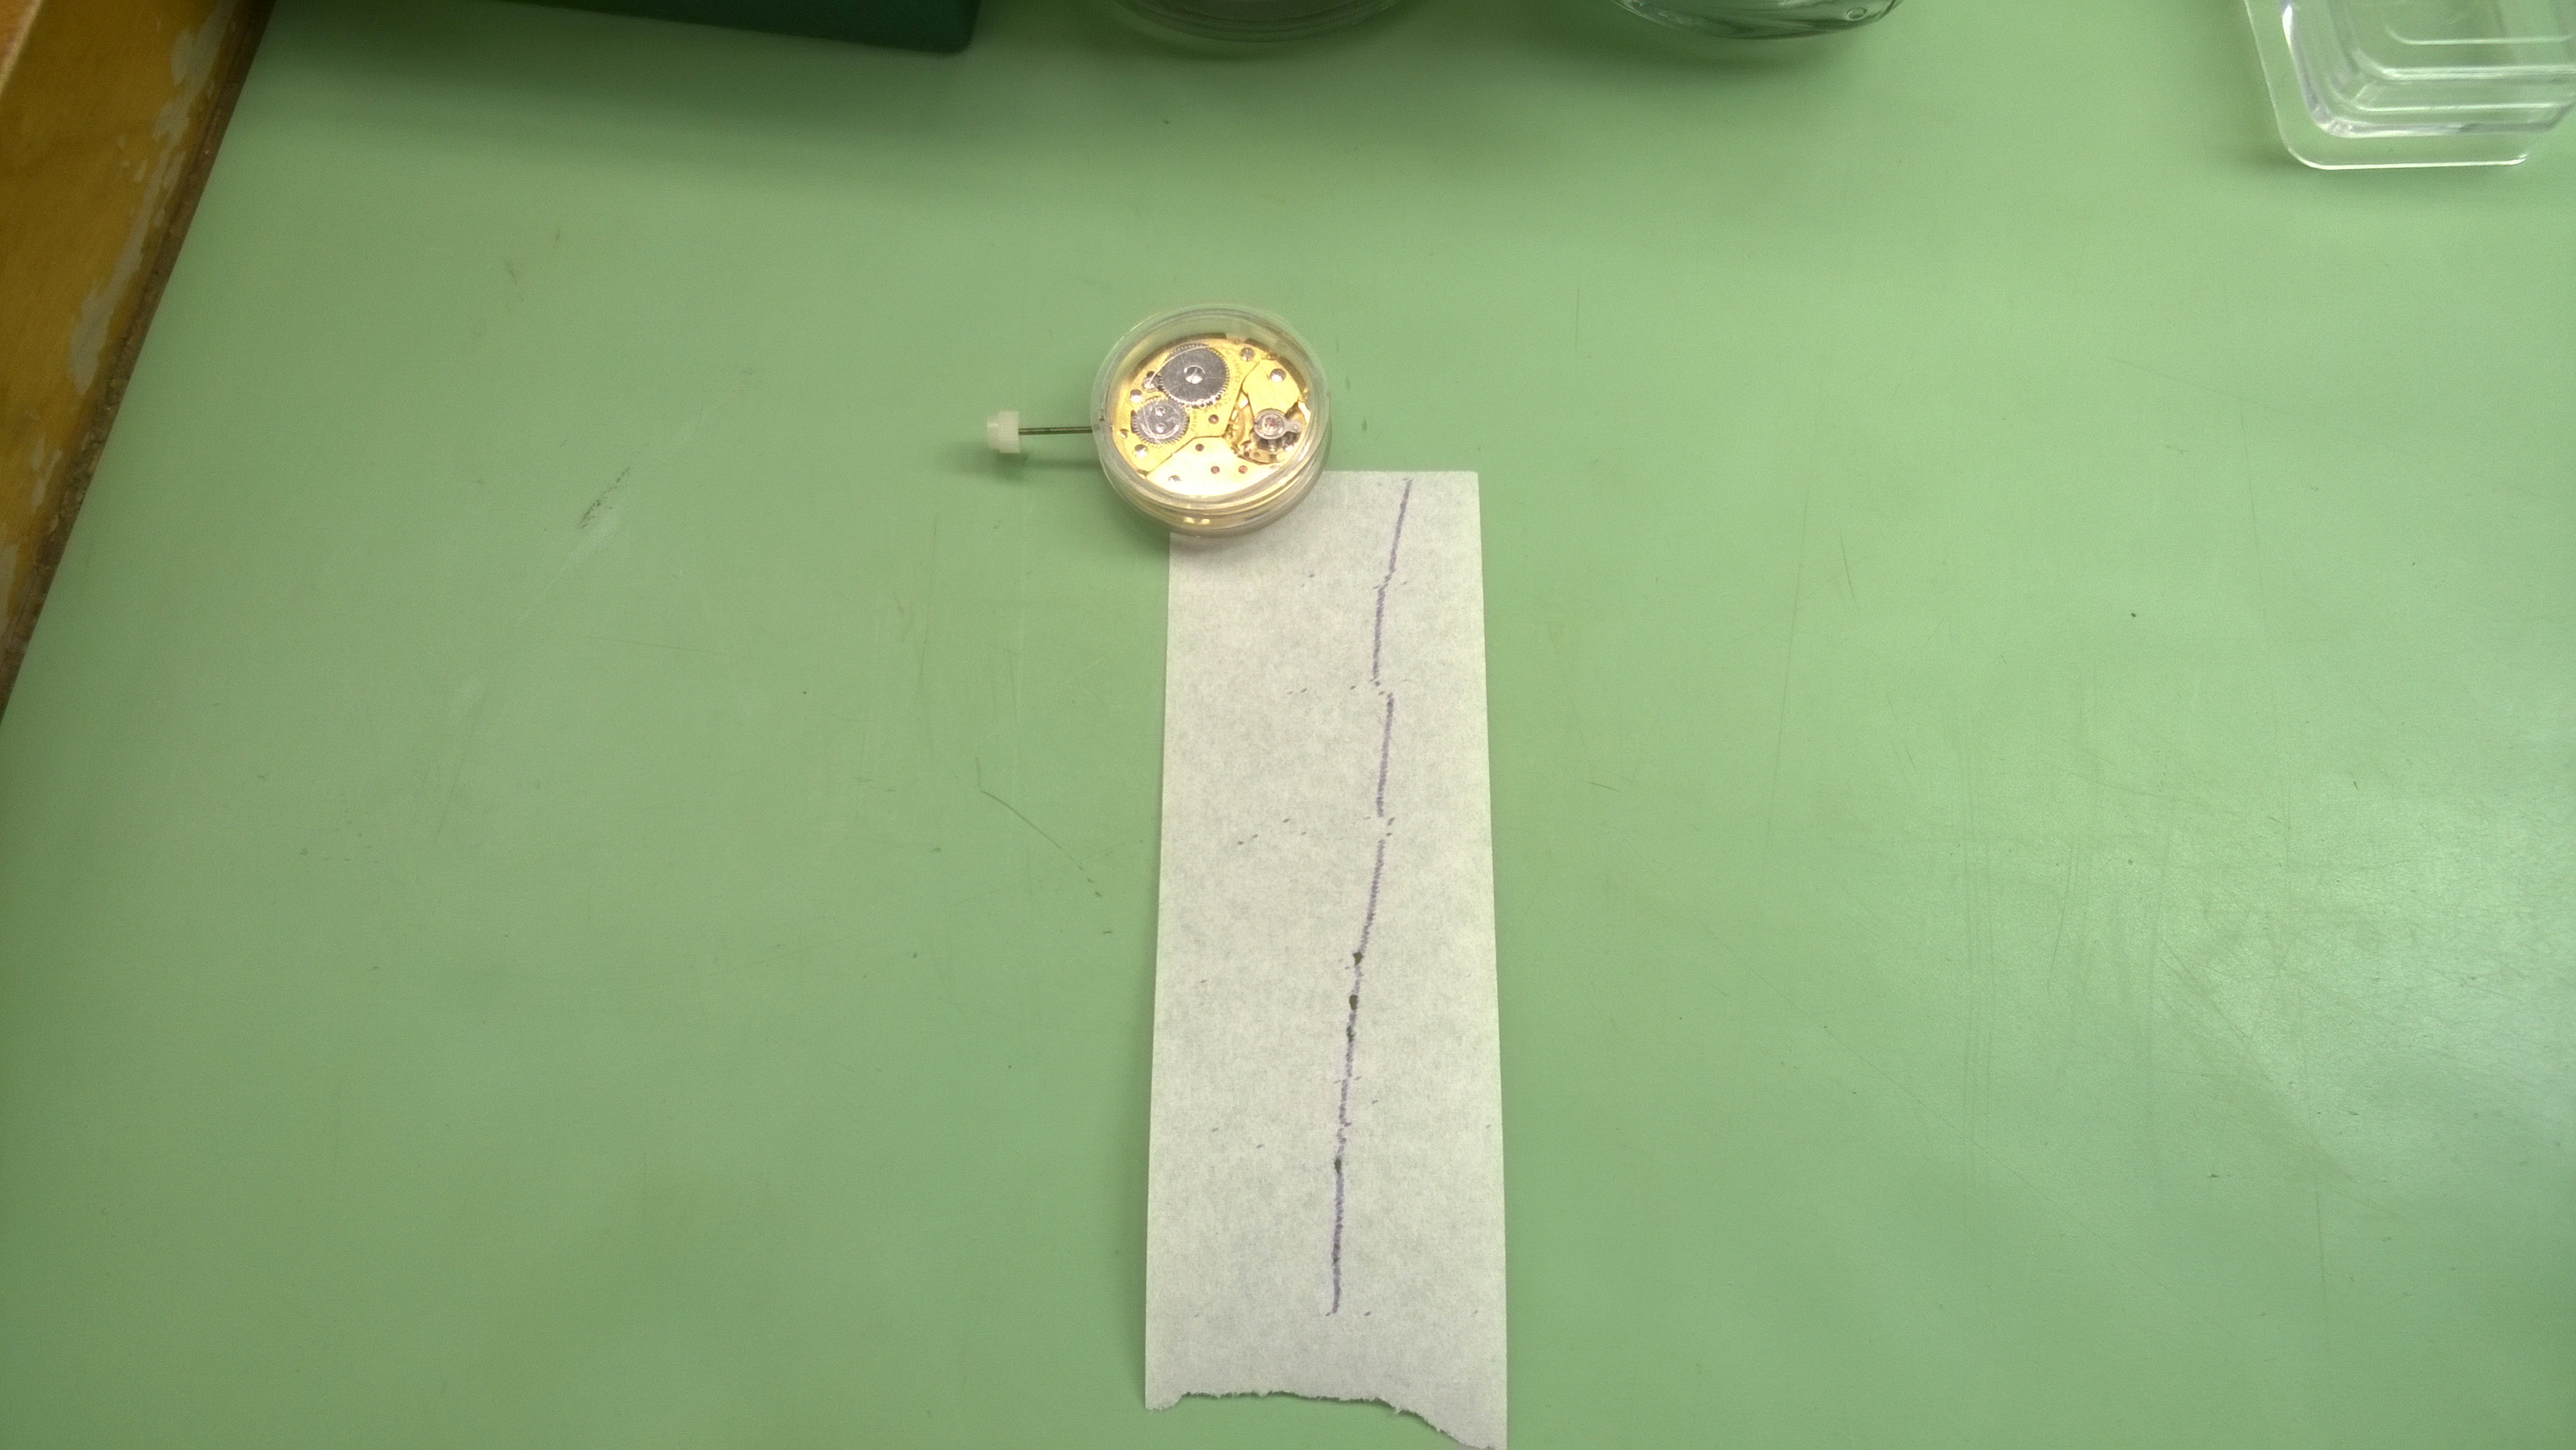 The last picture is the watch after I timed it out. As you can see, the slight upward trend is showing that the watch is gaining slight time in each position, but that isn’t really an issue (if it were losing time, that would be a problem). I played around with the beat regulator until I got it down to 0.00ms-0.1ms in all positions. I am really enjoying the beat regulator (I am trying to not get used to it because not every watch uses one), but for now, I will definitely take advantage of it.
Here is a quick video of the movement after I got it cleaned, oiled and timed.
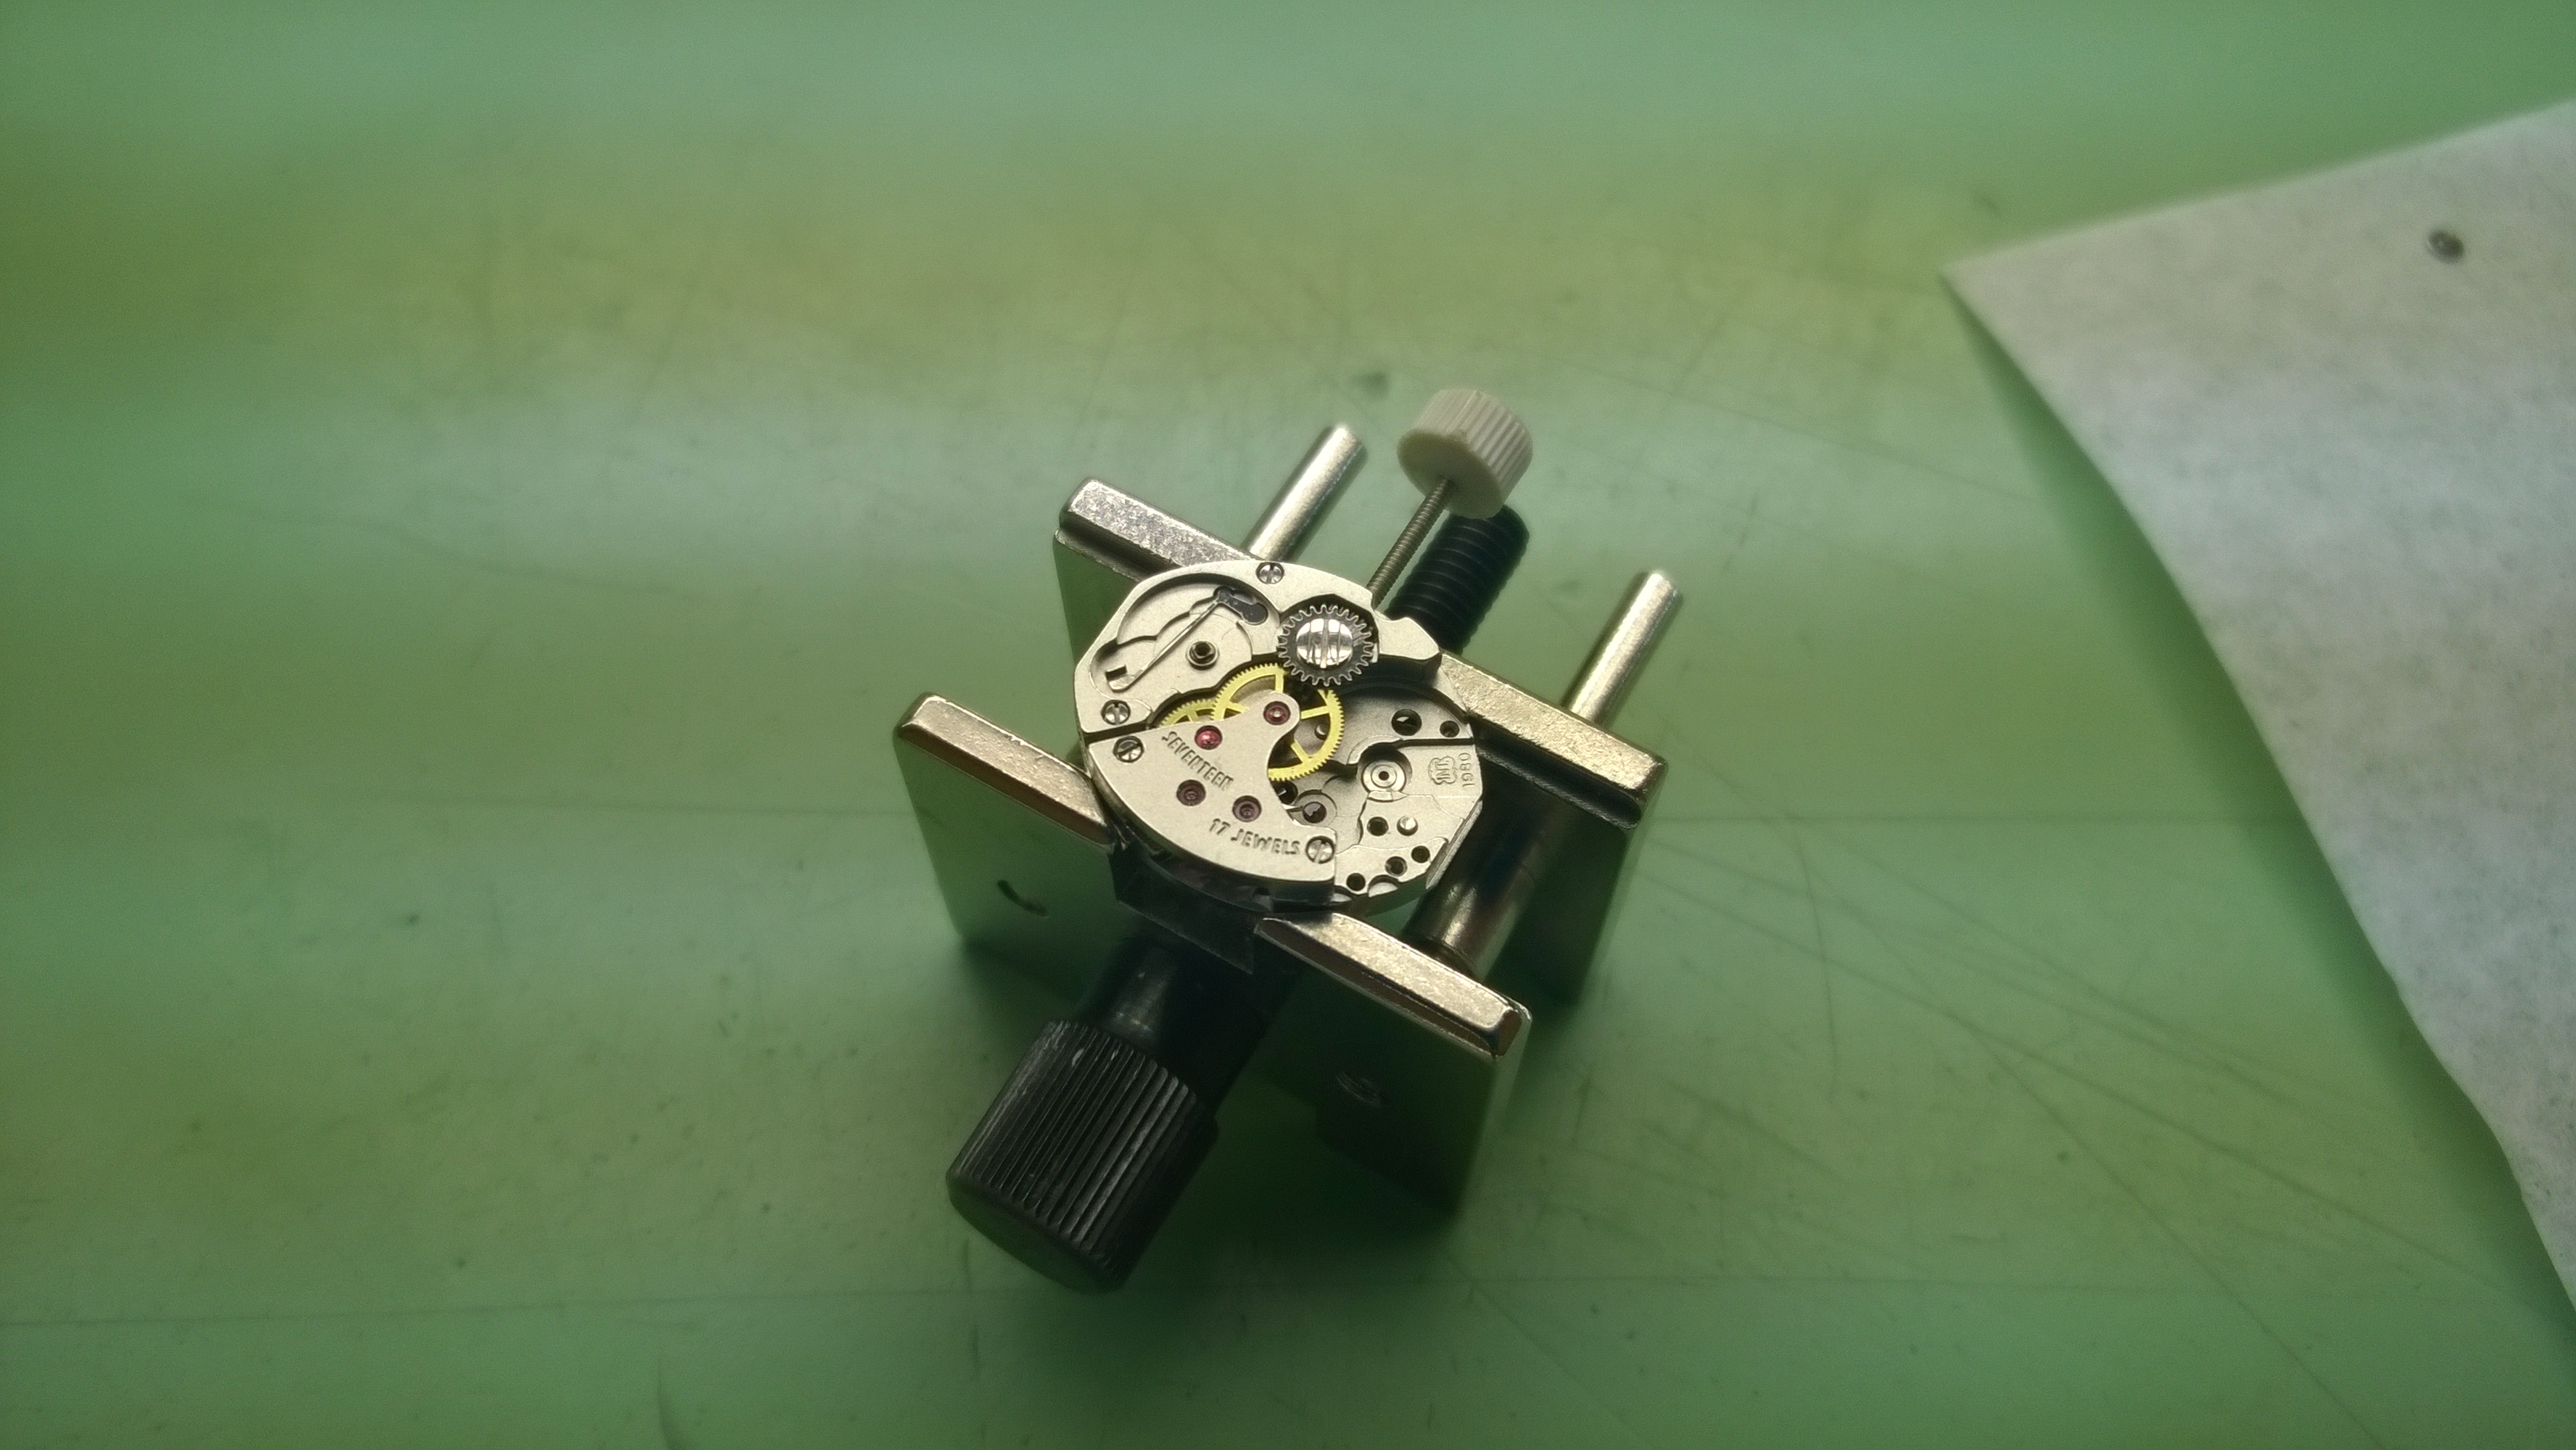
After turning in the 7001, I was given an Interchangeable 1980 movmement. I haven’t been able to find out much about the company (they are long out of operation), but it is a pretty small movement. It’s a ladies movement and is around 6 lignes (~13.53mm) in size. The usual process here-soak the fork, remove the stones, show it to my instructor, replace the stones, re-shellac and check lock after replacing the fork.
 Well, right when I was about to put the entrance stone in, my tweezers slipped and the entrance stone went to the big bench (aka, the floor). So, I had an impromptu lesson in how to match a new pallet stone when one is lost.
 First, you need to get a micrometer. This is a really accurate measuring device. If you look at the far left side of the knob, you can see a zero peeking out. The gradations on the knob itself go from 0-100. As you spin the knob open, the knob moves to the right showing the size from 0mm-5 or 10mm (I believe). By seeing how many ticks on the barrel (from 0-5) you have, as well as where the knob stops and lines up with the horizontal dash, you can determine the size of an item to an accuracy to a hundredth of a millimeter (X.XX mm)
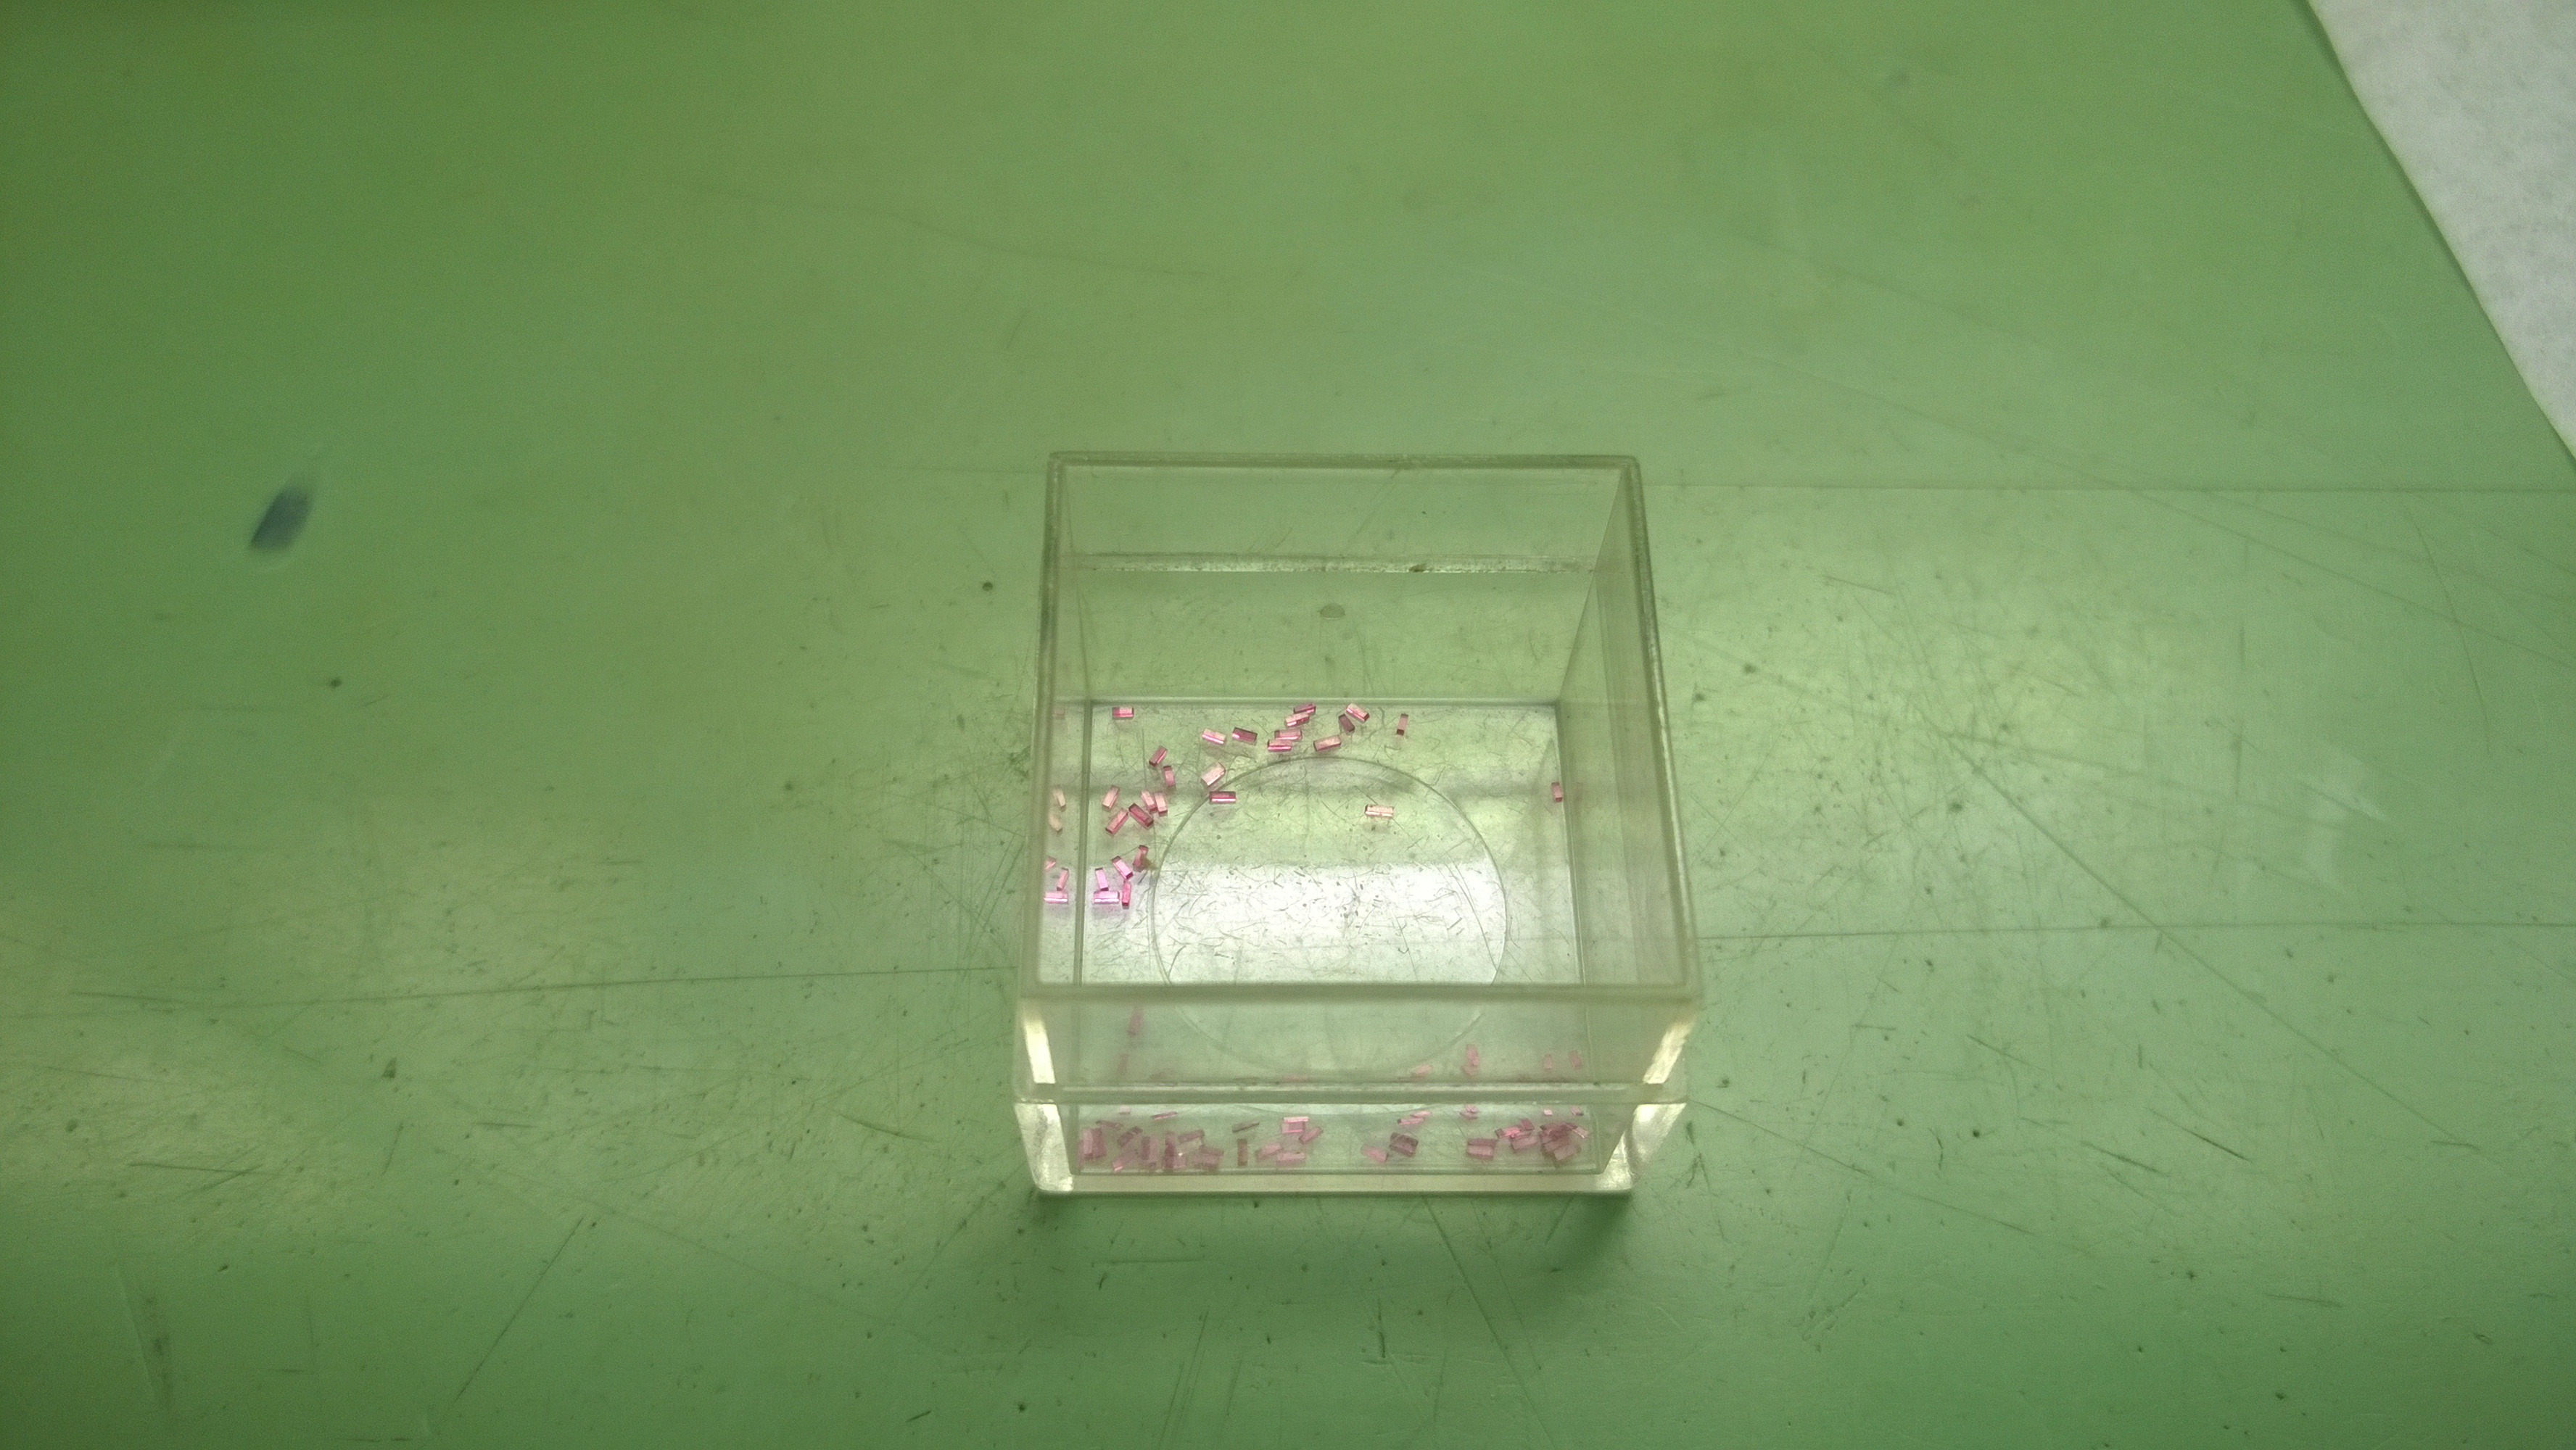
To roughly match a pallet stone, you need to measure the width of the stone that you do have. This is a lot harder than it sounds, but you just… put the stone in the micrometer.
 Inside that little gap is a pallet stone. It measured out to be .26mm wide. After getting the width of the stone, it is just a matter of digging through a box of stones your instructor has to find the right kind of stone (entrance/exit), pull out the ones you think will fit, measure them and go from there.
 This all happened after lunch, and took the rest of the day. On Tuesday, I came in fresh and ready to measure out the stones I had chosen. Once I found two that would work, I went to slide one into my fork and the outside “arm” that holds the stone in snapped off. Luckily, there was a donor watch that I was able to salvage another fork from to repeat the process.
Well, guess what happened. Again. Fling! Pallet stone went flying. I grumbled my way through the micrometer/pallet stone box process again. Success finally came after lunch. I got the stone in and shellaced. Once I put it in the watch to check the lock, I found that the entrance stone wasn’t achieving enough lock, so I had to play around for a while to get it fixed. This moved me into Wednesday.
After getting the lock adjusted (removing the shellac, moving the stone, redoing the shellac, putting the fork back, winding and checking for lock), I found out that I had a slight out-of-flat and out-of-round bend in my hairspring. The out-of-flat was coming from the corrective curve and was causing the stud to be higher than it should have been, and the out-of-round was just past the corrective bend.
 If you click on the picture, the area of the hairspring that is right next to where my tweezer tips are is the corrective bend. (I am sure I will have a post later about corrective bends, but they are usually put in a hairspring so there is ample room for the hairspring to move through the regulator pins) This was going to be a tricky procedure for me because I wasn’t able remove the hairspring from the wheel. I ended up using a bench block to get some stability when working on the spring. Also, since the bend was in a small area that is critical to the function of the spring, I had to be extra careful while working on it. I started on the out-of-flat bend and was able to slowly work it to where it wasn’t as bad-I’d say I got it about 95% complete. I then worked the out-of-round bend. After getting it checked, my instructor pointed out that the corrective bend had been deformed a bit, so I set out to work on those.
Next thing I knew, it was time to go home. So, after a day and a half of staring at pallet stones, and a day of working on hairsprings, my brain was a little fried, hence the reason for not posting last night.
This morning, I thought I was finishing up my hairspring work when I noticed I had a breguet bend (hockey stick bend) in my spring. Again, back and forth with the spring until I got it about 75% fixed. At that point, it was beyond my skills, so I took it to Mr. Poye to work on, and in about a minute or two he had it back to 100%. Hopefully in 20 years I will have 10% of the skill he has when it comes to hairsprings.
After getting the hairspring back, I disassembled the watch, cleaned it and oiled it. Once thing that struck me as a little odd was the click (remember, the click is what prevents the the barrel from unwinding by interacting with the ratchet wheel). All the clicks that I have had up until this point have been a three-part system (click, click spring, and click screw), but this was a one part system-and I thought it was great design. It was a single bar style system.
 The click is top left in this picture. The ratchet wheel sits on top of the bar and the click springs back and forth.
Here is a video of the click in action.
Also different about this watch was the shock system used. It looks similar to Incabloc shocks, but instead of hinging open, the shock spring comes out completely. In order to not lose the spring, you have to pin the spring down, “open” both sides, and slide the spring out. To put it back in, you reverse the procedure (slide in the spring, pin it down and then close it).
To make things a bit easier, the upper and lower shock springs were two different kinds.
 Luckily, no flung springs or broken settings, which, for the first time working with that kind of system was refreshing.
I tentatively have the watch timed, but need to get my timegrapher tape figured out (when I turned it to the dial right/left positions, the line split into two). I need to double check the settings on the machine because everything looked okay when I put it on the Witschi.
