The end of this week, was. Awesome. I am not going to skip ahead, but it is safe to say that my education is really getting started.
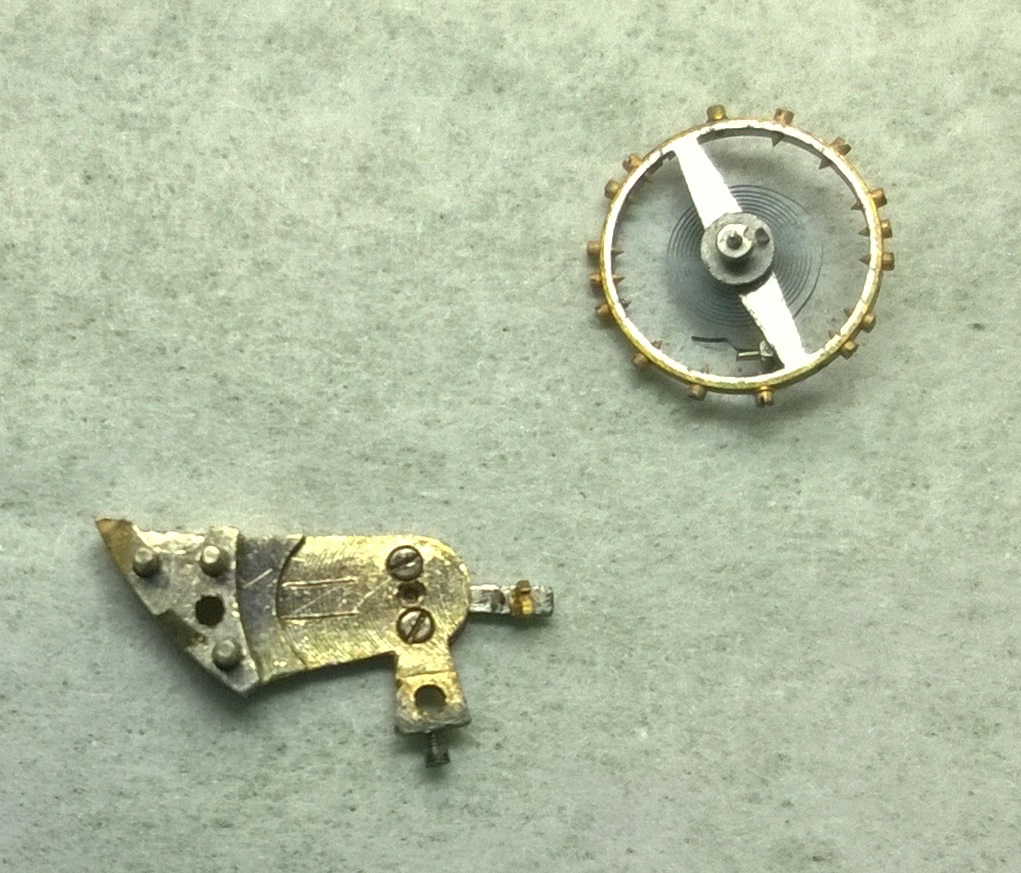
On Wednesday, the first half of the day was working on watch movements. The watch that I had started on Tuesday was proving to be a real jerk. I was able to get everything back together the way it needed to go-all gears seated in their jewels, all bridges put on with few difficulties, and the balance wheel was moving pretty well. Unfortunately, I discovered that the mainspring was either broken or the hook had detached from the arbor.
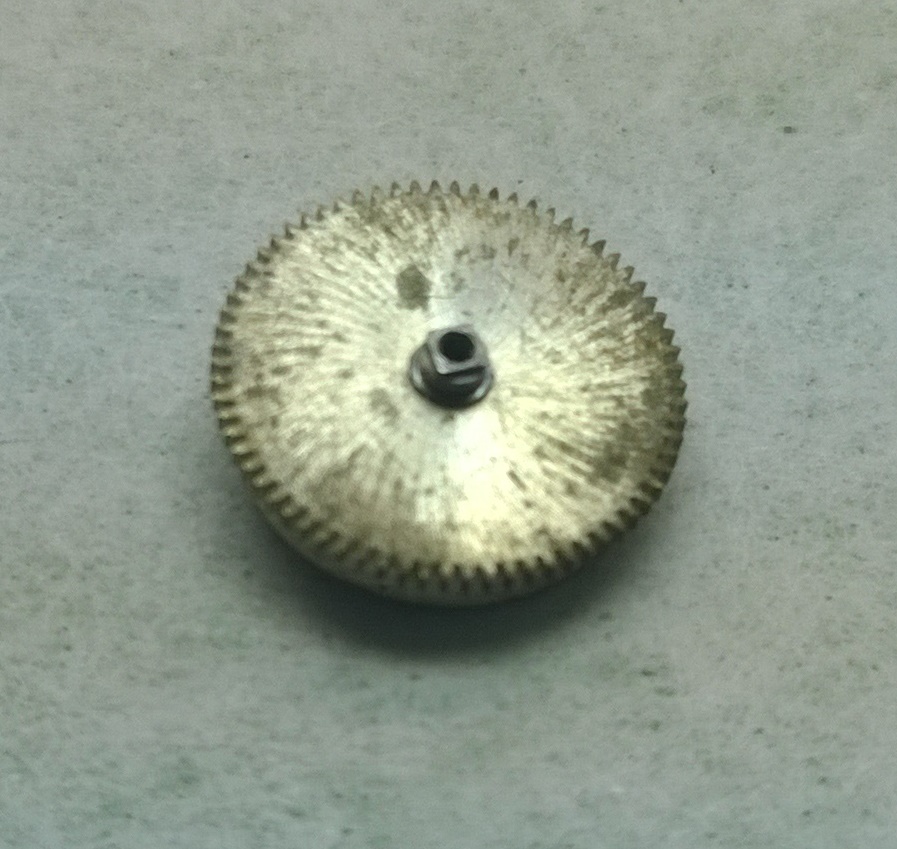
Here is an assembled mainspring barrel from a watch I had been working on. The square part is the arbor. The mainspring attaches to the arbor via a hook. The ratchet wheel rides the arbor, and when it turns, it winds the mainspring.
When I went to check the power transmission, I was not able to wind the watch. The ratchet wheel was spinning but the barrel was still. C’est la vie.
After a little while, Mr. Poye called myself and the other new student to his supply room to show us the exercise that he had set up so we could get some more material systems practice. This time, it was with Gaskets/O-Rings. As I said in a prior post, the main point of a gasket in a watch is to help seal it as much as possible to the outside elements. There used to be a bunch of different materials used (lead, cork, acrylic, etc) to produce gaskets, but now they are primarily made of silicon. The exercise that we did consisted of choosing the correct sized gasket for 3 watches.
Sizing a gasket properly is important-if it is too big or too small, it won’t do its job and then I’ll have to do my job ;P
When sizing a gasket, there are 3 different measurements that need to be accounted for:
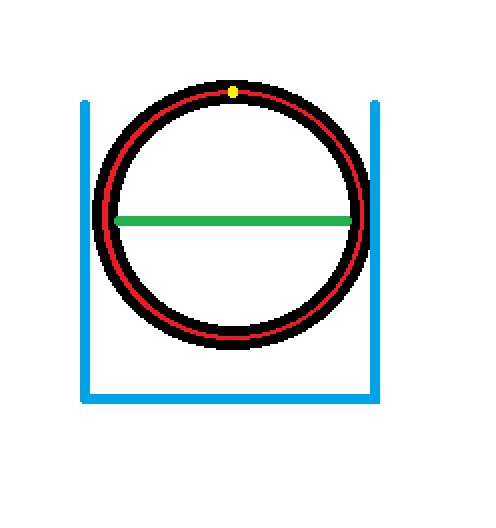 The Blue line represents the outside diameter. It is the total width from outside edge to outside edge. The green line is the internal diameter. It is the total width from inside edge to inside edge. The yellow dot at 12:00 represents the cross-section. The cross section is 1/2 the difference between the outside and inside diameter and is a measure of thickness. So if the Outside Diameter is 30 mm, and the inside is 28 mm, the cross-section is 1 mm.
Getting back to the exercise. The set-up was pretty simple (at least compared to the crown exercise!). Three watch cases, a small box of gaskets, and a pair of digital calipers. We had to measure the internal diameter of the case and case back, and figure out what size gasket was required for the case.
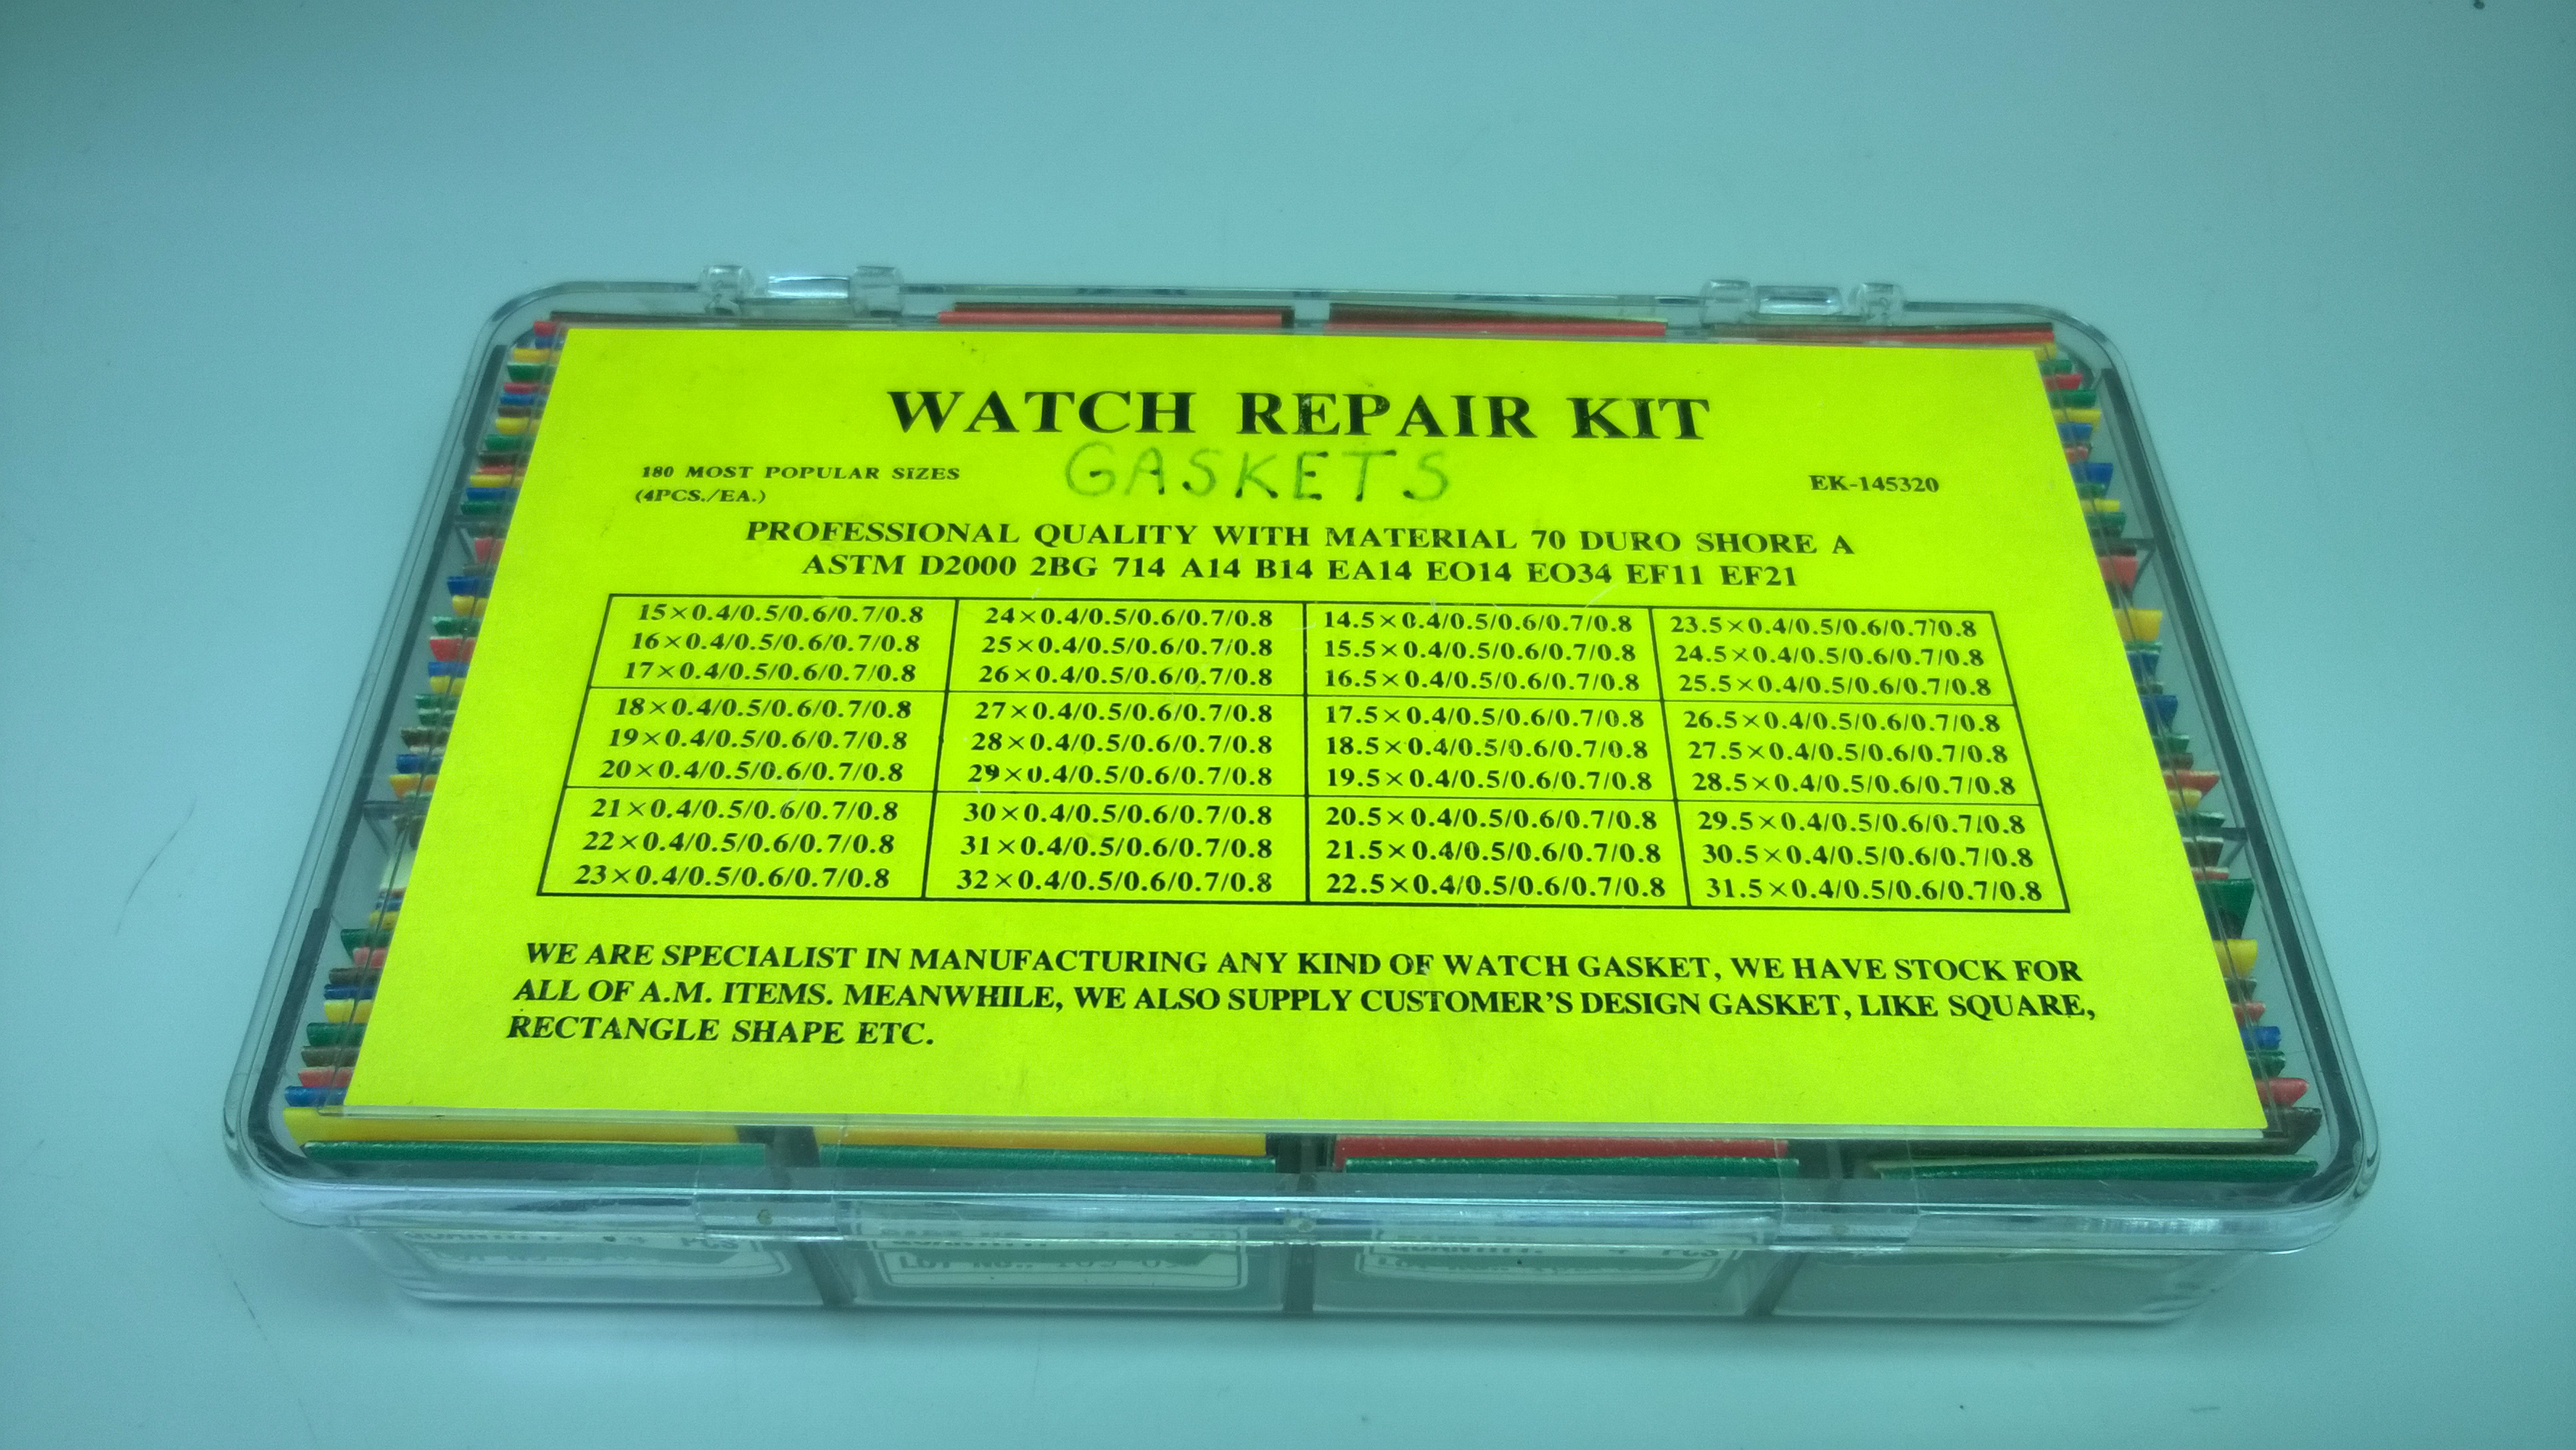
Here is the box that contained the gaskets. It ranged in size from 15.00mm to 32 mm. If you click the picture, you will see that there are bunch of numbers listed (15 x 0.4/0.5/0.6/0.7/0.8) Those are representative of the Internal Diameter x Cross Section. 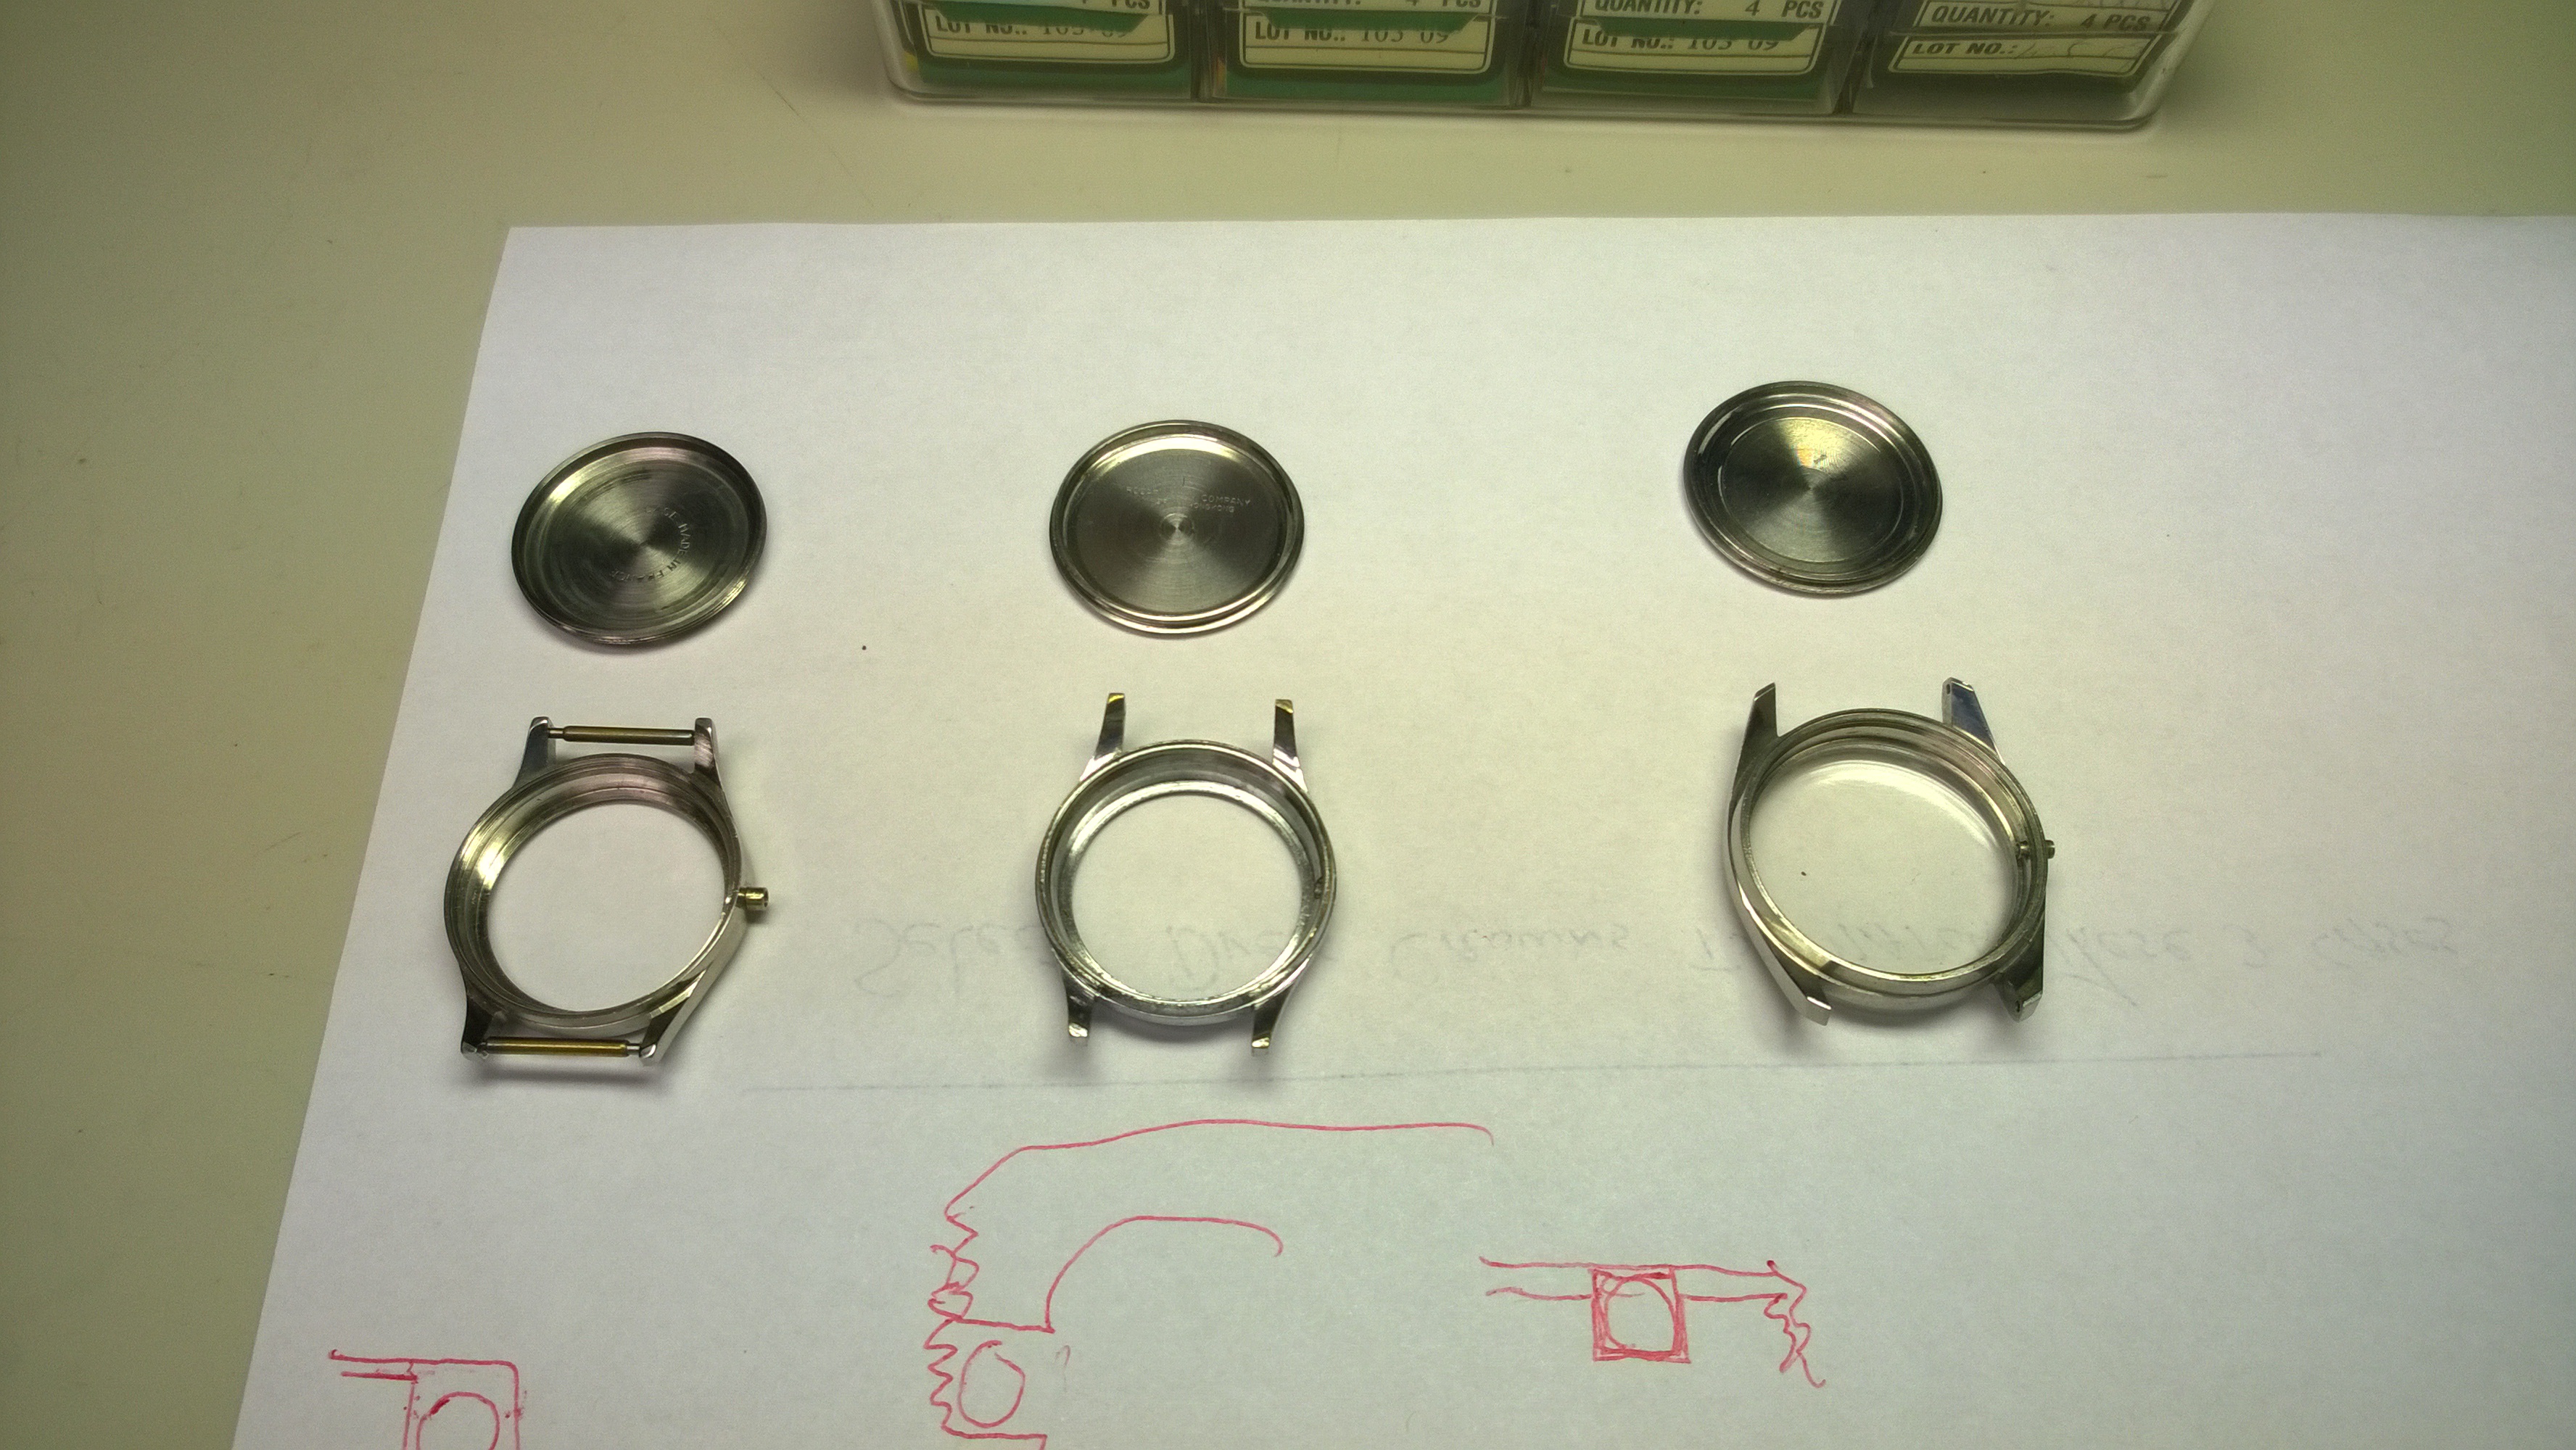
Here are the watch cases I worked with. The red drawings are ones that Mr. Poye did showing different ways gaskets can fit in a watch.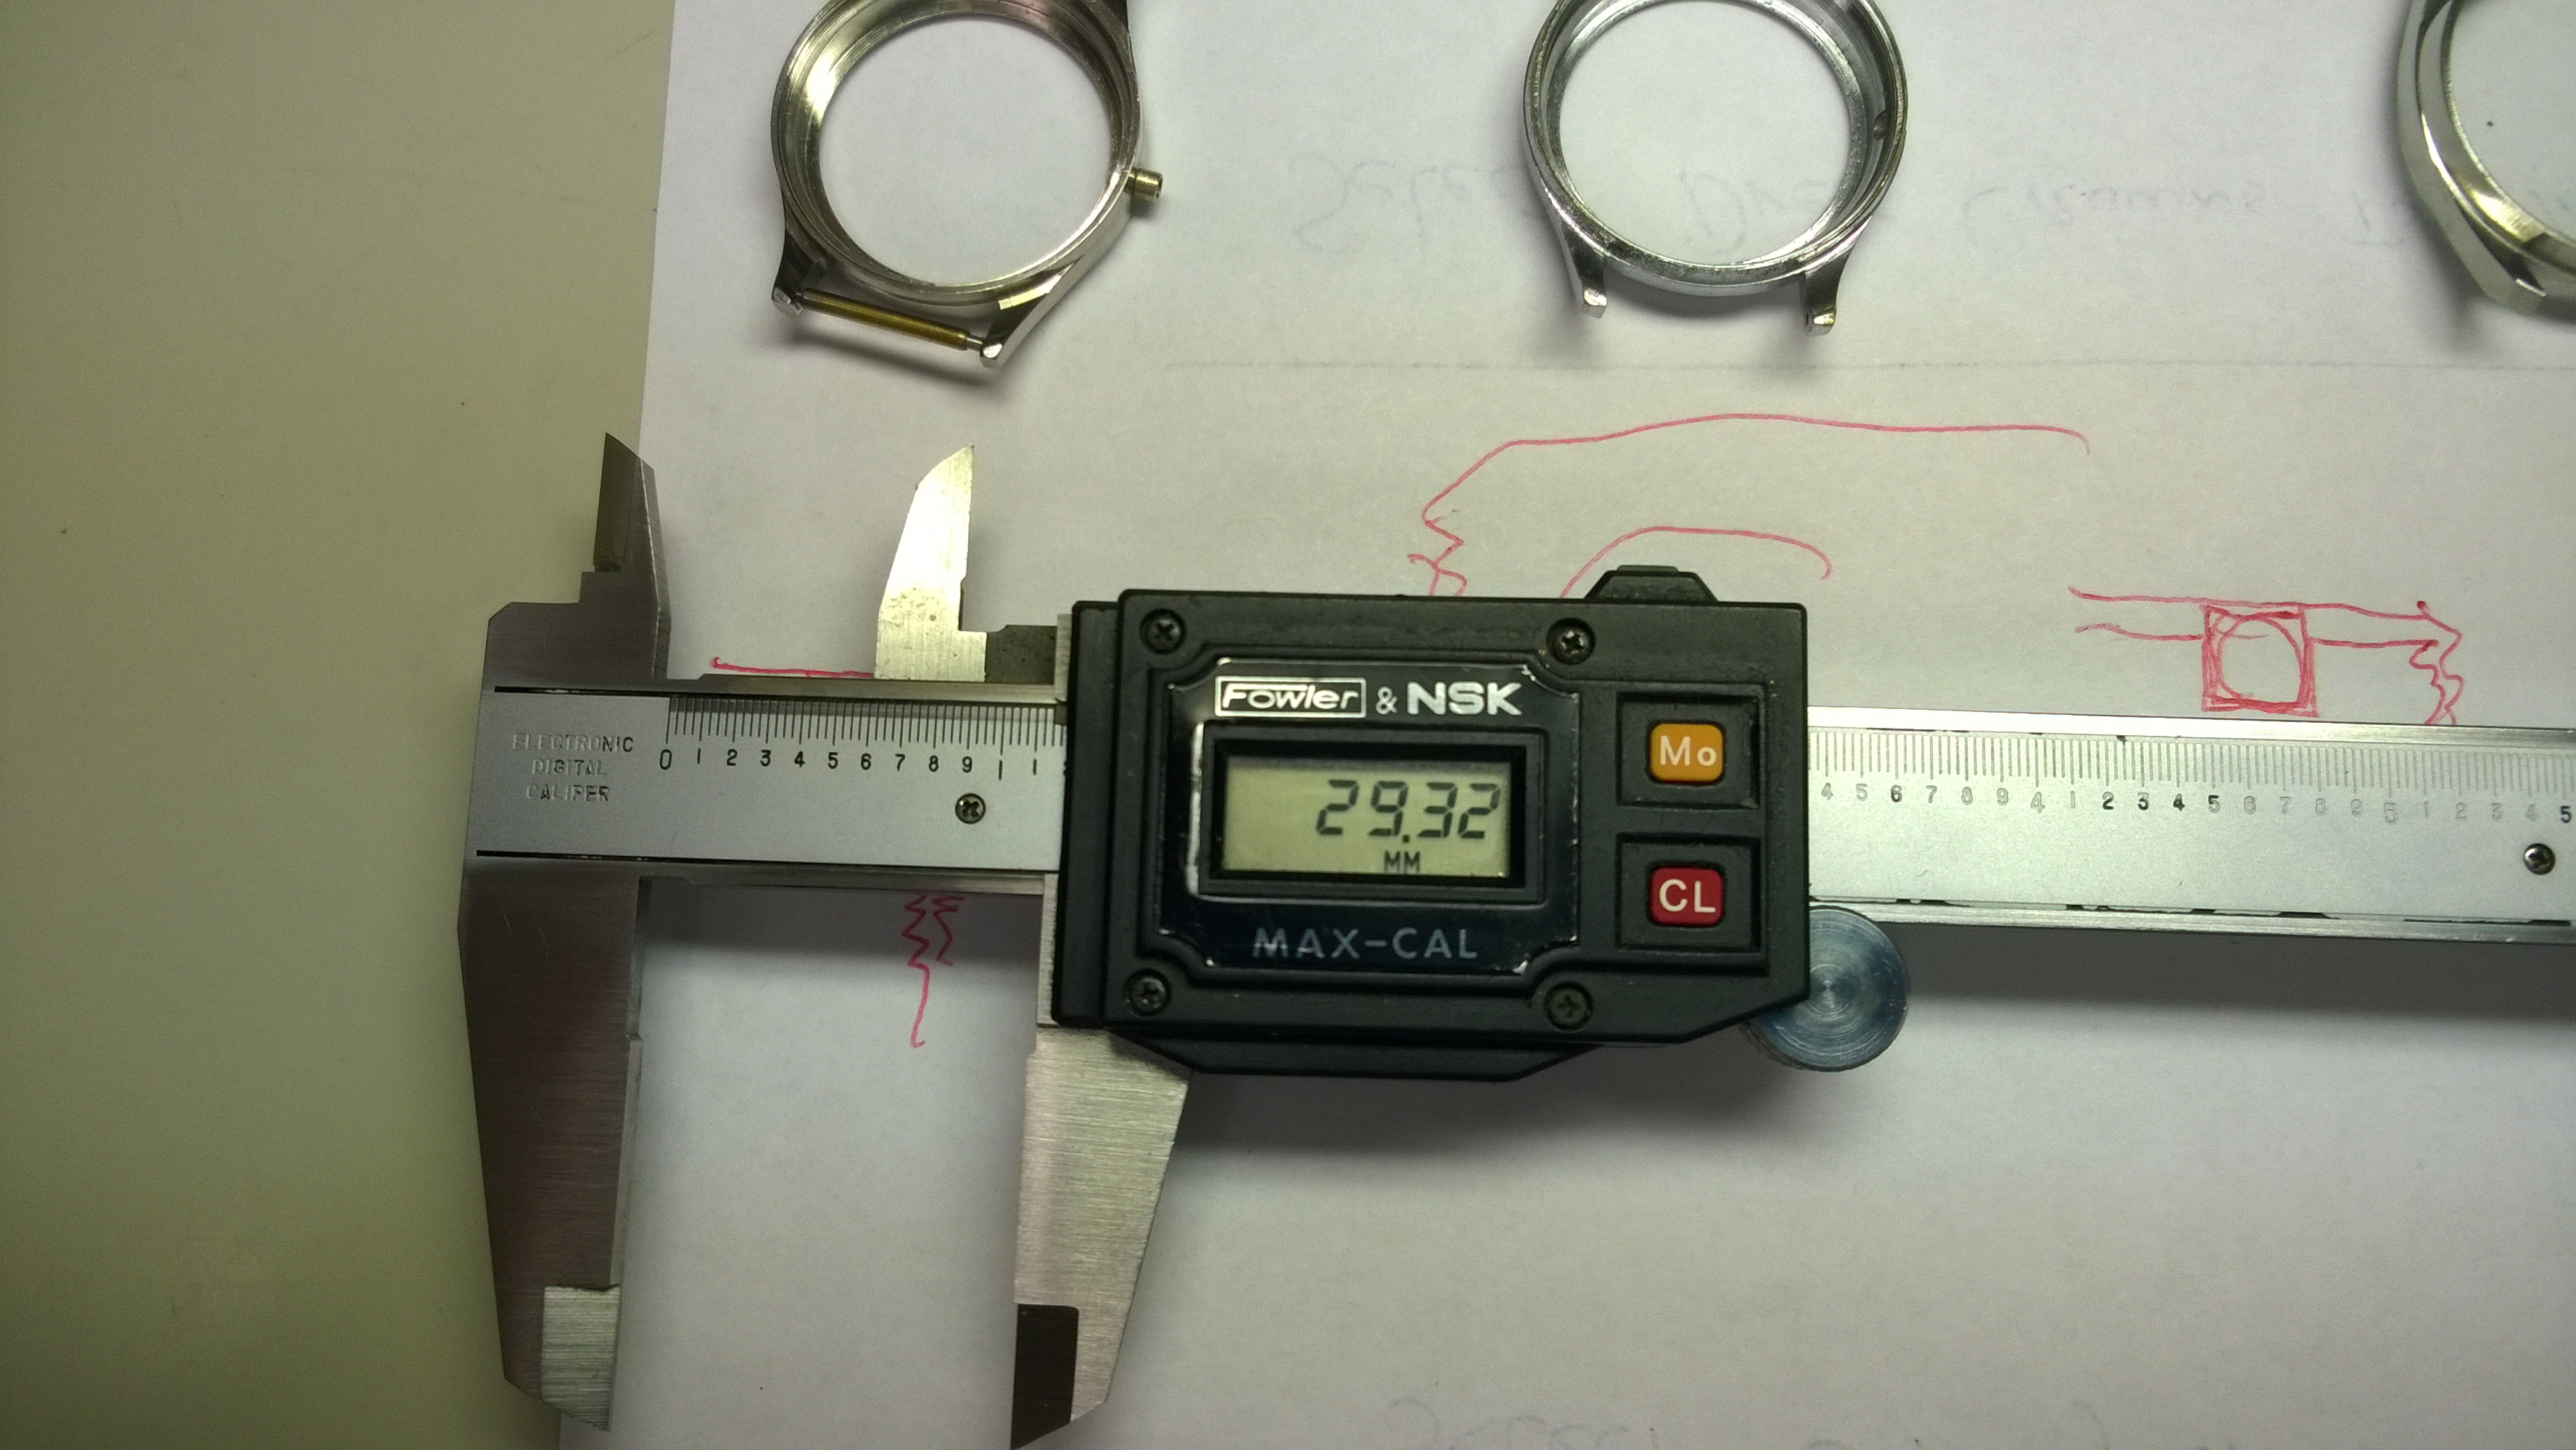
These are the calipers showing the internal diameter of the first case. The top part of the calipers are used if you want to slide the calipers open to measure, whereas the bottom are the grippy/sliding closed way of measuring things. 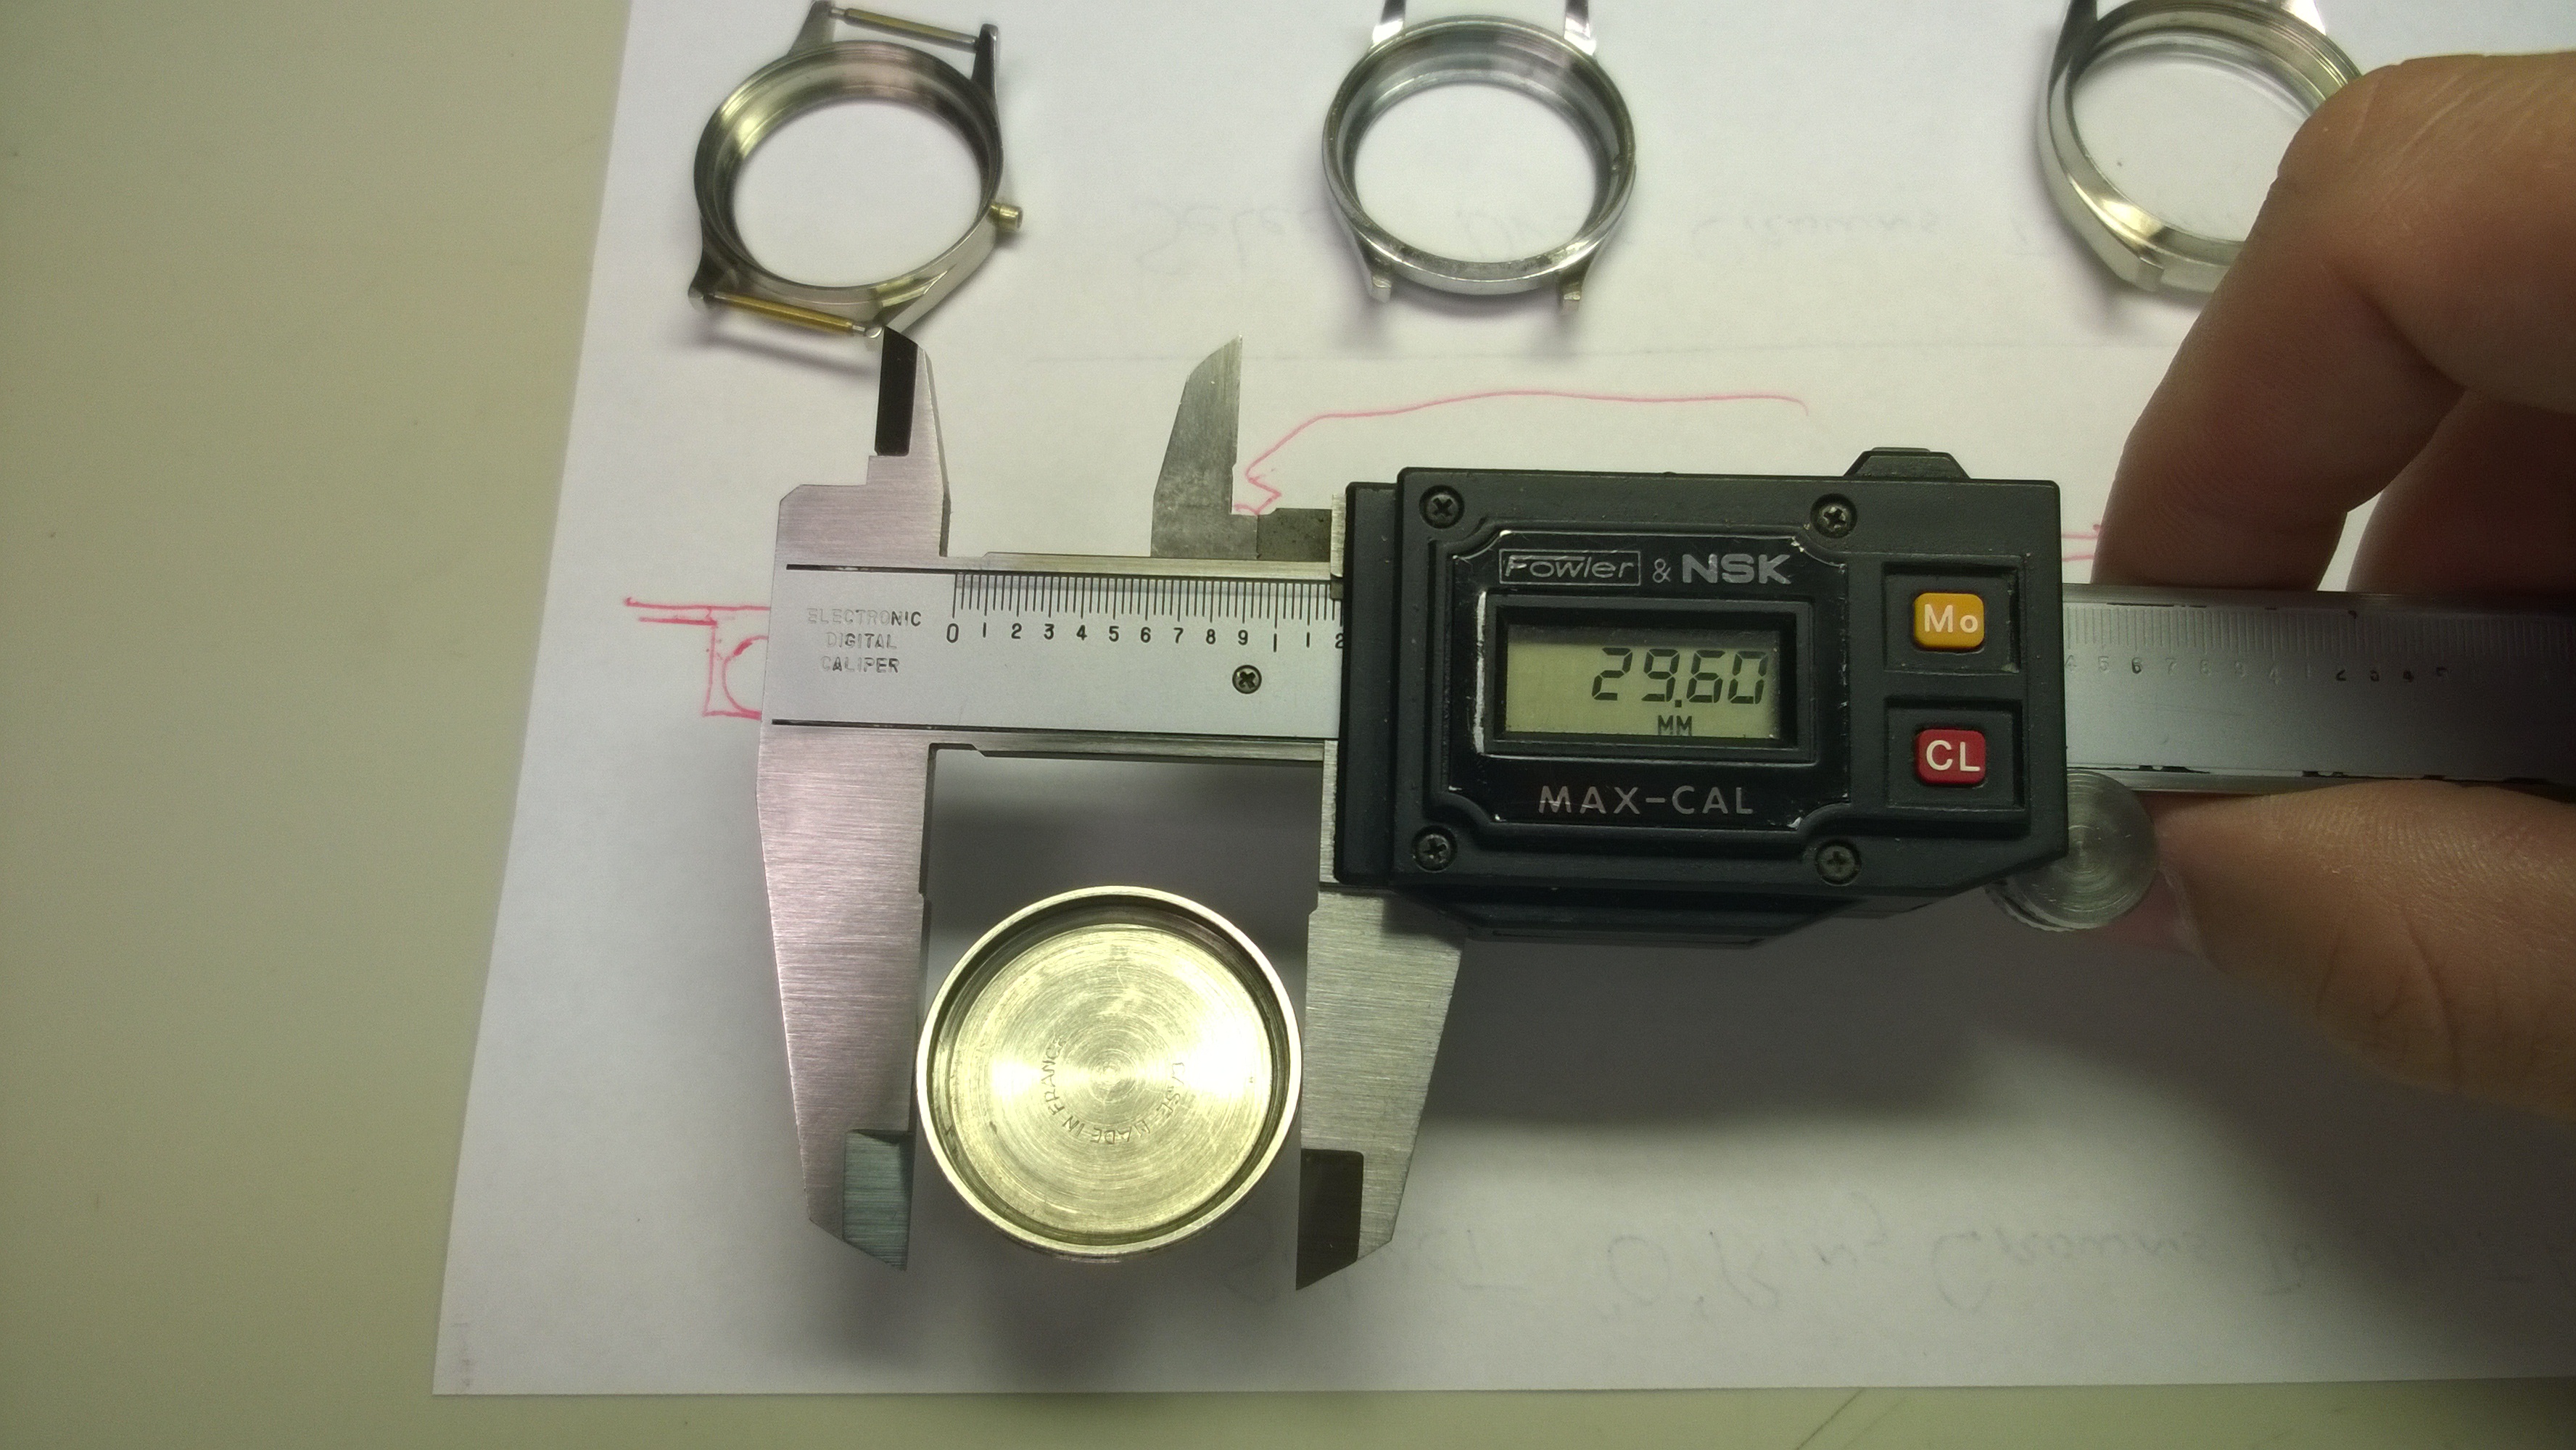
It is much easier to take a picture of this method of measuring as opposed to the top. In this picture the calipers are measuring the diameter of the case back that screws into the watch 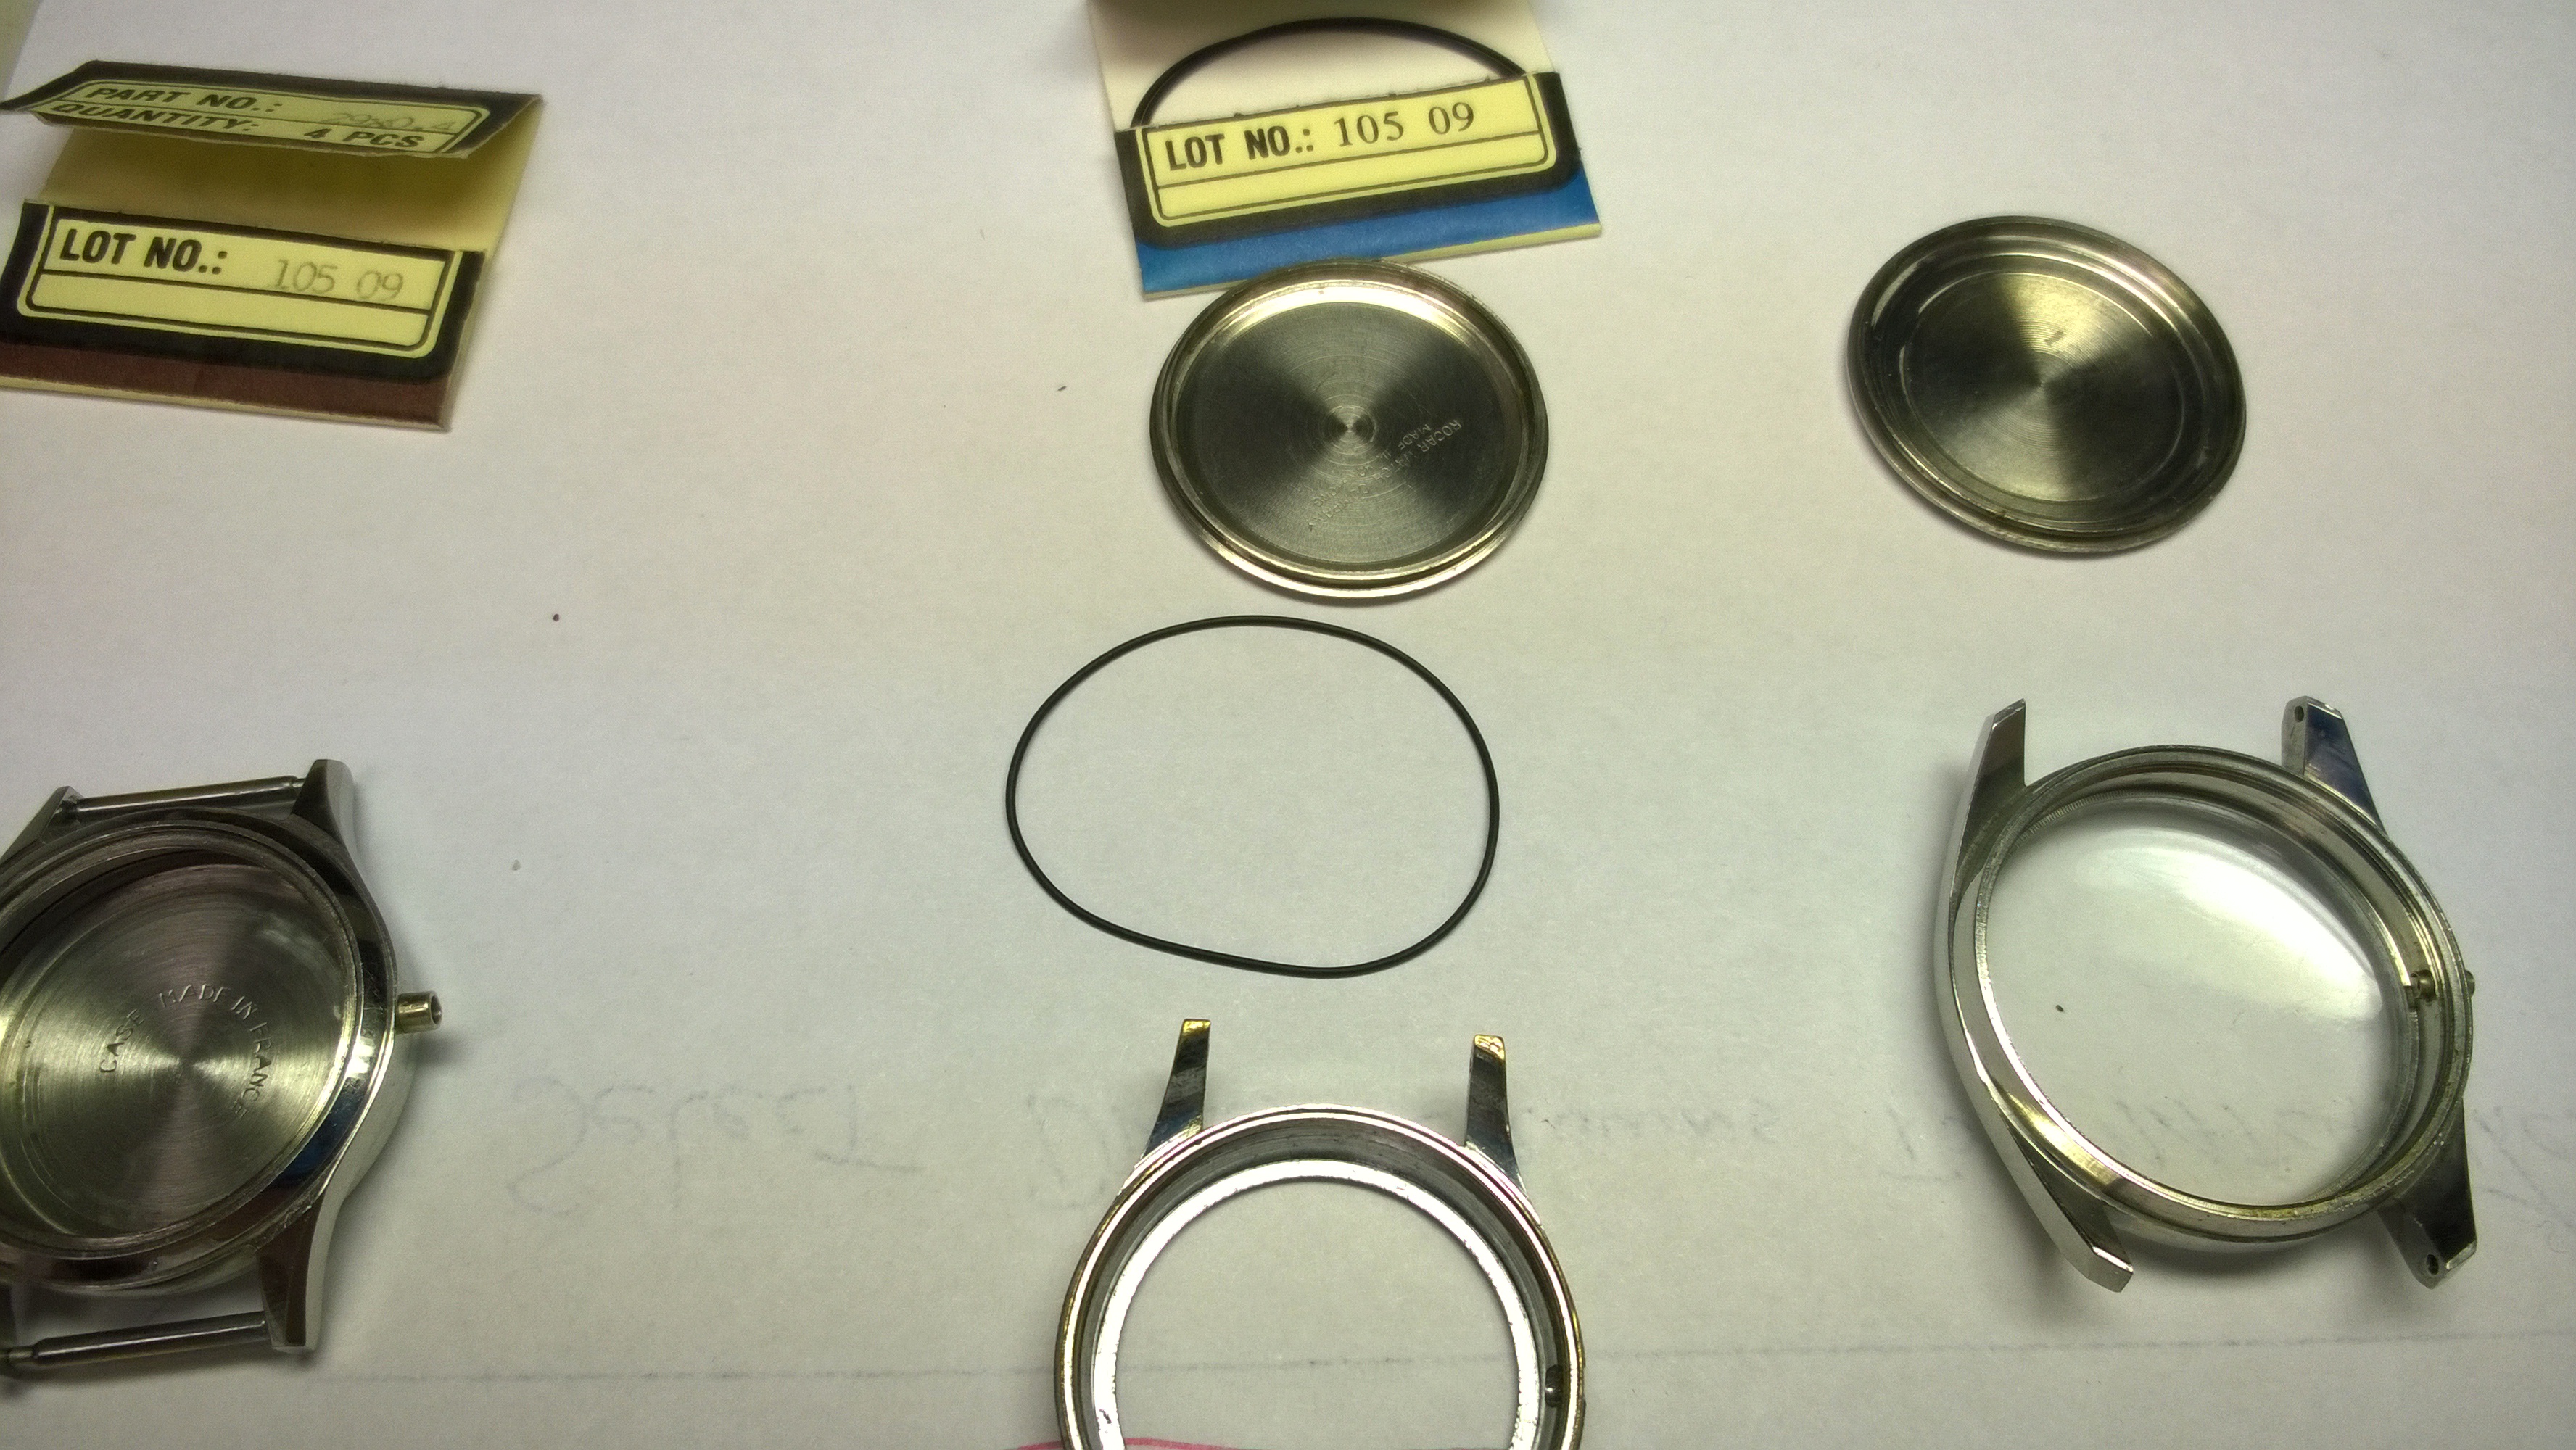
Here is a picture of what a gasket looks like. I should have taken more pictures showing what the gaskets look like when they are fitted, but it slipped my mind.
I got all three correct on my first try, so I went back to working on watches for the rest of the day.
Thursday is where it started to get exciting for me. We had our introductory lecture regarding hairsprings. The hairspring is heart of the watch. I have also read it described as the breath of the watch. Regardless, it extremely important.
 The hairspring is the spring that you see that is attached to the balance wheel. It works in tandem with the balance bridge, the pallet fork, and the escape wheel to allow for the time keeping function of the watch. Quick watch lesson:
Turn the Crown→Crown wheel engages ratchet wheel→Ratchet Wheel turns barrel via arbor→Mainspring is wound→Mainspring fully wound and wants to unwind→mainspring unwinding causes barrel to rotate→barrel engages center wheel pinion causing center wheel to turn→center wheel teeth engage the third wheel pinion causing the third wheel to turn→third wheel teeth engage the fourth wheel pinion causing the fourth wheel to turn→fourth wheel teeth engage the escape wheel pinion causing the escape wheel to turn
If it weren’t for the escapement (escape wheel, pallet fork, and balance), the watch would unwind immediately. Due to the escape wheel locking and unlocking because of the pallet fork and the fork’s interplay with the balance, the power of the mainspring is able to be divided down into measurable units.

How the escapement of a watch works. From Timezone.com
Back to hairsprings. The hairspring used in clocks used to be made from pig bristles. It was stiff enough to allow for a rebound impulse to drive the escapement of clocks. Sometime in the 1600’s Robert Hooke (as well as Christiaan Huygens) developed the idea for putting the hairspring in a watch (an actual spring this time), and Thomas Tompion made the first few watches with hairsprings in them-one of the first watches he made was signed Robert Hooke invent. 1658. T. Tompion fecit, 1675″ which translates into Robert Hooke invented it, T. Tompion made it (Independent watchmaker F.P. Journe’s slogan is “Invenit et Fecit” which is used to mean that F.P. Journe’s company designs and makes every part of the watches).
Skipping forward to the now, there is one large company that supplies the majority of hairsprings used in Swiss watches-Nivarox. (it is important to note that not every company relies on Nivarox for hairsprings) Nivarox is a subsidiary of the Swatch Group. They make hairsprings of all different sizes and out of different alloys. The most common alloys that hairsprings are made of are:
- Titanium
- Nickel
- Cobalt
- Tungsten
- Zing
- Zircon
- Niobium
- Silicon
There are some other materials that are used, but these are the most common (Titanium and Nickel being used the most).
After going through the basic history of hairsprings, we delved into the three most common bends that can be seen in a hairspring:
- Out-of-Round
- Out-of-Flat
- Breguet/Hockeystick
*When talking about bends in hairsprings, it’s important to note that a hairspring needs to be level with its coils spaced evenly apart. If not, it runs the risk of getting caught on different parts when it is in motion*
An Out-of-Round hairspring bend will have all of its coils on the same plane, but there will be a deviation in the spiral of the spring.
An Out-of-Flat hairspring bend will have one or more coils on a different plane (bent up or down)
A Breguet/Hockey-stick bend is a little more difficult to explain (especially because there is something called a Breguet Overcoil that is a good thing (I’ll explain that later when I learn more about it). It is called a h0ckey stick bend as well because that is the shape it takes. It is a sudden bend of the coil up or down that is similar to an Out-of-Flat bend.
The fist kind of bend we are focusing on are Out-of-Round (OoR) bends. In order to correct an OoR, you need two tweezers (we are using our #3 and #3C tweezers), a piece of etched glass, and a good amount of patience.
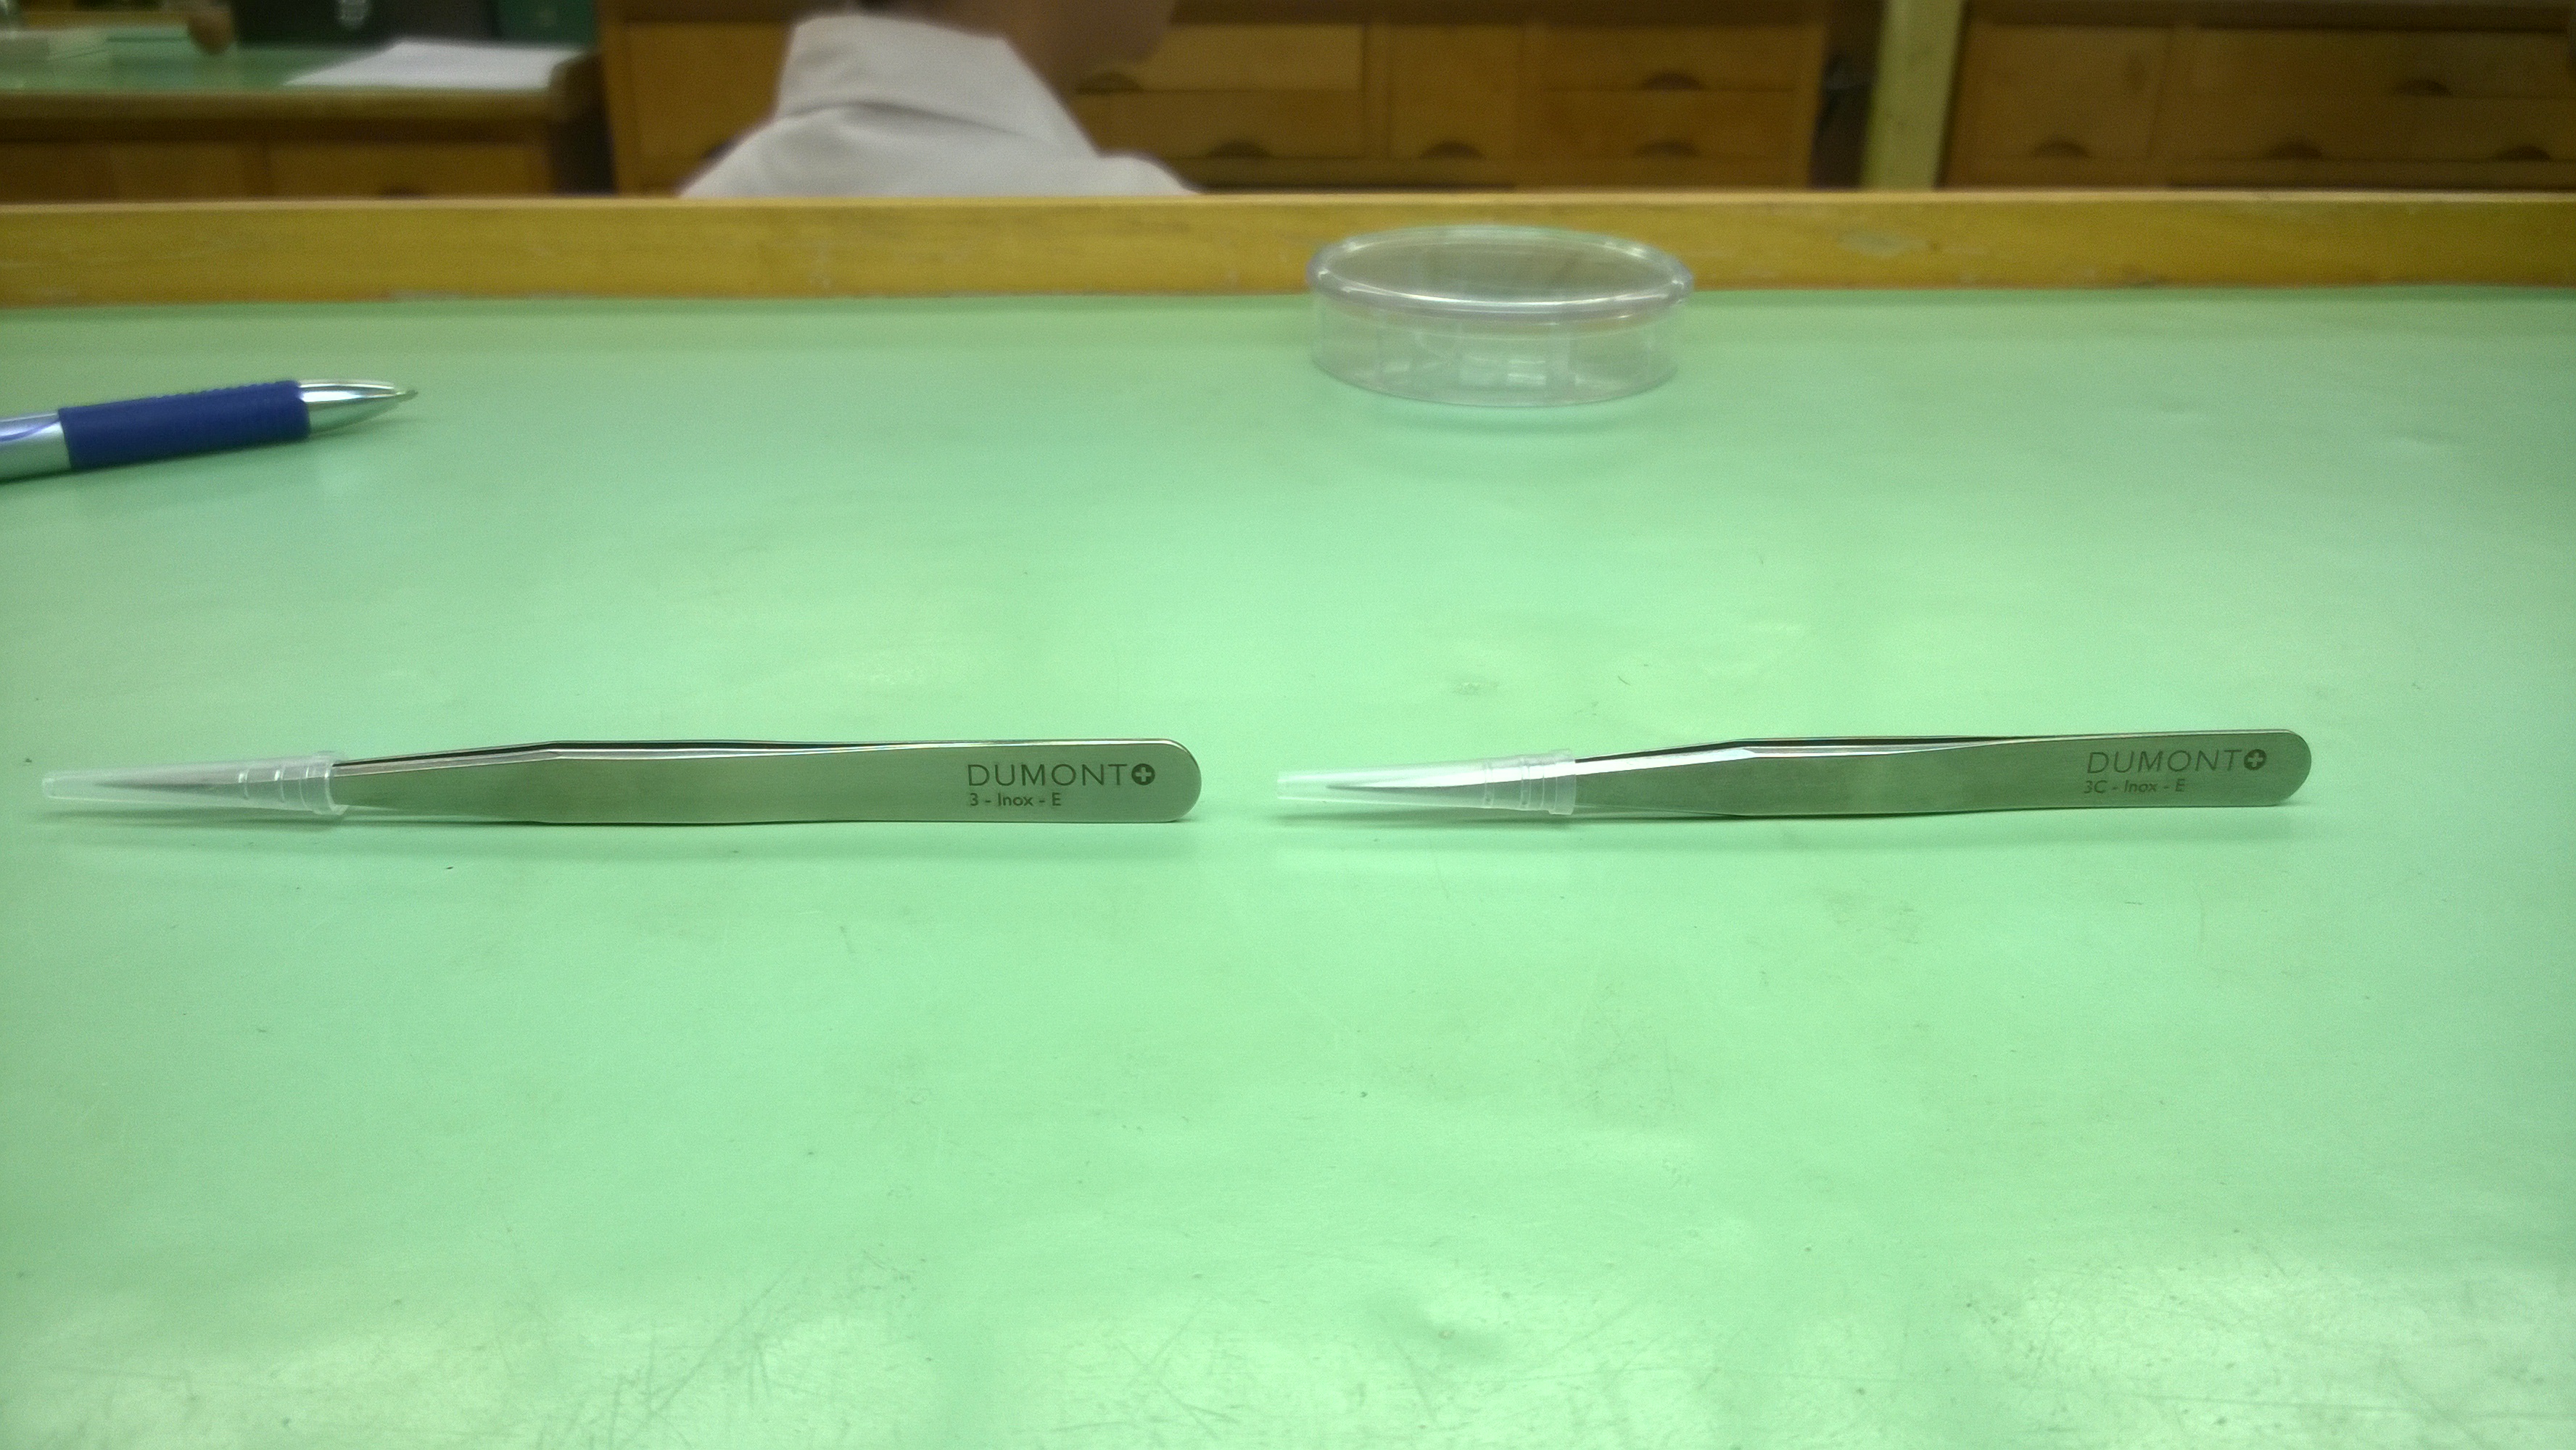
Here are the tweezers that I was using. The #3E are just a little smaller than the 3’s but have a very similar tip profile to them.
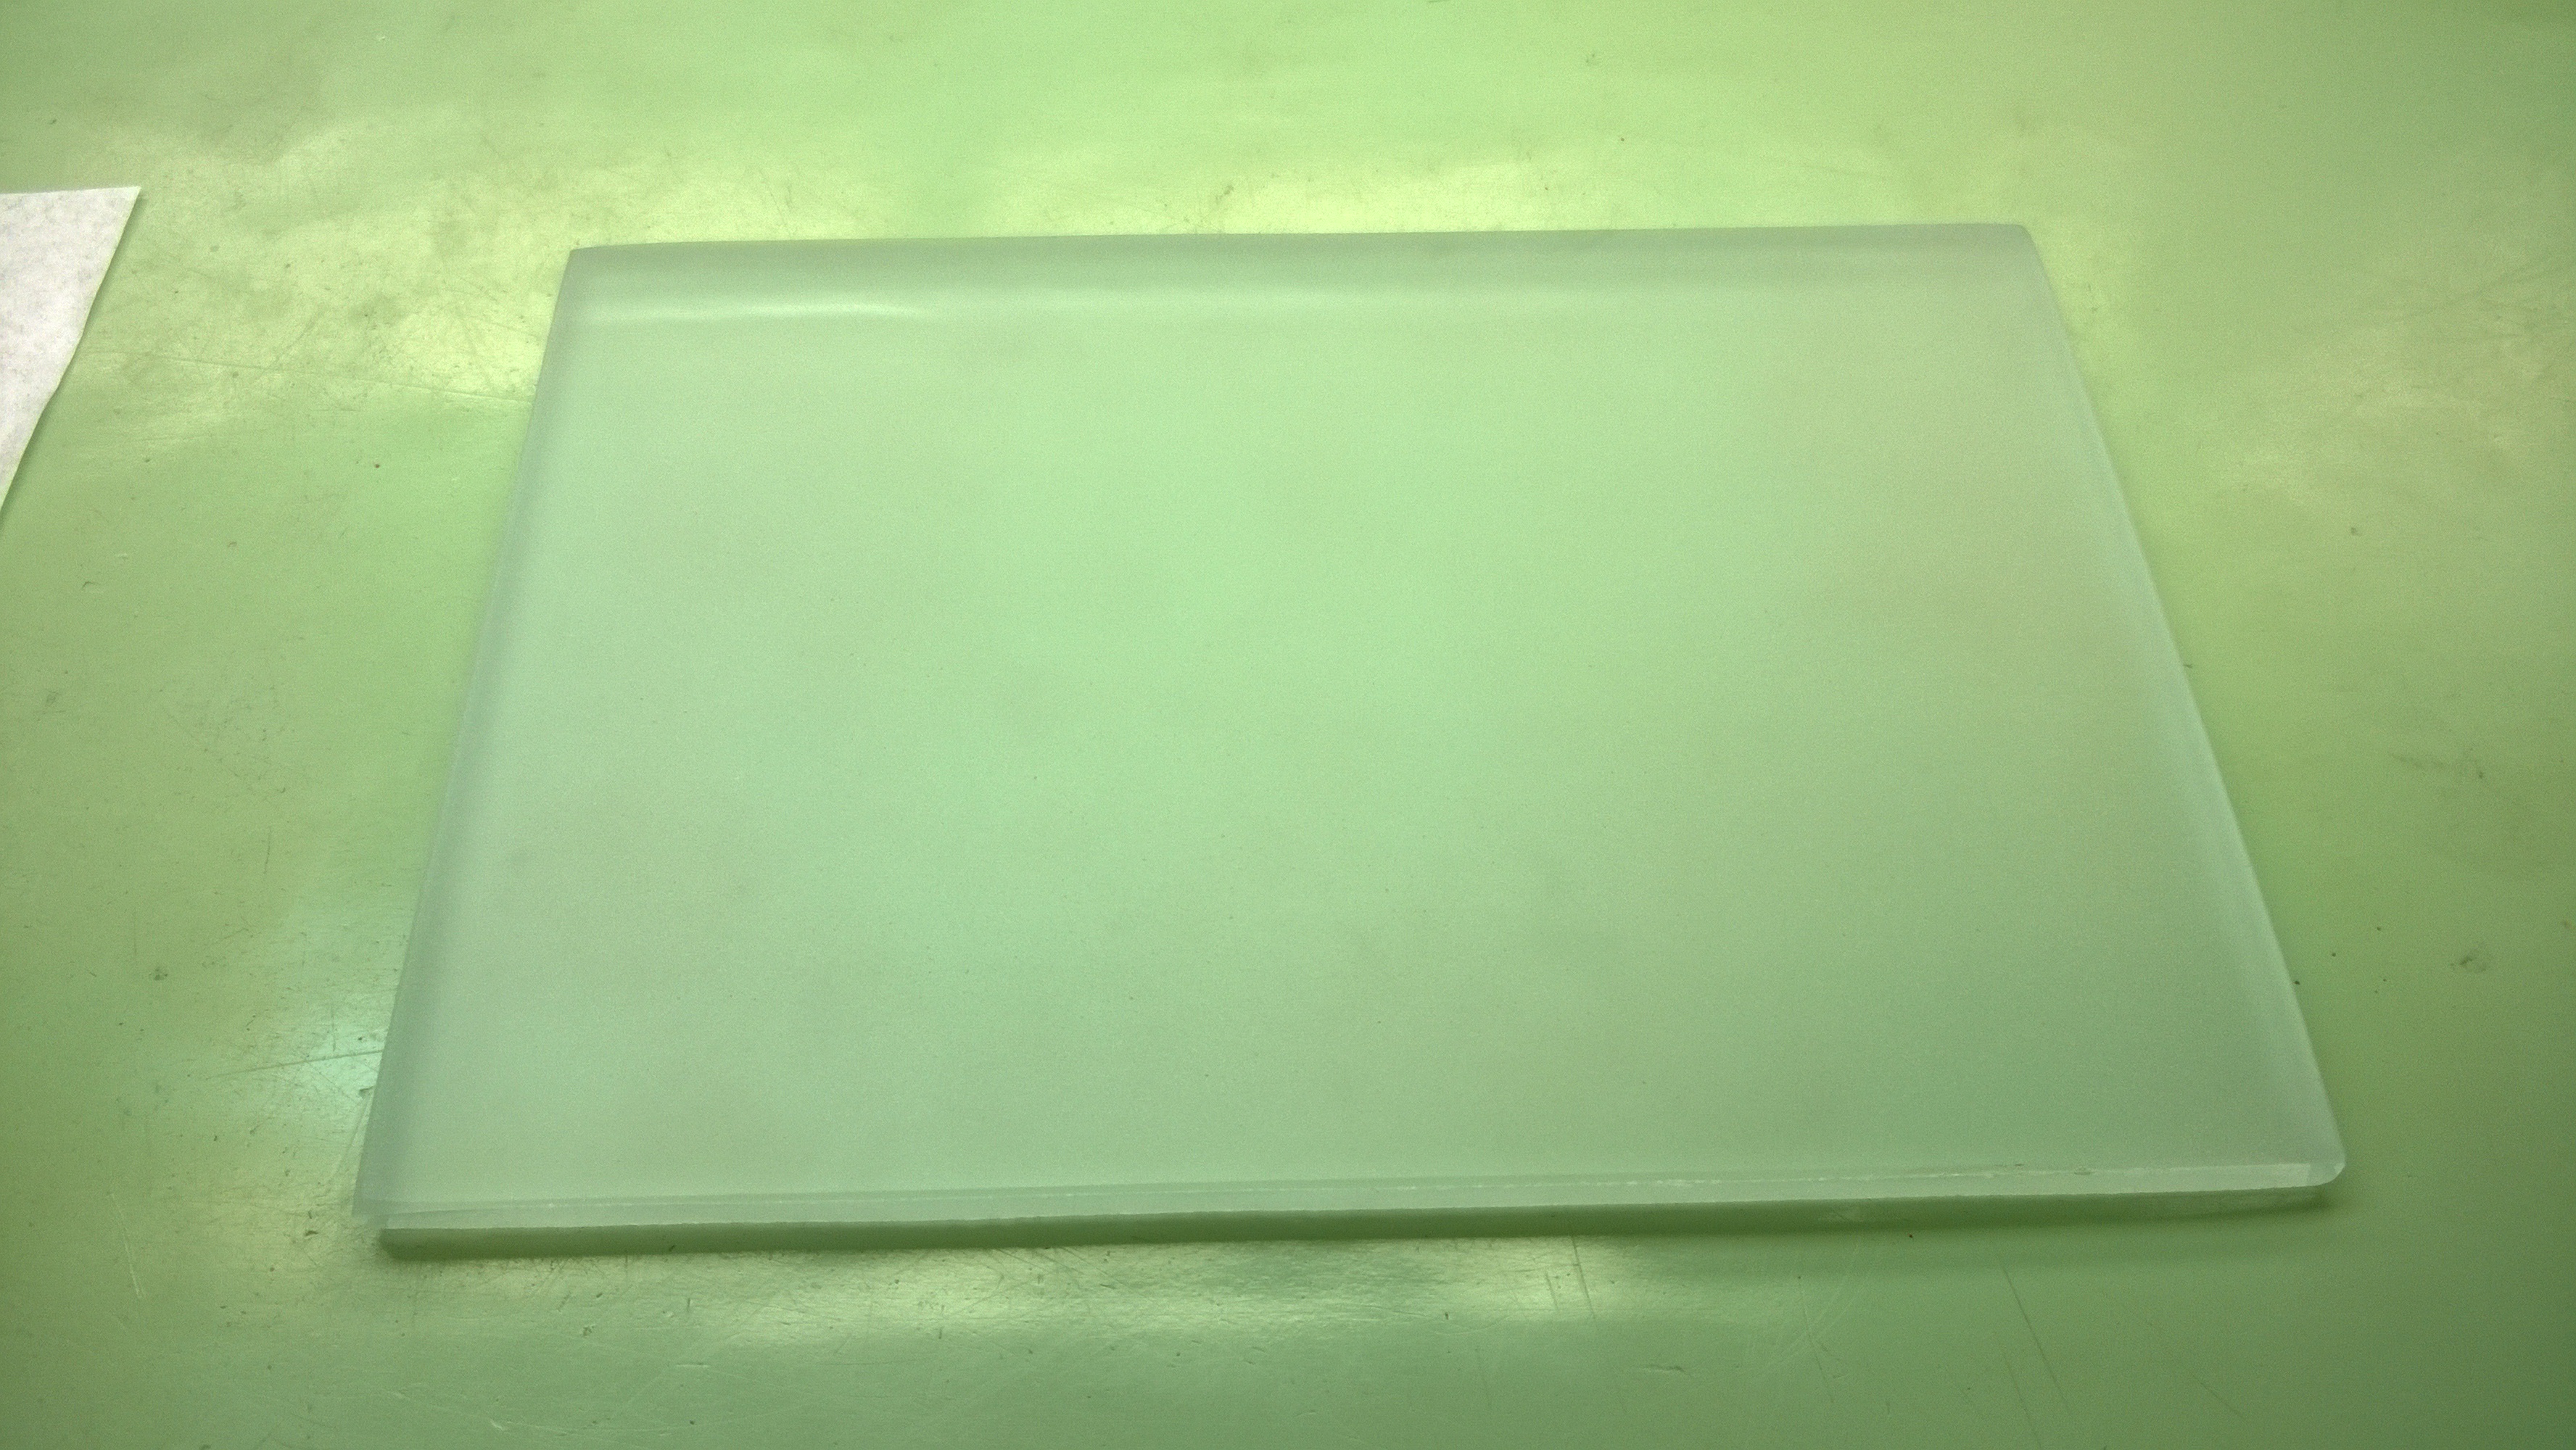 I actually etched this glass myself. We used a water/alcohol mix and two different abrasives to etch it. The reason you use etched glass is two-fold. The etched side removes glare from the light and reduces the reflection of the hairspring. The etching is also slightly rough, so the hairspring can move easier on the glass (kind of counter intuitive, I know. But it works)
 Here is a picture of what the glass looked like before etching. The glare, the reflection, and the surface are too annoying to work with.
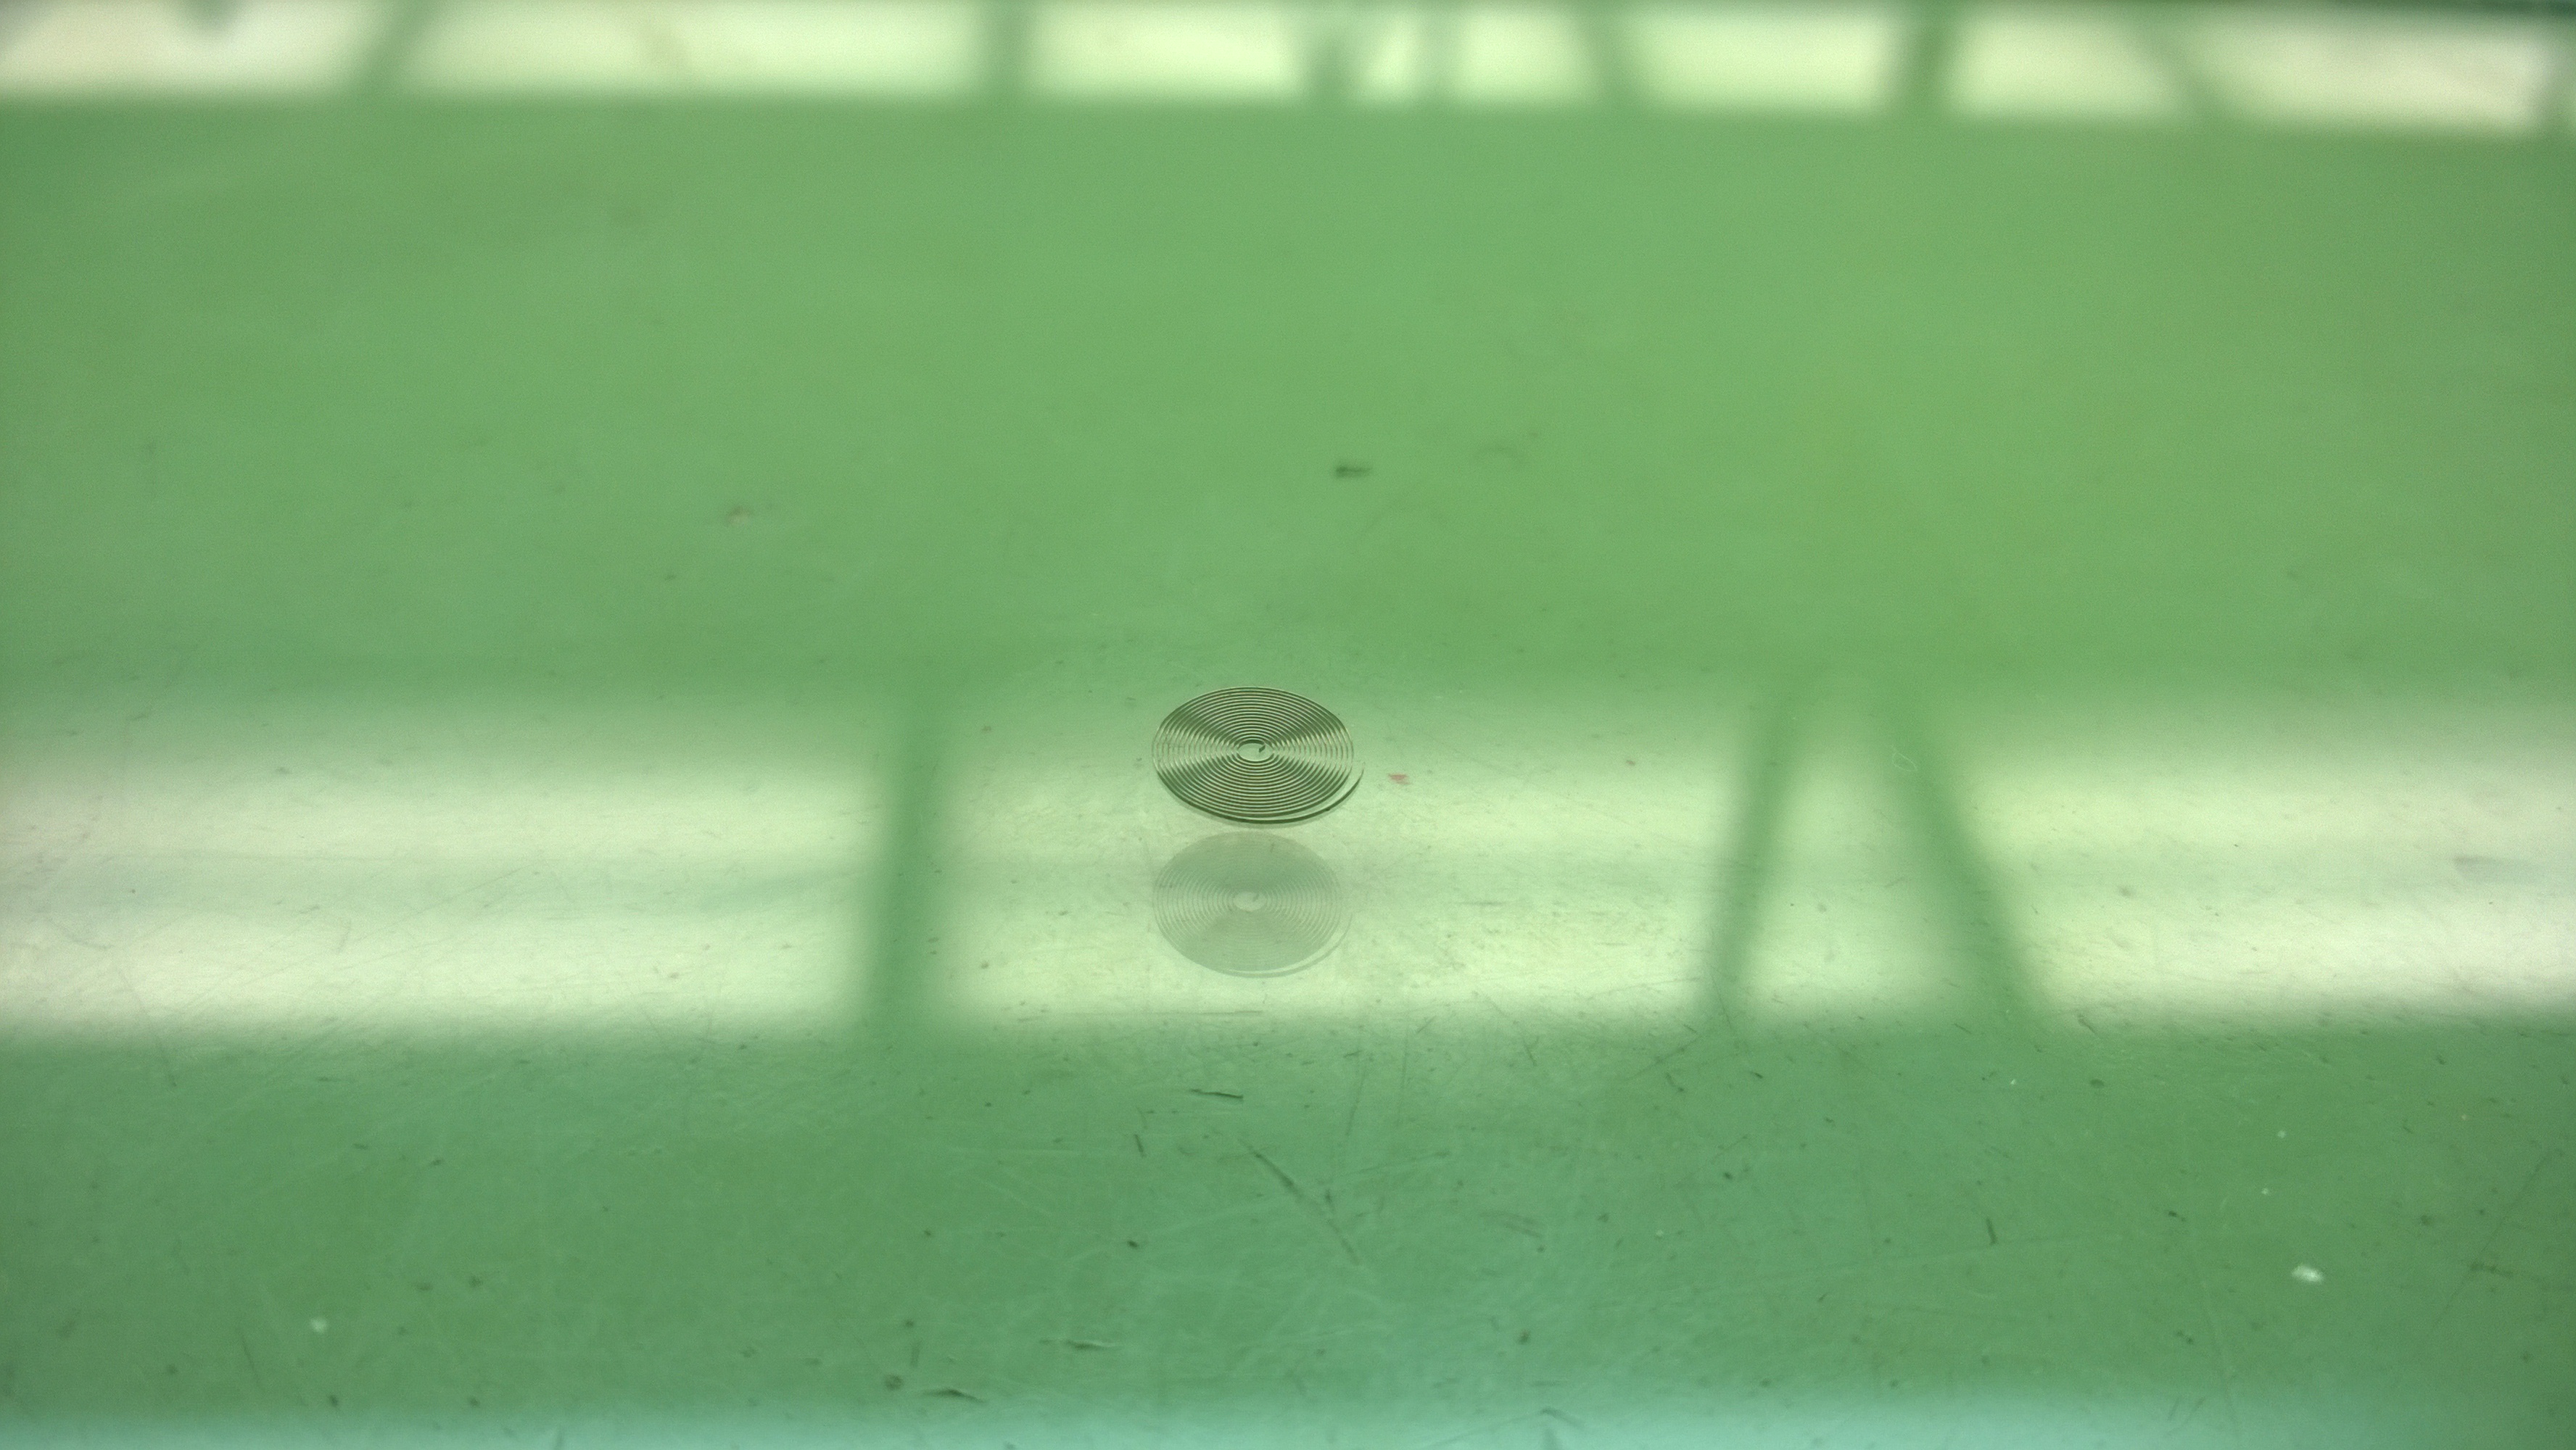
To correct the bend, you need to find the widest part of the bend, go in towards the center and make a 90 degree turn to the same coil. The bend will be in that area.
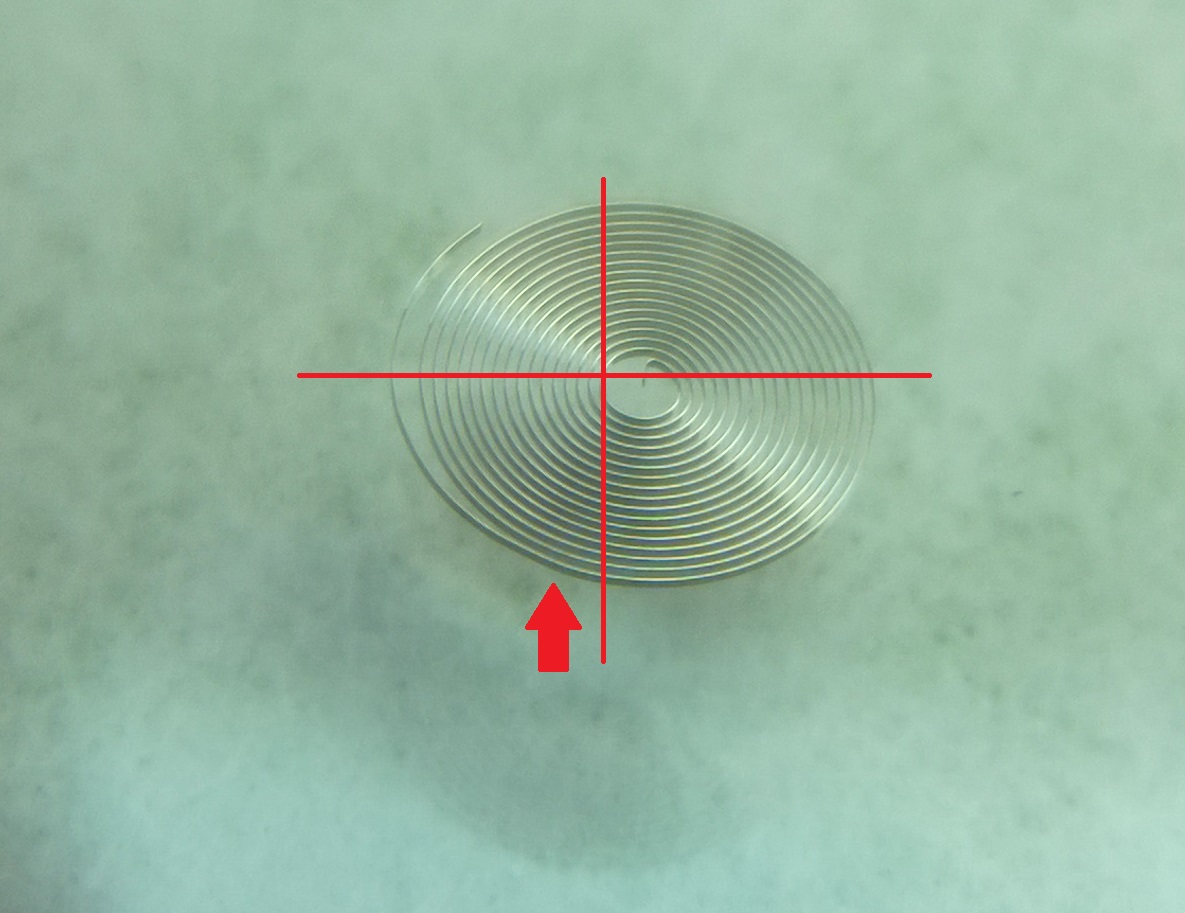
At the far left, you can see the outermost part of the bend. Going in towards the center and down 90 degrees, you can see the area where the bend starts (indicated by the arrow).
You place set of tweezers just behind the bend (the red arrow in the picture above) and grip it. You keep the other set closed and gently tap the spring close to the bend driving the free end towards the spring. After a few times of doing this, the gap that existed should be gone, as should all traces of the bend (unless it was a severe bend).
 As you can see, the hairspring has been corrected and the OoR bend is gone. The only evidence that it was there is the little hump on the left hind side at about 10:00.
The bulk of my day (from 10:30-ish to 5:00 sans lunch) was spent working with the same three hairsprings. Mr. Poye would bend them, I would correct them. He would check them, bend them again, I would correct them again. Ad infinitum.
I would say this is the closest I have come to approaching a Zen-like state. There were of course moments of frustration-over correcting an OoR and turning it into an Our-of-Flat, or trying to pick up the spring only to have the tweezers slip and cause a Breguet bend, but for the most part, it was an exercise of simplicity.
The hardest part is trying to ignore your eyes. It is very easy to look at the spring and see what you think is the bend-only to correct it and see another bend slightly behind where your tweezers were. As long as you follow the 90 degree rule (even if you can’t see a bend), everything should work out well.
Even though I know how to describe correcting Out-of-Flat bends, I’m going to leave that for another post.
Thanks for reading!

Very cool write up! And that animated gif is tres magnifique!
Thank you! I wish I could take credit for the gif, but my graphic skills aren’t that good.
Pingback: Semester 2, Week 6 (includes week 5), Days 1-3 (Hairspring Corrections) | watchmaking journey·