Again, another short post. Wednesday and Thursday consisted of more hairspring work.
Wednesday was kind of a rough day for me. For whatever reason, my fingers and tweezers were not wanting to work together. Every time I was able to get the bend corrected, it seemed like my tweezers would get caught or slip and terribly distort the spring. I persevered and made it through the day. It was my first time dealing with frustration at what I was doing, but it wasn’t horrible. I just continued to focus on the rules of correcting the out-of-round bends (90 degrees 90 degrees 90 degrees) and went slowly. Towards the end of the day, things got a bit better.
Thursday was a bit more interesting. After finishing up my Out-of-Rounds, Mr. Poye started introducing Out-of-Flat bends.
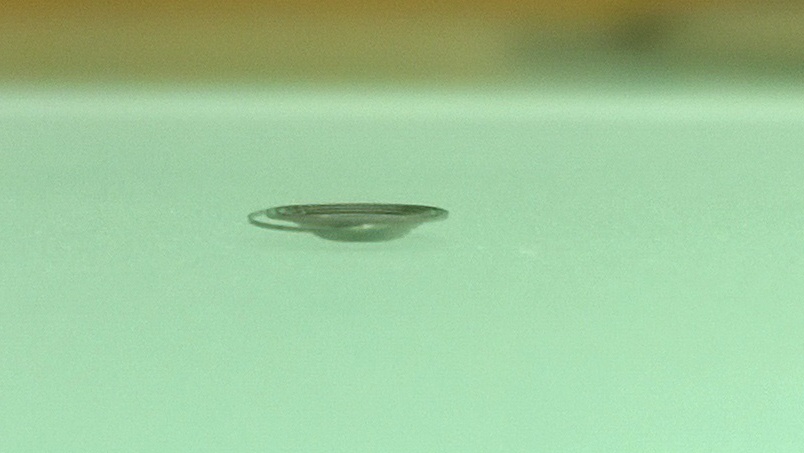
Out-of-Flats (OoF) are definitely a lot easier to correct than Out-of-Rounds. To correct an OoF bend, you find where the highest/lowest (this depends on how the spring is situated) part of the bend is, and go 180 degrees in the opposite direction and stay on the same coil. Using two tweezers, you grasp the spot of the bend and either push one of the tweezers, or pull the other.
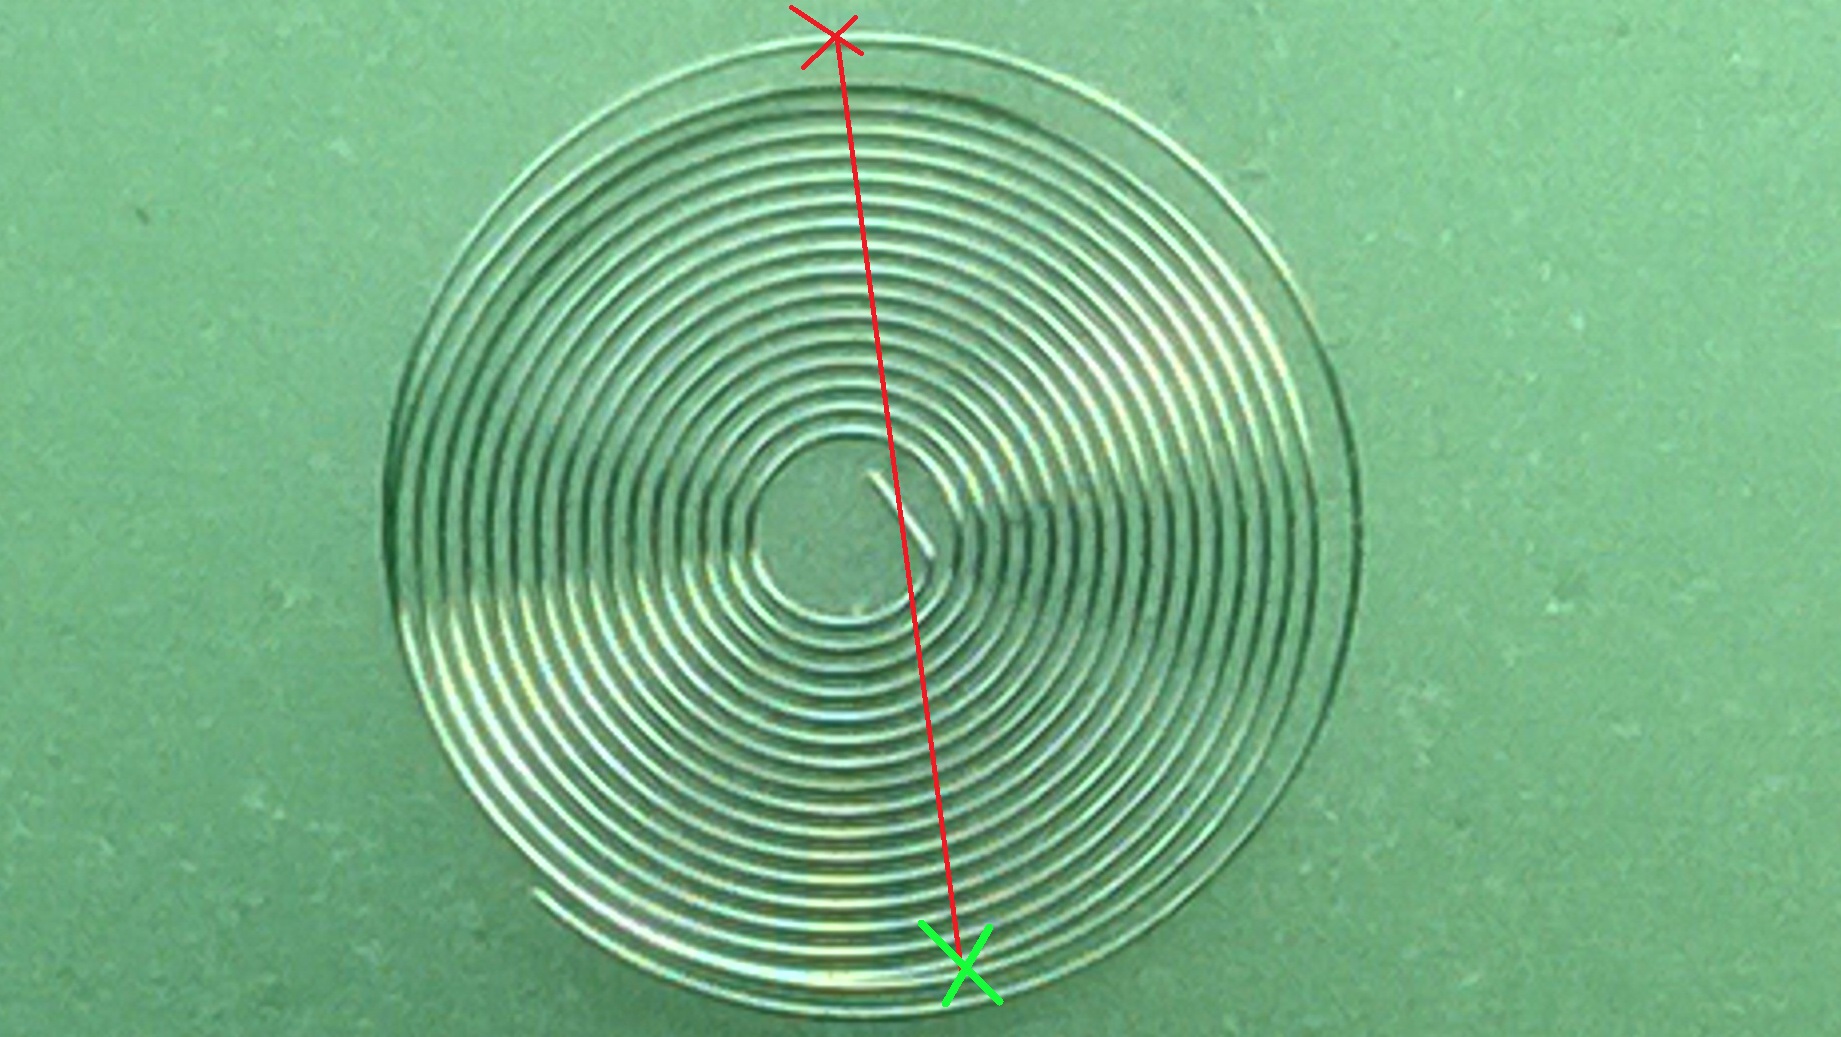 In this picture, the red “X” is the highest spot and the green “X” is where the bend is. The picture below is going to be a little thought experiment to help explain the pushing or pulling.
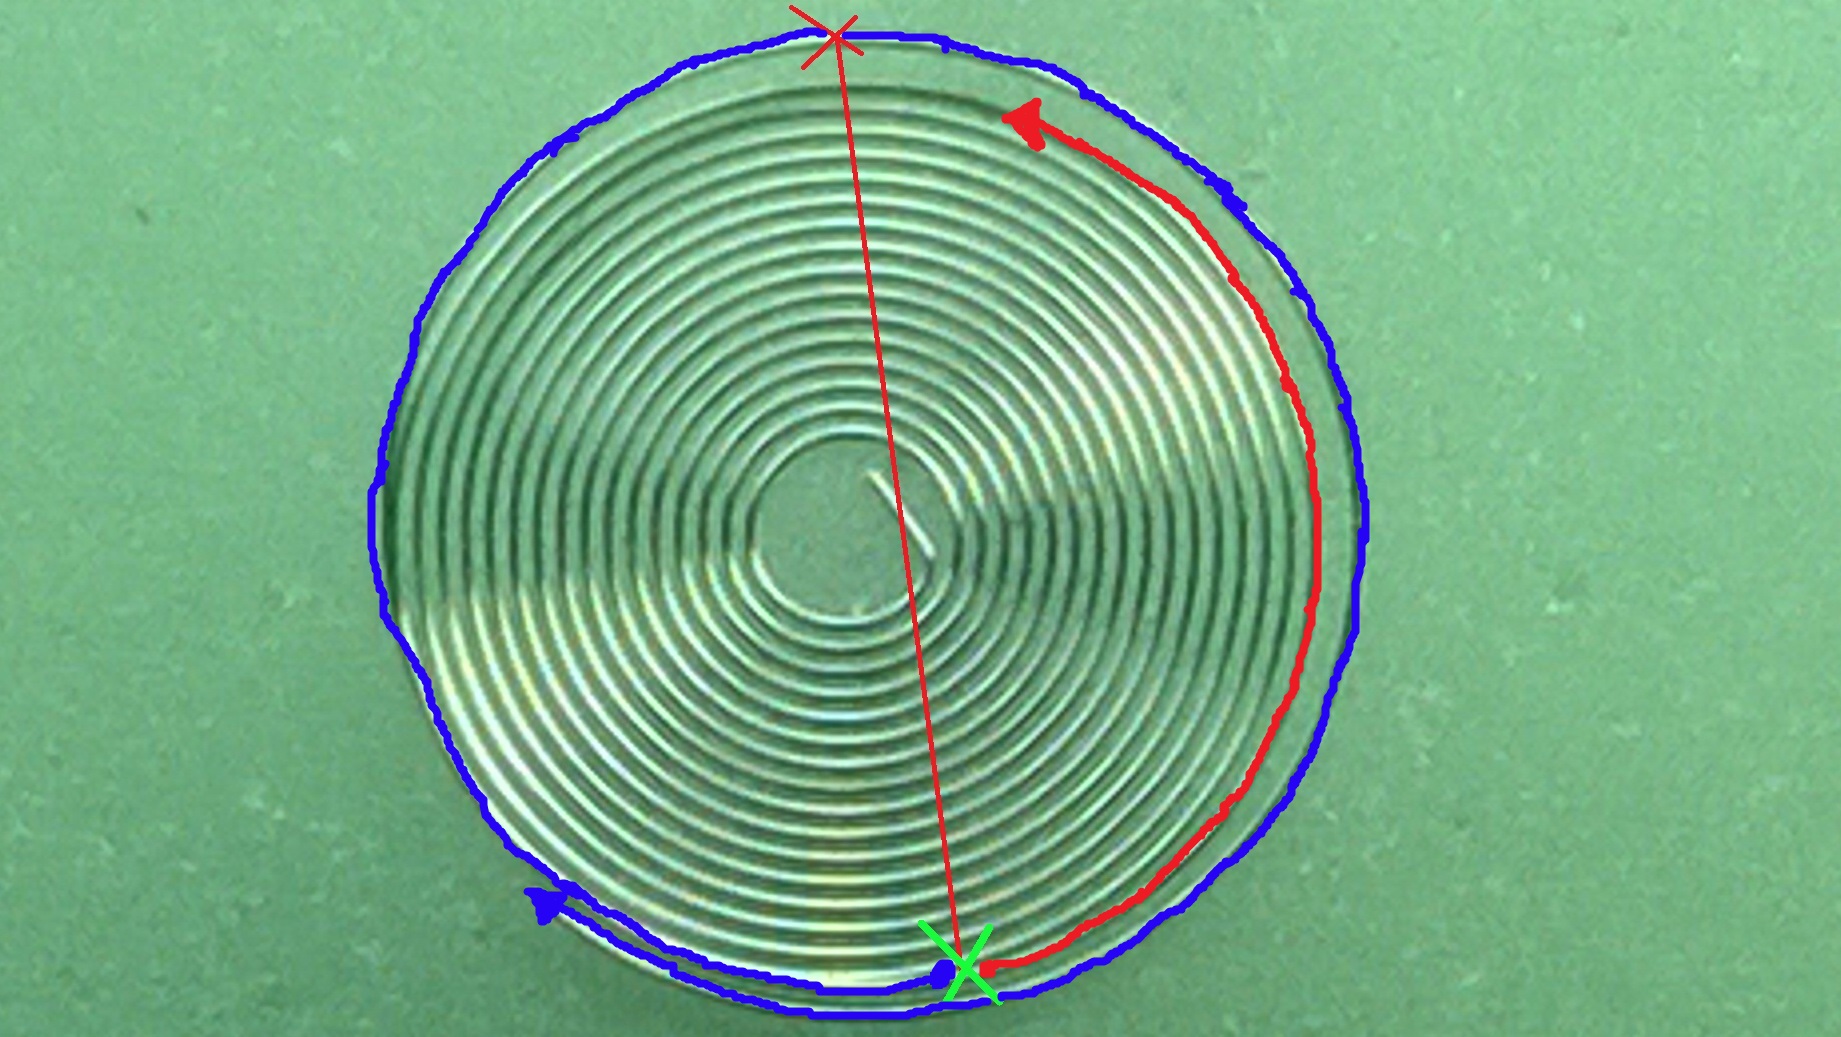 Imagine h0lding two tweezers. The tweezers will go just on either side of the green “X.” The blue arrow that starts at the green “X” is running clock-wise. Every motion you make with the tweezers in your left hand will move everything from the tweezers and radiating outwards in a clockwise motion. Conversely, everything you do with the tweezers in your right hand (the red arrow) will affect from the tweezers and radiate inwards in an anti-clockwise direction.
Since the coil is high, you can do one of two things-push down with the tweezers in your left hand and lower the high coil, or pull with the tweezers in your right hand and raise the rest of the spring to meet the high spot. Either way will achieve the same result:
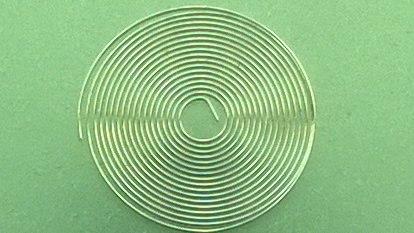
 A flat hairspring.
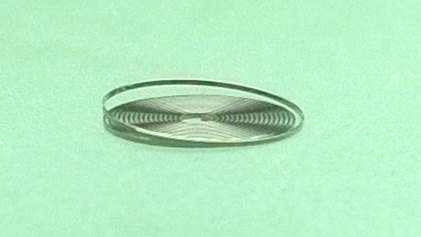
After doing that for a few hours, Mr. Poye introduced a curve-ball. A Spiral Helix.
 Most of the time, a hairspring that has this kind of bend gets it when the balance wheel gets caught on something when the balance assembly is being removed from the watch and it gets stretched out. There are two ways to correct this bend-they both are essentially the same, but one offers a bit more control. The way I prefer to do it (the more control way) involves taking one pair of tweezers and grabbing the free end of the spring and holding it securely. You then take a second pair of tweezers and grasp the center most coil and pressing it straight down to the top of the bench. The spring will look nice and flat.
Once you have a flat spring, you keep the center of the coil pinned down while pulling up on the free end, essentially inverting the spiral helix. You stretch it out a fair amount and allow it to relax. If you did it right, it will look a bit like this
 At this point, you continue that motion and stretching it out until it is flat.
 The other way to correct this is by doing the same motion, but holding it in your hands and pulling it apart horizontally as opposed to vertically. The problem with doing it this way is you run the risk of pulling at an angle, and you will have a stair-step type of spring (it will be slanted as opposed to flat).
The rest of the day was a mix of OoF and Spiral Helix bends. It was pretty nice and relaxing compared to Wednesday.
Apparently next week, we will be learning how to do overcoils! More on that next week.

Pingback: Week 5, Days 3 & 4 (Forming Breguet Overcoils) | watchmaking journey·