This last week has been kind of a whirlwind for me. My last day of class was Wednesday. After class, I took a friend to Dallas so he could catch a bus and didn’t get home until Thursday. I helped another friend move out of his apartment and into a new one on Friday. I’m now able to get caught up for this week. I will be back on my new schedule next week of Wednesday/Saturday updates.
_____________________
This week, my focus was on my final project for the semester-Colleting and studding hairsprings. In order to attach the hairspring to balance staff, you need the collet as a point of attachment. Once the spring is attached to the wheel, you need a second point of attachment for the balance bridge (besides the regulator pin and key). The hairspring stud fills that role.
Normally, when you collet and stud a hairspring, you need to be extremely precise with how you do it. It involves using a vibrating tool and some specific math formulas to get the exact spots that you are going to work with. I won’t be doing that until the end of my second semester. For now, it was just practice with the initial process.
Before I even started working with the hairsprings, collets, and studs, I had to make some pins to hold the collet in place.
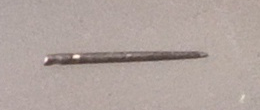 The above picture is the finished pin. This inserts into a hole in the collet and wedges between the hairspring and the wall of the hole to keep the hairspring in place. The process for making these is relatively straightforward and quick. Lucky for me because I had to make about 30 of them.
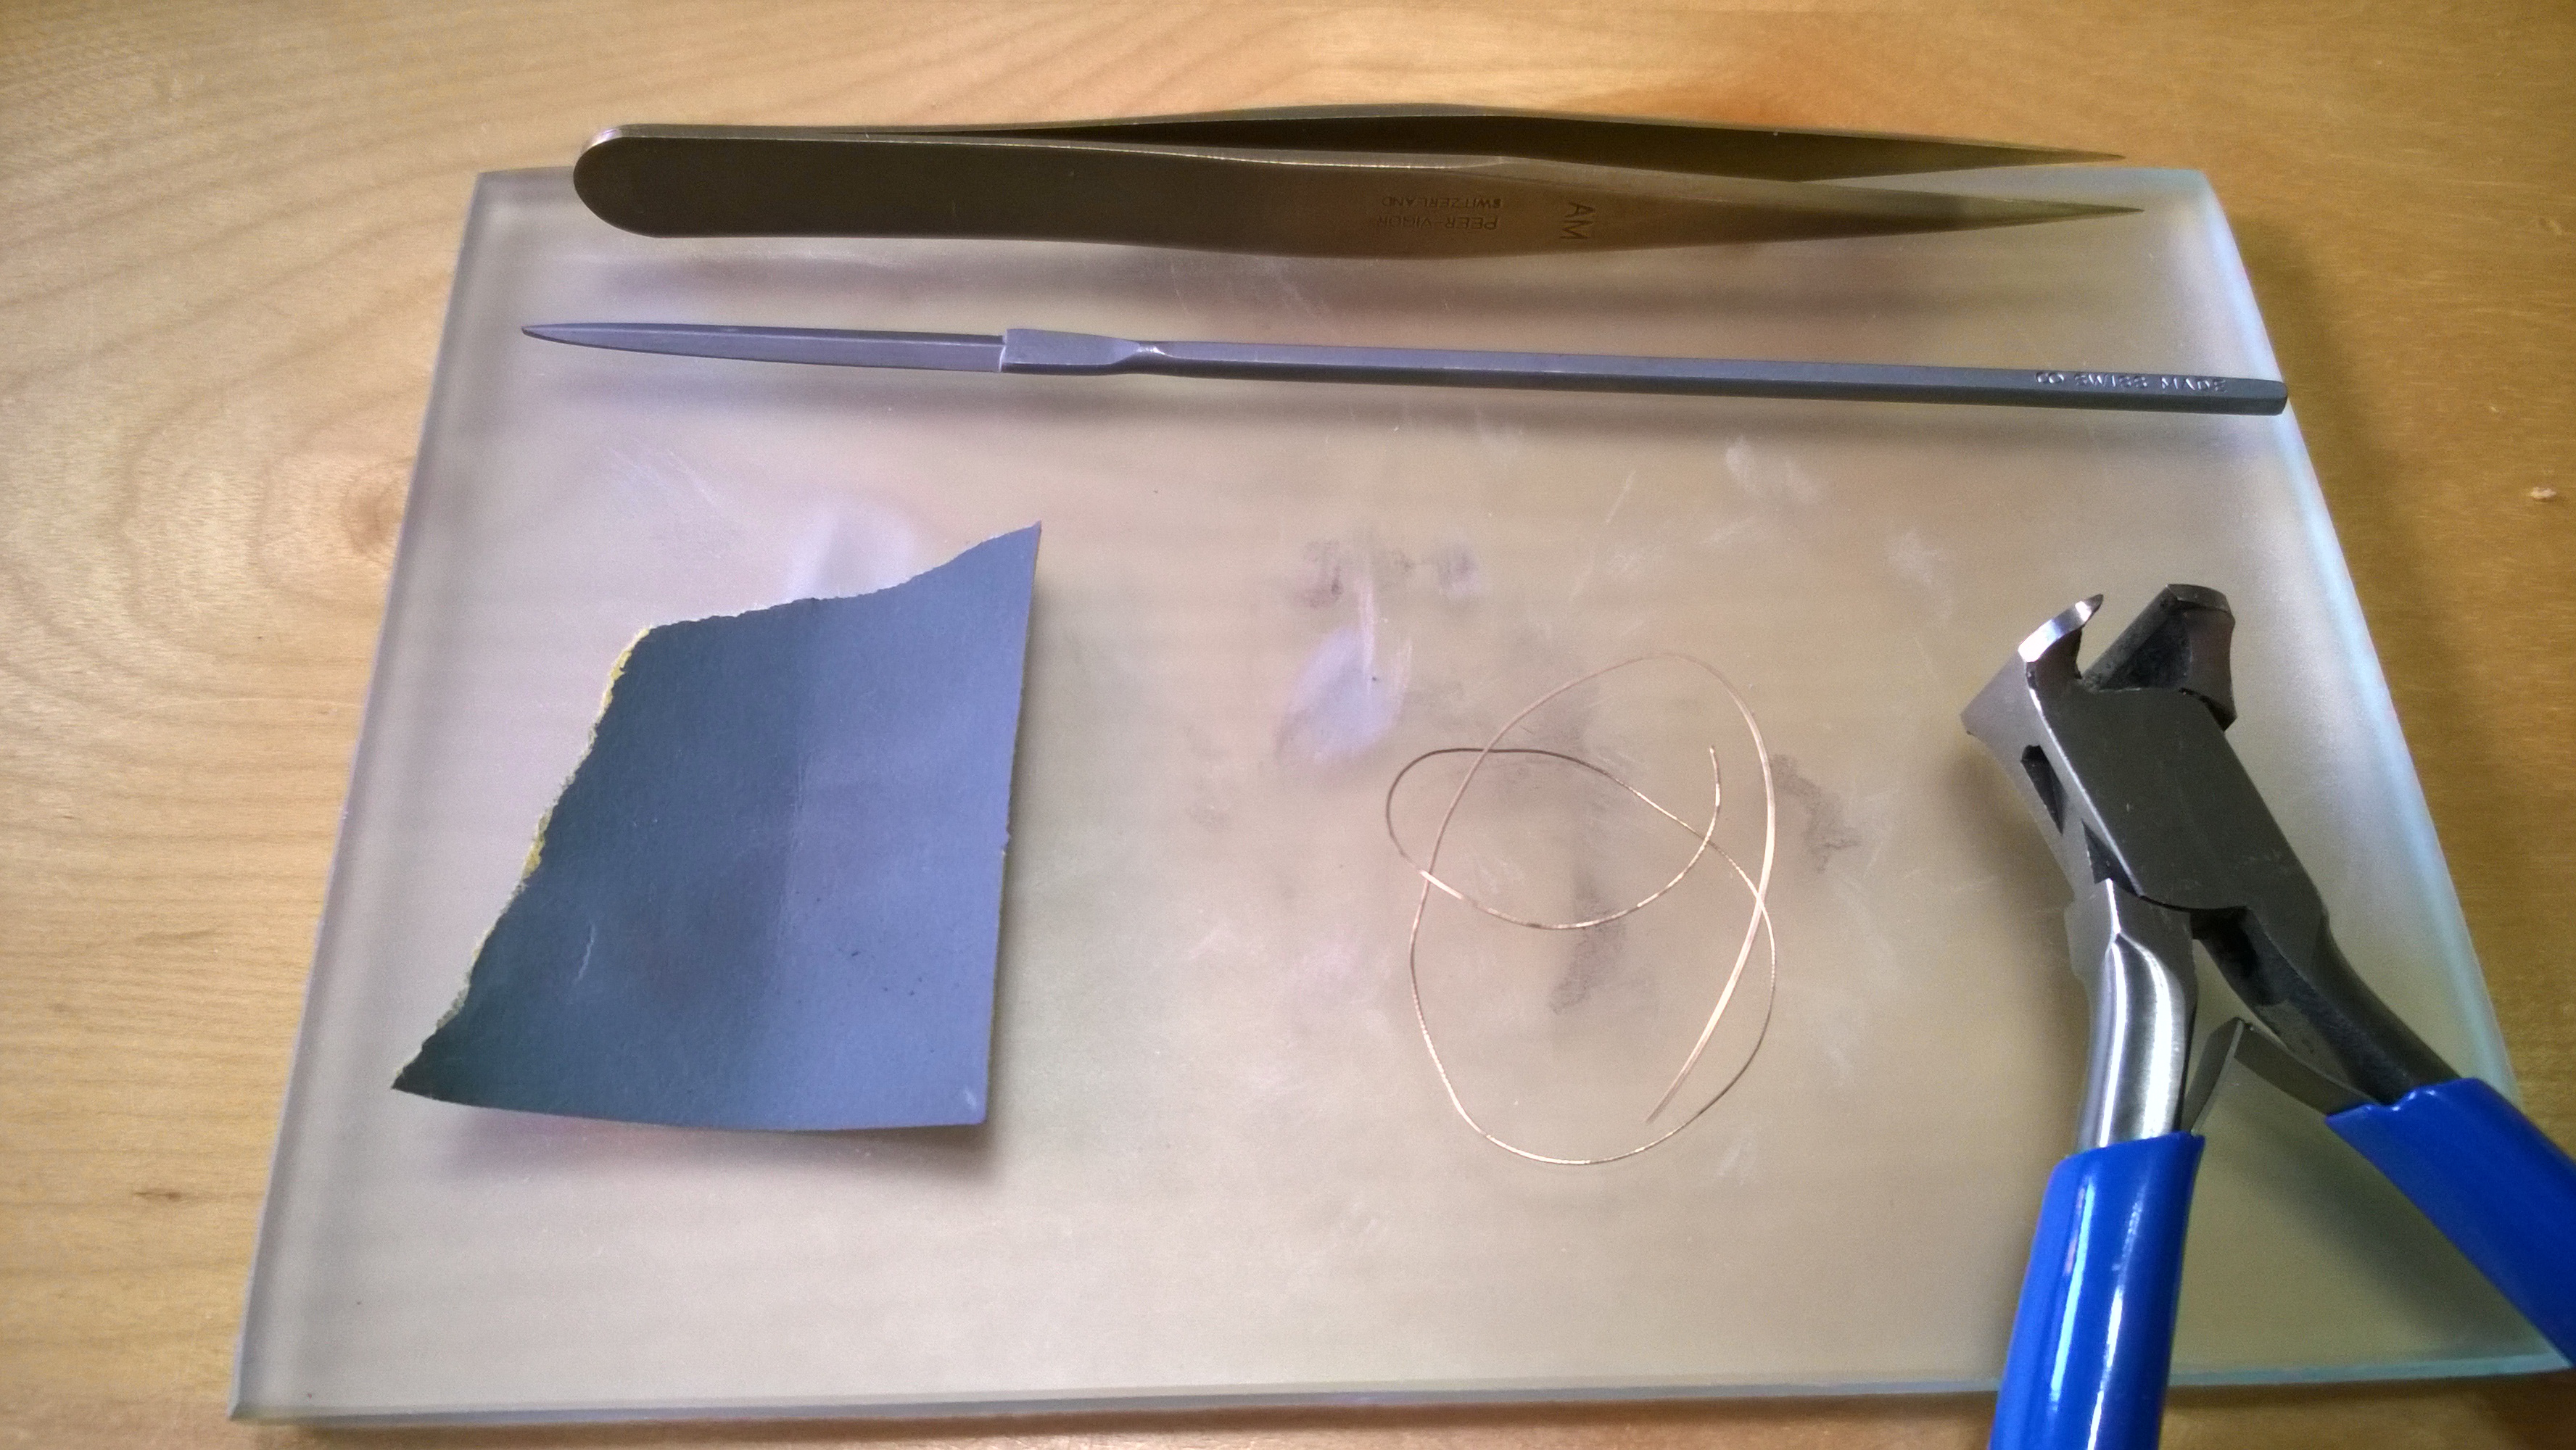 Here is the set-up that I used to make the pins. Besides the obvious stuff (wire cutters, wire, and tweezers) is an escapement file (below the tweezers) for shaping the pins. On the bottom left is a piece of emery paper that is used for polishing the pins. All of this is sitting on the piece of glass I etched earlier this year. The rough-ish surface of the glass provides some friction so the wire isn’t slipping all over the place when filing it.
To make the pins, you snip off a piece of wire (about 4-5 mm in length), place it on the glass and start filing away. I started at the top and made a couple quick passes with the file to straighten out the wire and to shave a little off the diameter of the wire. After that, I applied a heavier pressure from the middle towards one end of the wire. A few passes is all that is needed to get a slight taper formed. If the taper is too sharp, when you put the pin in the collet, you won’t have enough pressure on the hairspring as it exits the collet (and that can allow the hairspring to rotate around and mess up its accuracy, cause kinks or bends). After you have the pins formed, you need to polish them by rubbing them back and forth on the emery paper.
Once you have made your pins, it is time to fit the collet to the hairsprings.
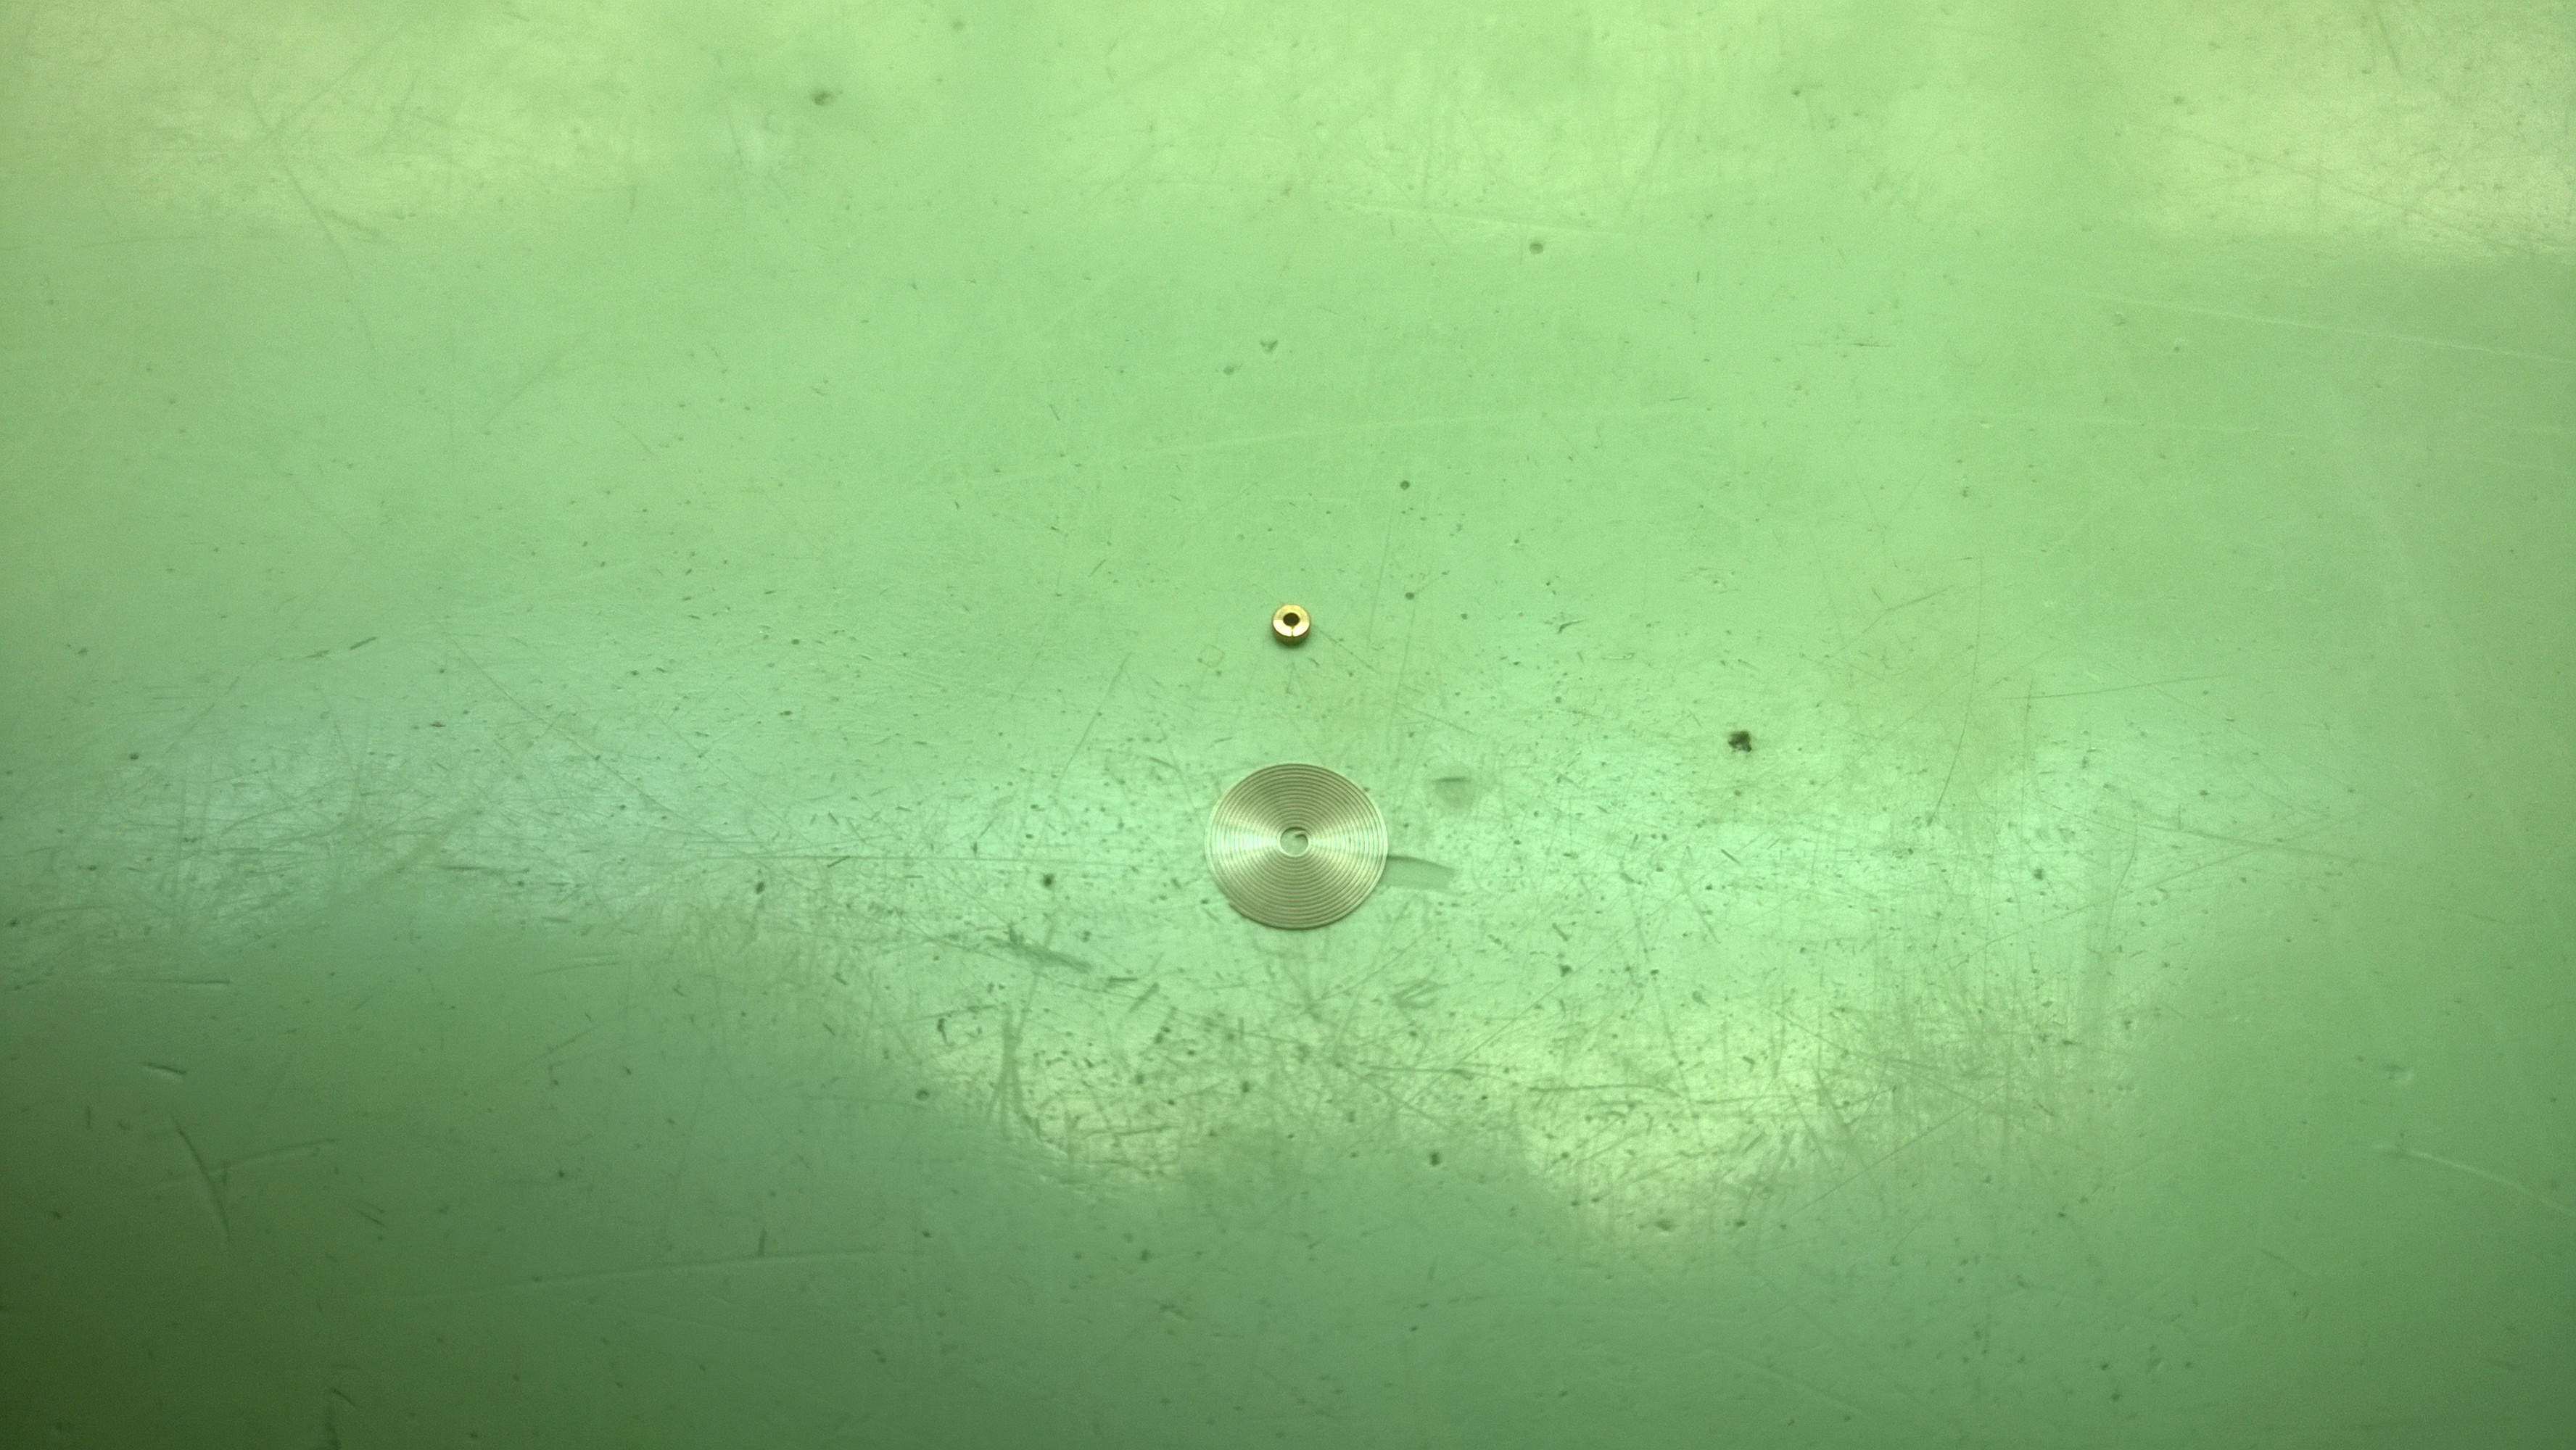 When you are working with a new hairspring, the center is going to be too small and tight to allow the collet to fit without deforming the spring. In order to fix that, you need to place the collet on the center of the spring and break the hairspring off at the point where it “pokes out” from underneath the collet.
 To break the spring, you grip with a pair of tweezers at that spot, and with another pair of tweezers you grab the center of the spring, stretch it out and move it back and forth until it snaps off. Once you have the spring removed, you put the collet back and check the spring. Ideally, you want 1 to 1.5 coils of space between the collet and the hairspring. The initial break will most likely not be enough. At that point, 1/8-1/4 of a turn of the hairspring should be removed until you get right at 1 coil of spring around the collet.
 Once you have the right space, you need to form the tongue that will go through the hole in the collet. About half a turn is needed for the tongue. Similar to how you broke the spring, you grip the spot where you want the tongue to start, and start nudging the free end of the spring perpendicular to the tweezers.

Now that you have the spring sized for the collet and the tongue formed, you can start the process for pinning the collet to the spring. In order to do this, you slide the collet onto a broach that is in a pin vise, followed by the spring. You then grab the part where you initiated the bend for the tongue with some tweezers and slide the tongue into the collet. After fiddling for a bit, you should get it.
 At this point, I stopped taking pictures because I had 9 total that I had to do, but the process is fairly easy to explain. You take one of the pins you made and slide it through the hole of the collet. You want the tapered end to go towards the end of the tongue. Once you get it in, you need to level the spring with some tweezers (the pin is going to cause the spring to move around a little bit). Once you get it leveled, you keep pushing the pin until it is snug (and level). You then take a pair of fine snips and cut the ends of the pin. After the pin has been cut, you need to file down the ends to make them flush with the collet. You can leave it on the broach and file it that way, or you can push the pin out and file it down.
Once it is pinned, you need to put the stud on the free end of the spring. The stud needs to be facing upwards when the flat side of the collet is facing up (a collet has a beveled side and a flat side). If the stud has an indention for a screw, you want that end away from the spring. Like with the collet, you slide a pin between the spring and the stud, make sure it is level and snip the ends. You don’t need to worry about the ends being flush with the stud, but you don’t want it to be too long.
After all that is done, the next process is centering spring to the bridge, but that is something I will be doing next semester.

Pingback: Second Semester Final Project-Vibrating a Hairspring | watchmaking journey·