Sorry for the delay in the post, my wife and I took a quick trip out of town Friday, and by the time we got back into town Saturday, I had to leave immediately to go to a burger night that was planned for the Watch and Jewelry students.
_____________________
Thursday consisted of more work on Pallet Forks. As I said in my first post this past week, we are doing this exercise to get used to using shellac, and working with the stones-being able to remove them and re-insert them without damaging them.
Later on (in a couple weeks, I believe), we will be putting the stones in with a purpose-making sure that they will function as part of the escapement with proper clearance for locking/unlocking of the escape wheel. In preparation of that, I checked out a book from the library that will teach me how to draw the escapement-which will help me learn the angles that the Swiss Lever Escapement uses and give me a much deeper understanding of the escapement. Once I start that process tomorrow, I will include my progress in that as part of my updates. I am really excited about doing this.
When working with the pallet forks, you follow the same soak/remove/replace/shellac formula that you do with the roller table. When I first started working with the pallet forks, I was grasping the stones with my tweezers and pulling them out, but I noticed that my tweezers would slip a bit and scratch the stones. I ended up switching to a pith wood/peg wood combo that provided me with a lot more control and kept the stones in a lot better condition. Essentially, I sandwiched the fork between two pieces of pith wood with one side of the stones hanging free and used a sharpened peg wood stick to push the stone down and out.
I chose to do one stone at a time (for now) so I could get used to each side stone shape and angle. When you look at the pallet fork, there is a short arm and a long arm. The stone with the shorter angled impulse face goes with the short side, and the longer angled impulse face goes with the long side, and directionally, they both point towards the long side. This is important to keep in mind because you can put the stones in regardless of what direction you are looking at the pallet fork.
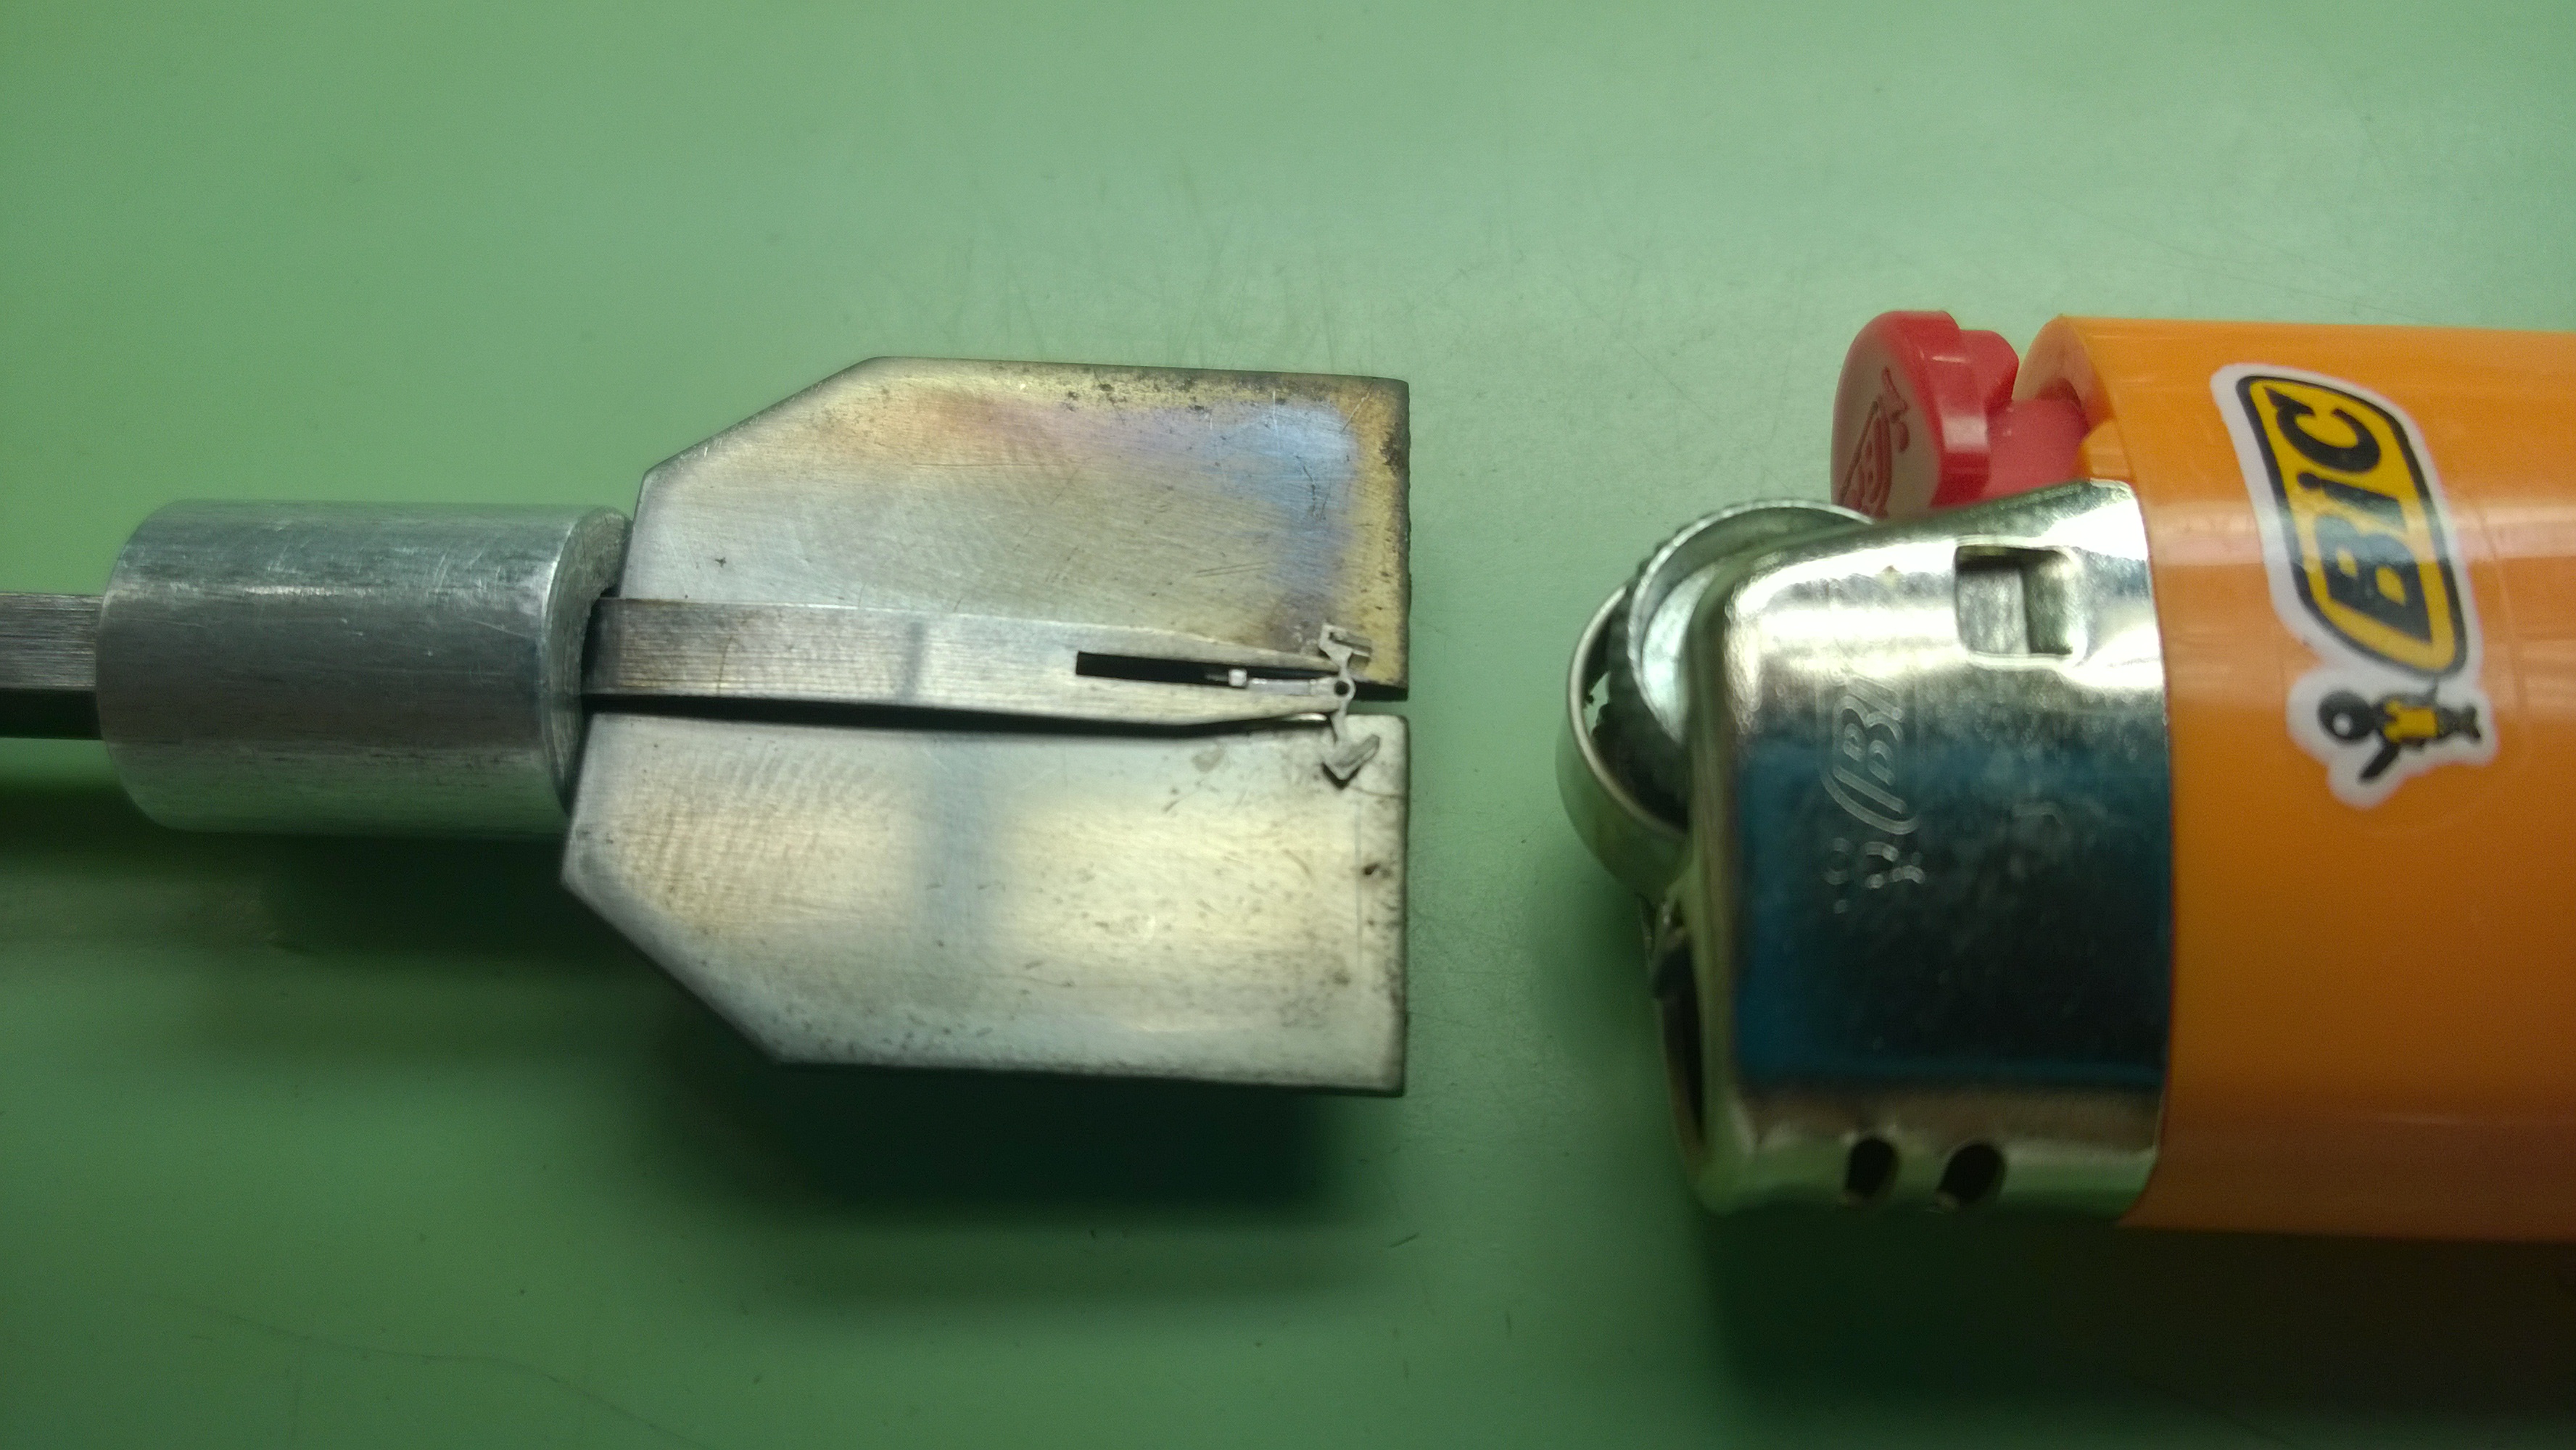
 In the picture above, the pallet fork is facing the correct way to have the shellac applied to it. When you put the pallet in, the shellac side will be dial-side down, leaving the pretty, non-shellac side facing upwards (so if you are looking at the movement through a display back, you won’t see any shellac).
After removing the stones, I dipped them in the alcohol, dragged them across a piece of watch paper (a lint free paper that is good for all kinds of things) to dry them. I then dipped the fork (with one stone out and one in) in alcohol and dragged a pieced of watch paper in the slot for the stones to remove any traces of shellac. I then replaced the stone and repeated the procedure with the other side.
Once the fork has been cleaned and the stones back in, it is time to start the shellac process.
 Here is the pallet fork on the pallet warmer with a lighter for scale. Once you have the pallet fork positioned, it is just a matter of heating the fork and applying the shellac. When working with pallet forks, you need to be a bit more careful of how long you heat the fork-you can damage the fork by heating it too much.
 After the fork has been heated, you use a thread of shellac to place a dot on the fork to keep the stone in place. You need to work quickly, because if you hold the shellac thread too long, there will be too much shellac that will make its way between the stone and the fork and wick from the back of the fork to the front. If that happens, you will need to clean the fork and do it all again.
I have had two suggestions from classmates as to how best work with shellac. One of them worked really well for roller jewels and the other for pallet forks. The first one suggested instead of using a thread of shellac for the roller jewel, to take a small, shark-toothed size piece (kind of a triangle) and use the tip to get the shellac over the jewel. It worked well because it doesn’t curl up and away like a thread of shellac does.
The second suggestion was to take a thread of shellac, break off a small piece and hold it in your tweezers with just a small amount showing. Doing it this way will allow you to control exactly how much you put on, and eliminates the curl factor.
______
Shifting gears, I had my first day of my Jewelry Practices class. It is going to be a good class because it deals with a lot of different aspects of the jewelry industry that I would learn over time if I were to work in the jewelry industry (such as appraisal, security, customer interaction, etc), but I will get the chance to learn some of it now. We will have some workshops given by people in the industry, from small business associations and other groups. We had a really short class Friday (just went over our syllabus) so once we have a full lecture, I can give a better rundown of what we will be learning.
