This has been a great week so far. I finished up the hairspring adjustments on Monday. All in all, that was a pretty good project that I just wrapped up. My current project that I am working on now involves friction jeweling.
As I have mentioned before, jewels are used in a watch to help reduce friction (that is not what friction jeweling is). Some jewels are held in place with a spring (like a shock spring), others are held in with a chaton.
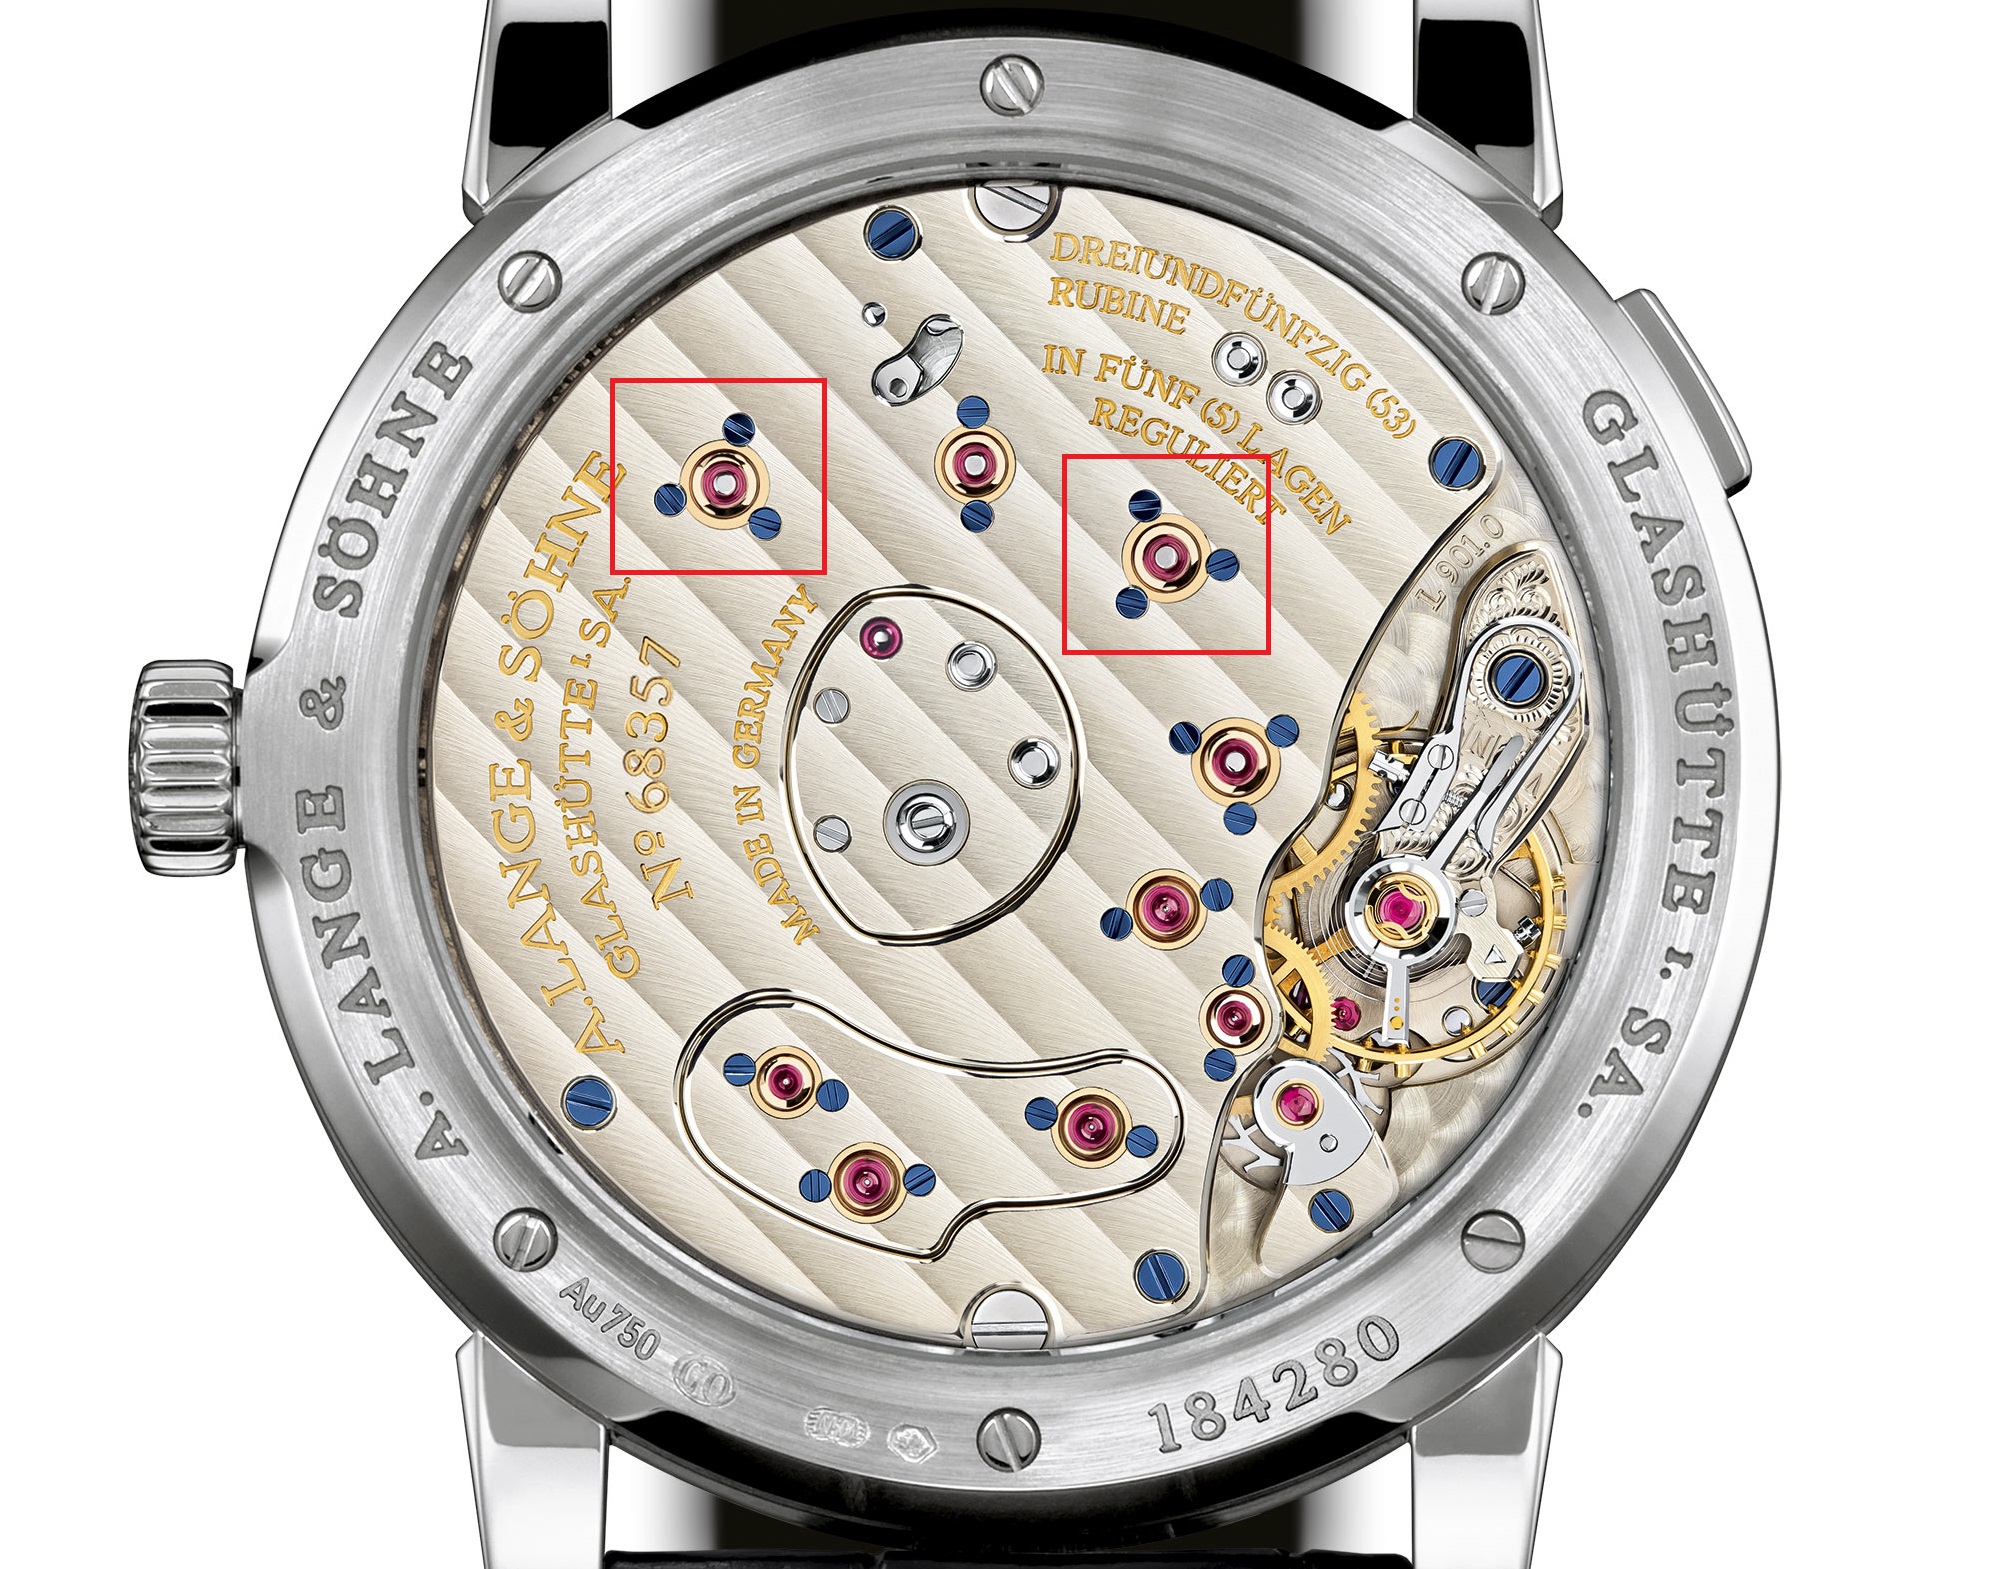 This is a great example of chatons in a watch. If you look at the majority of the jewels (I highlighted a couple of them in the red boxes), you will see that they are surrounded by gold and then screwed into the plate. Now, chatons are used for aesthetic reasons, but back around the 1700’s or so, real rubies were used as opposed to synthetic ones. When they worked with real rubies, there were two things to consider:
- Creating rubies of even size and shape, as well as internal hole diameter without breaking the rubies while forming them.
- Inserting the rubies into the plate without breaking them.
So, as you can see, breaking the rubies was pretty easy to do. They were able to address the second issue by sinking the ruby into the gold and then fitting the chaton into the plate.
The other way to put a jewel into a plate or bridge is to friction fit the jewels. To do so is relatively easy. You need a plate or bridge, a jeweling tool, and properly sized jewels. Simple, right? Obviously, it is a bit more involved and you have to walk before you run.
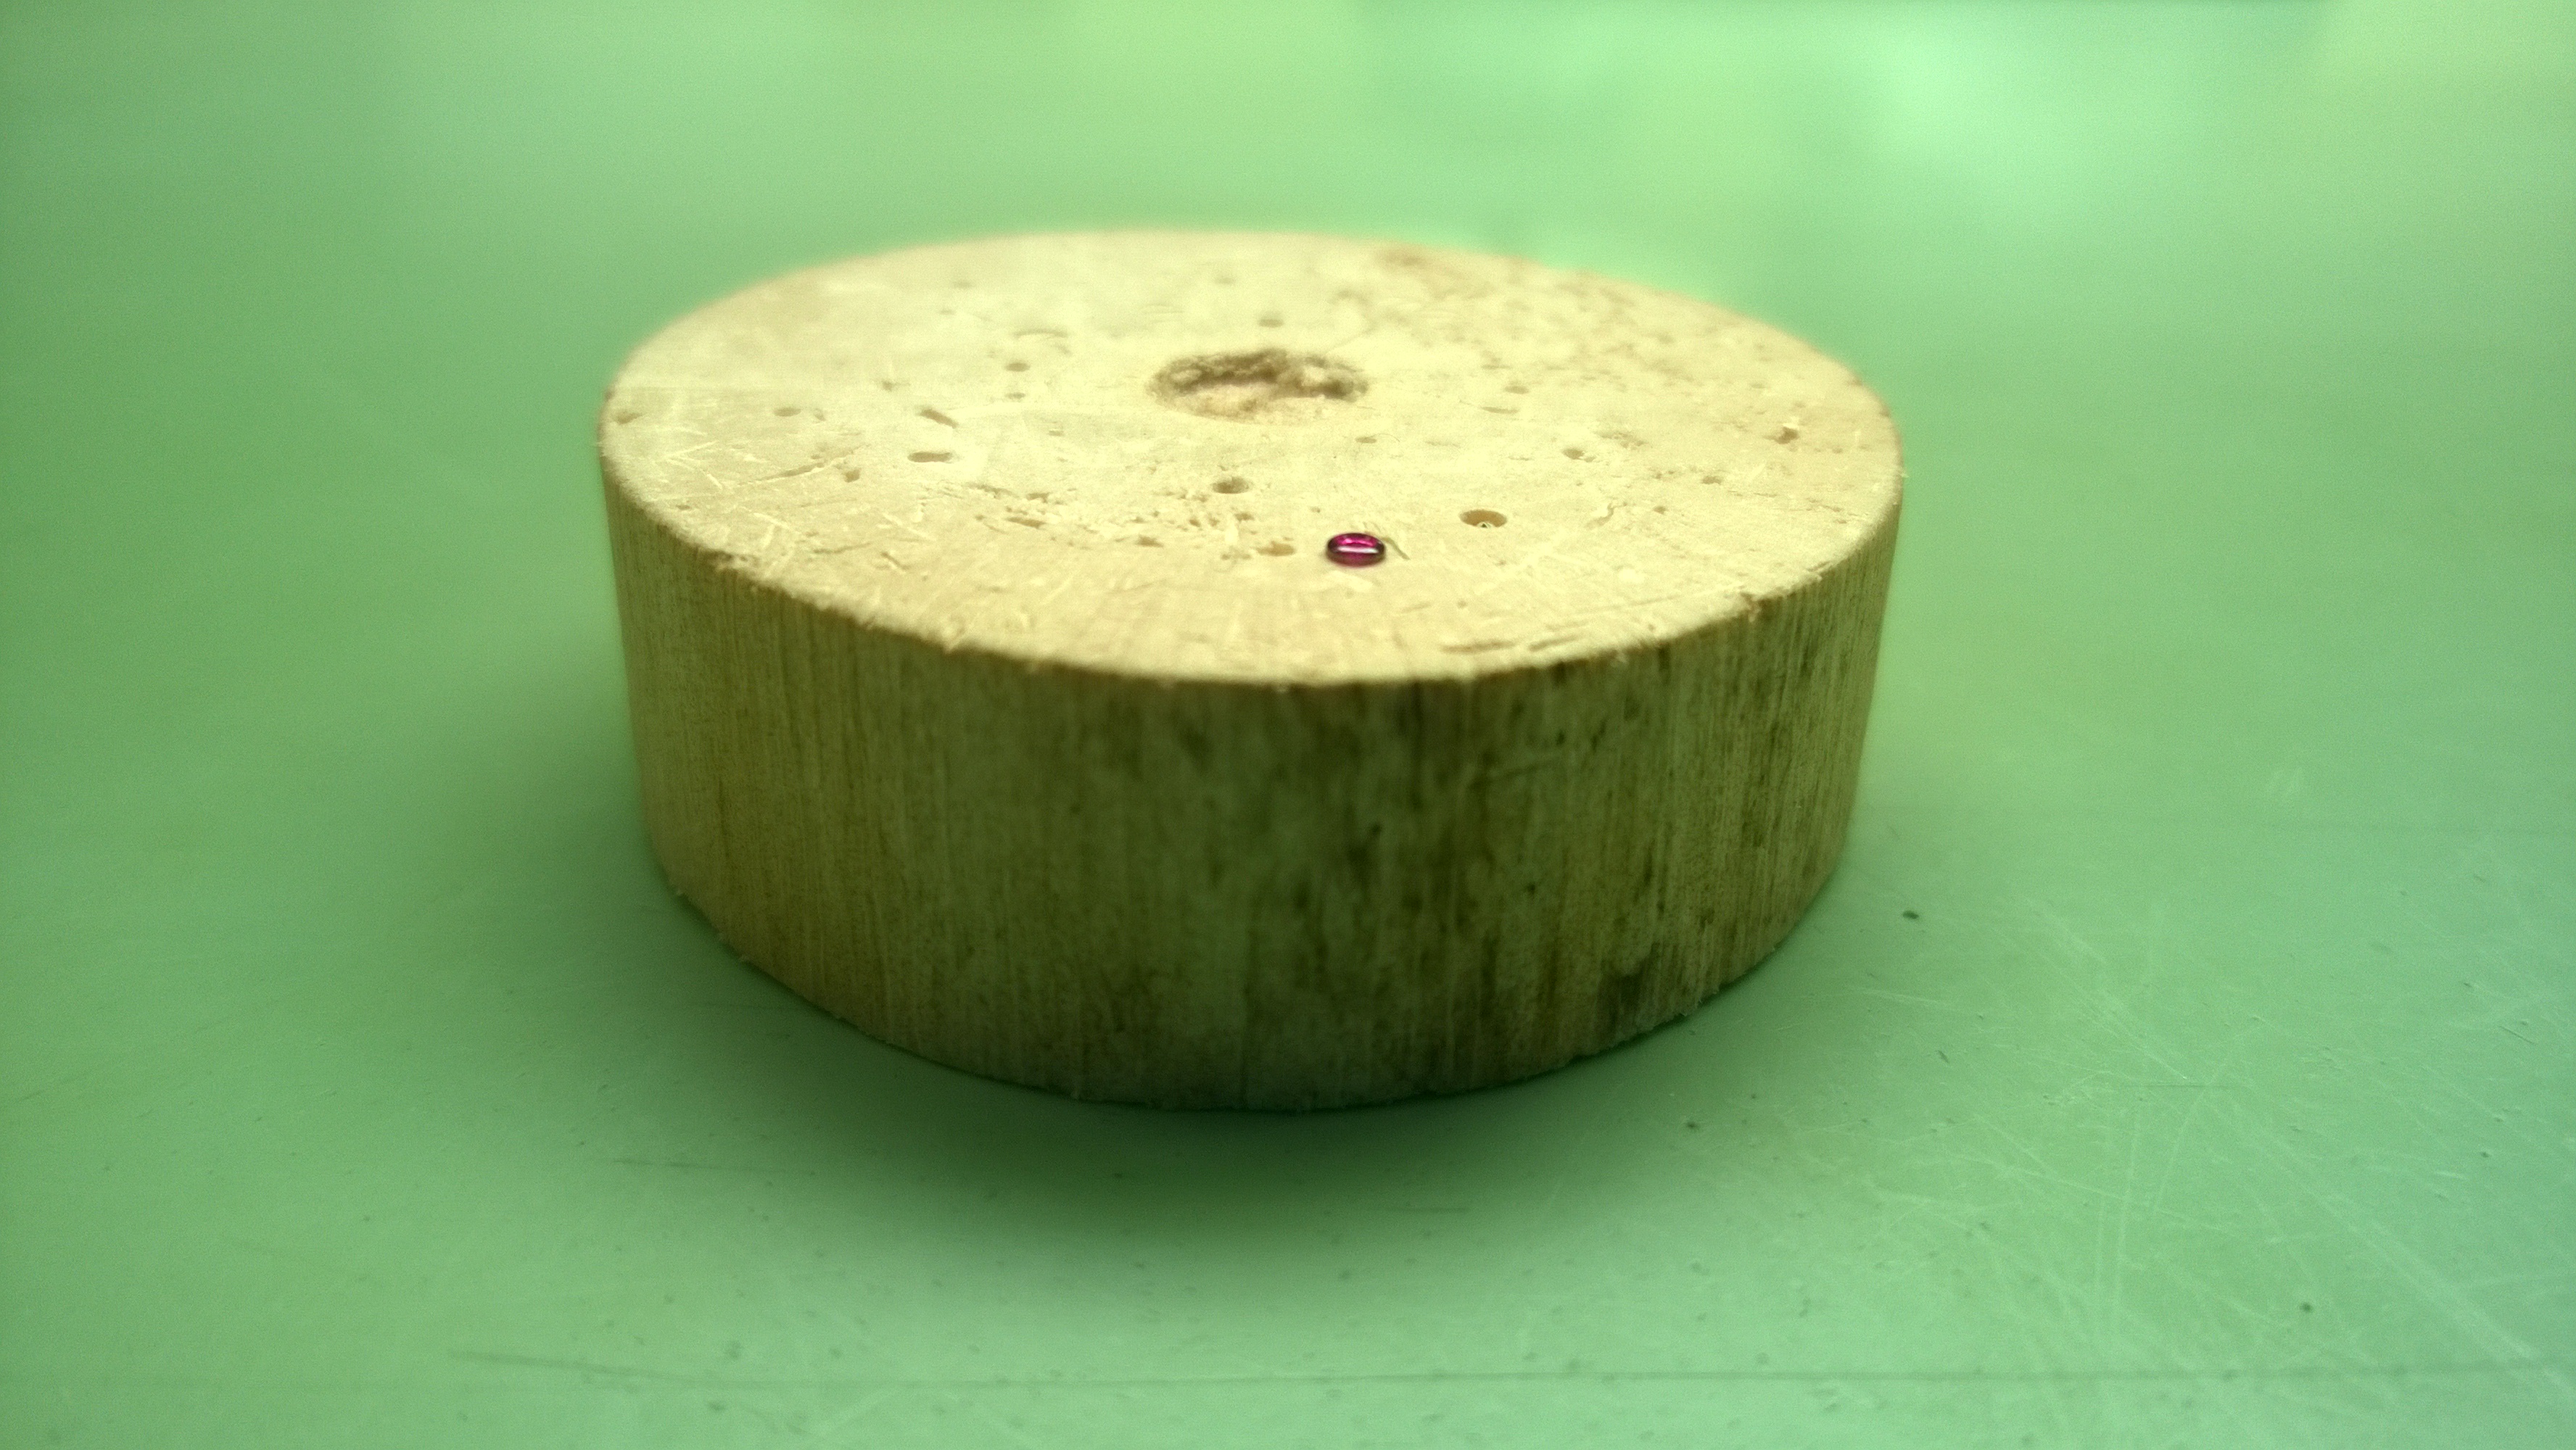
There are two main types of jewels that are used in a watch movement-plate jewels and cap jewels.
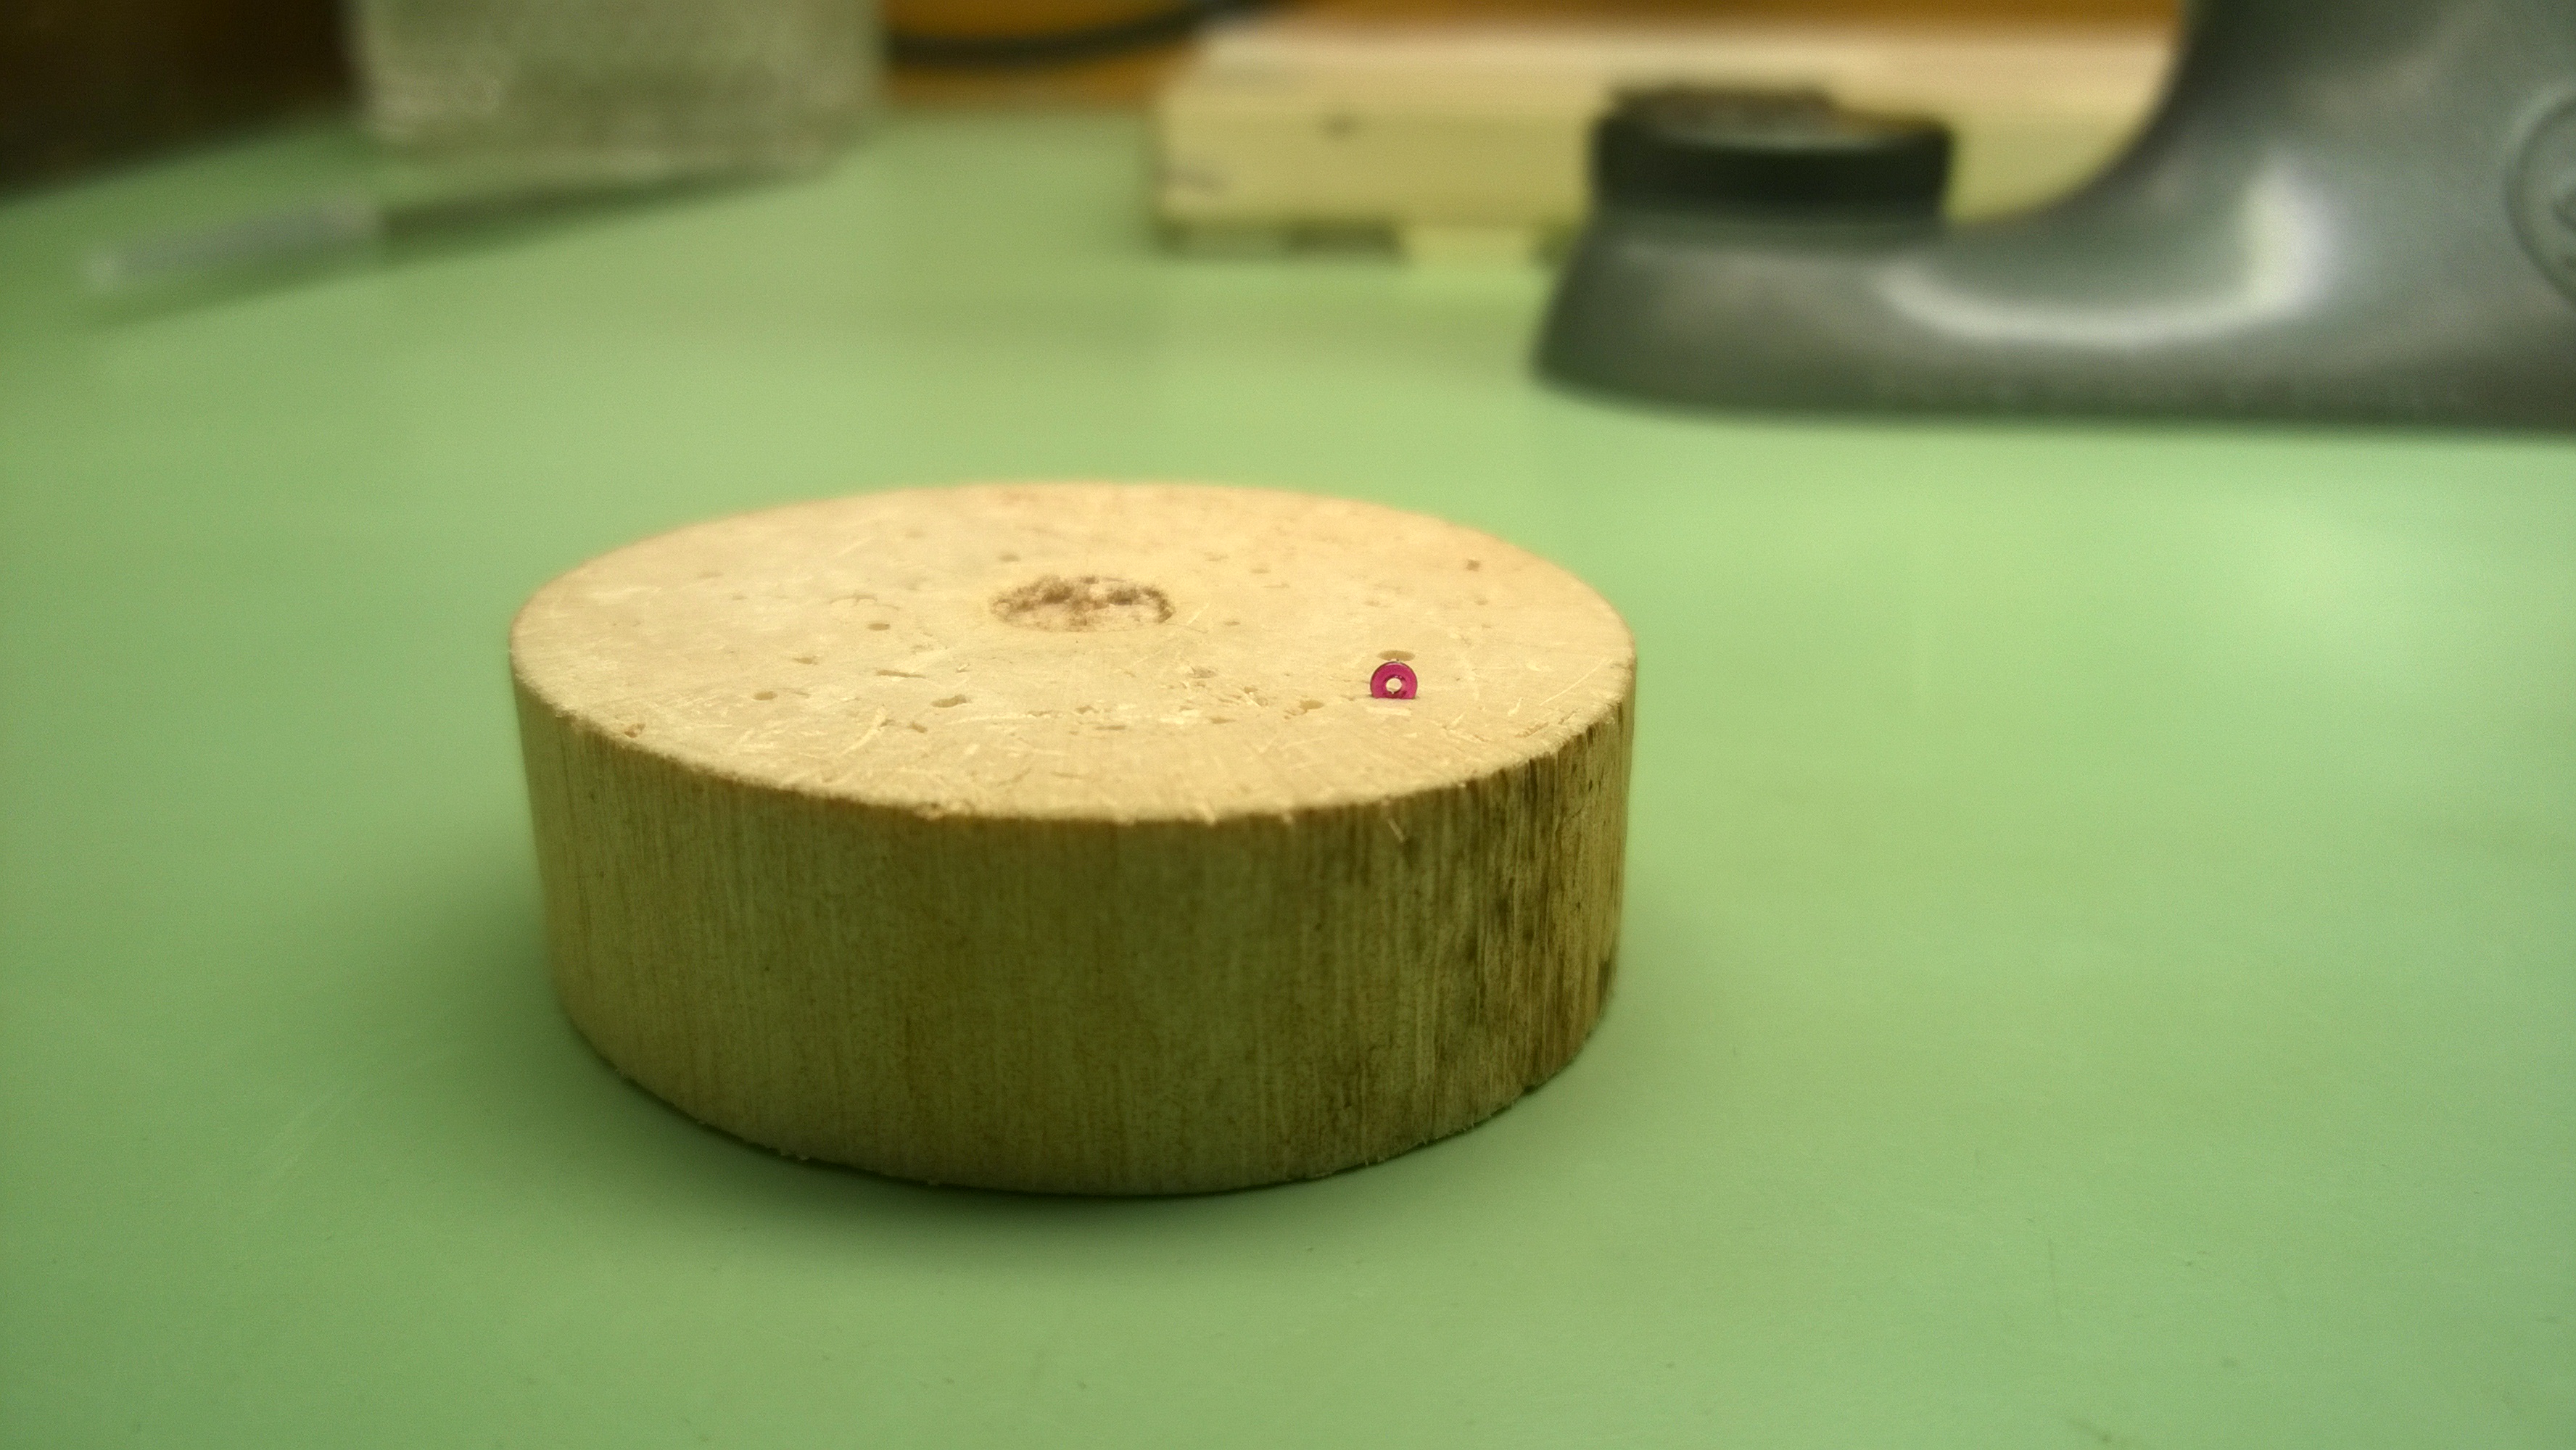
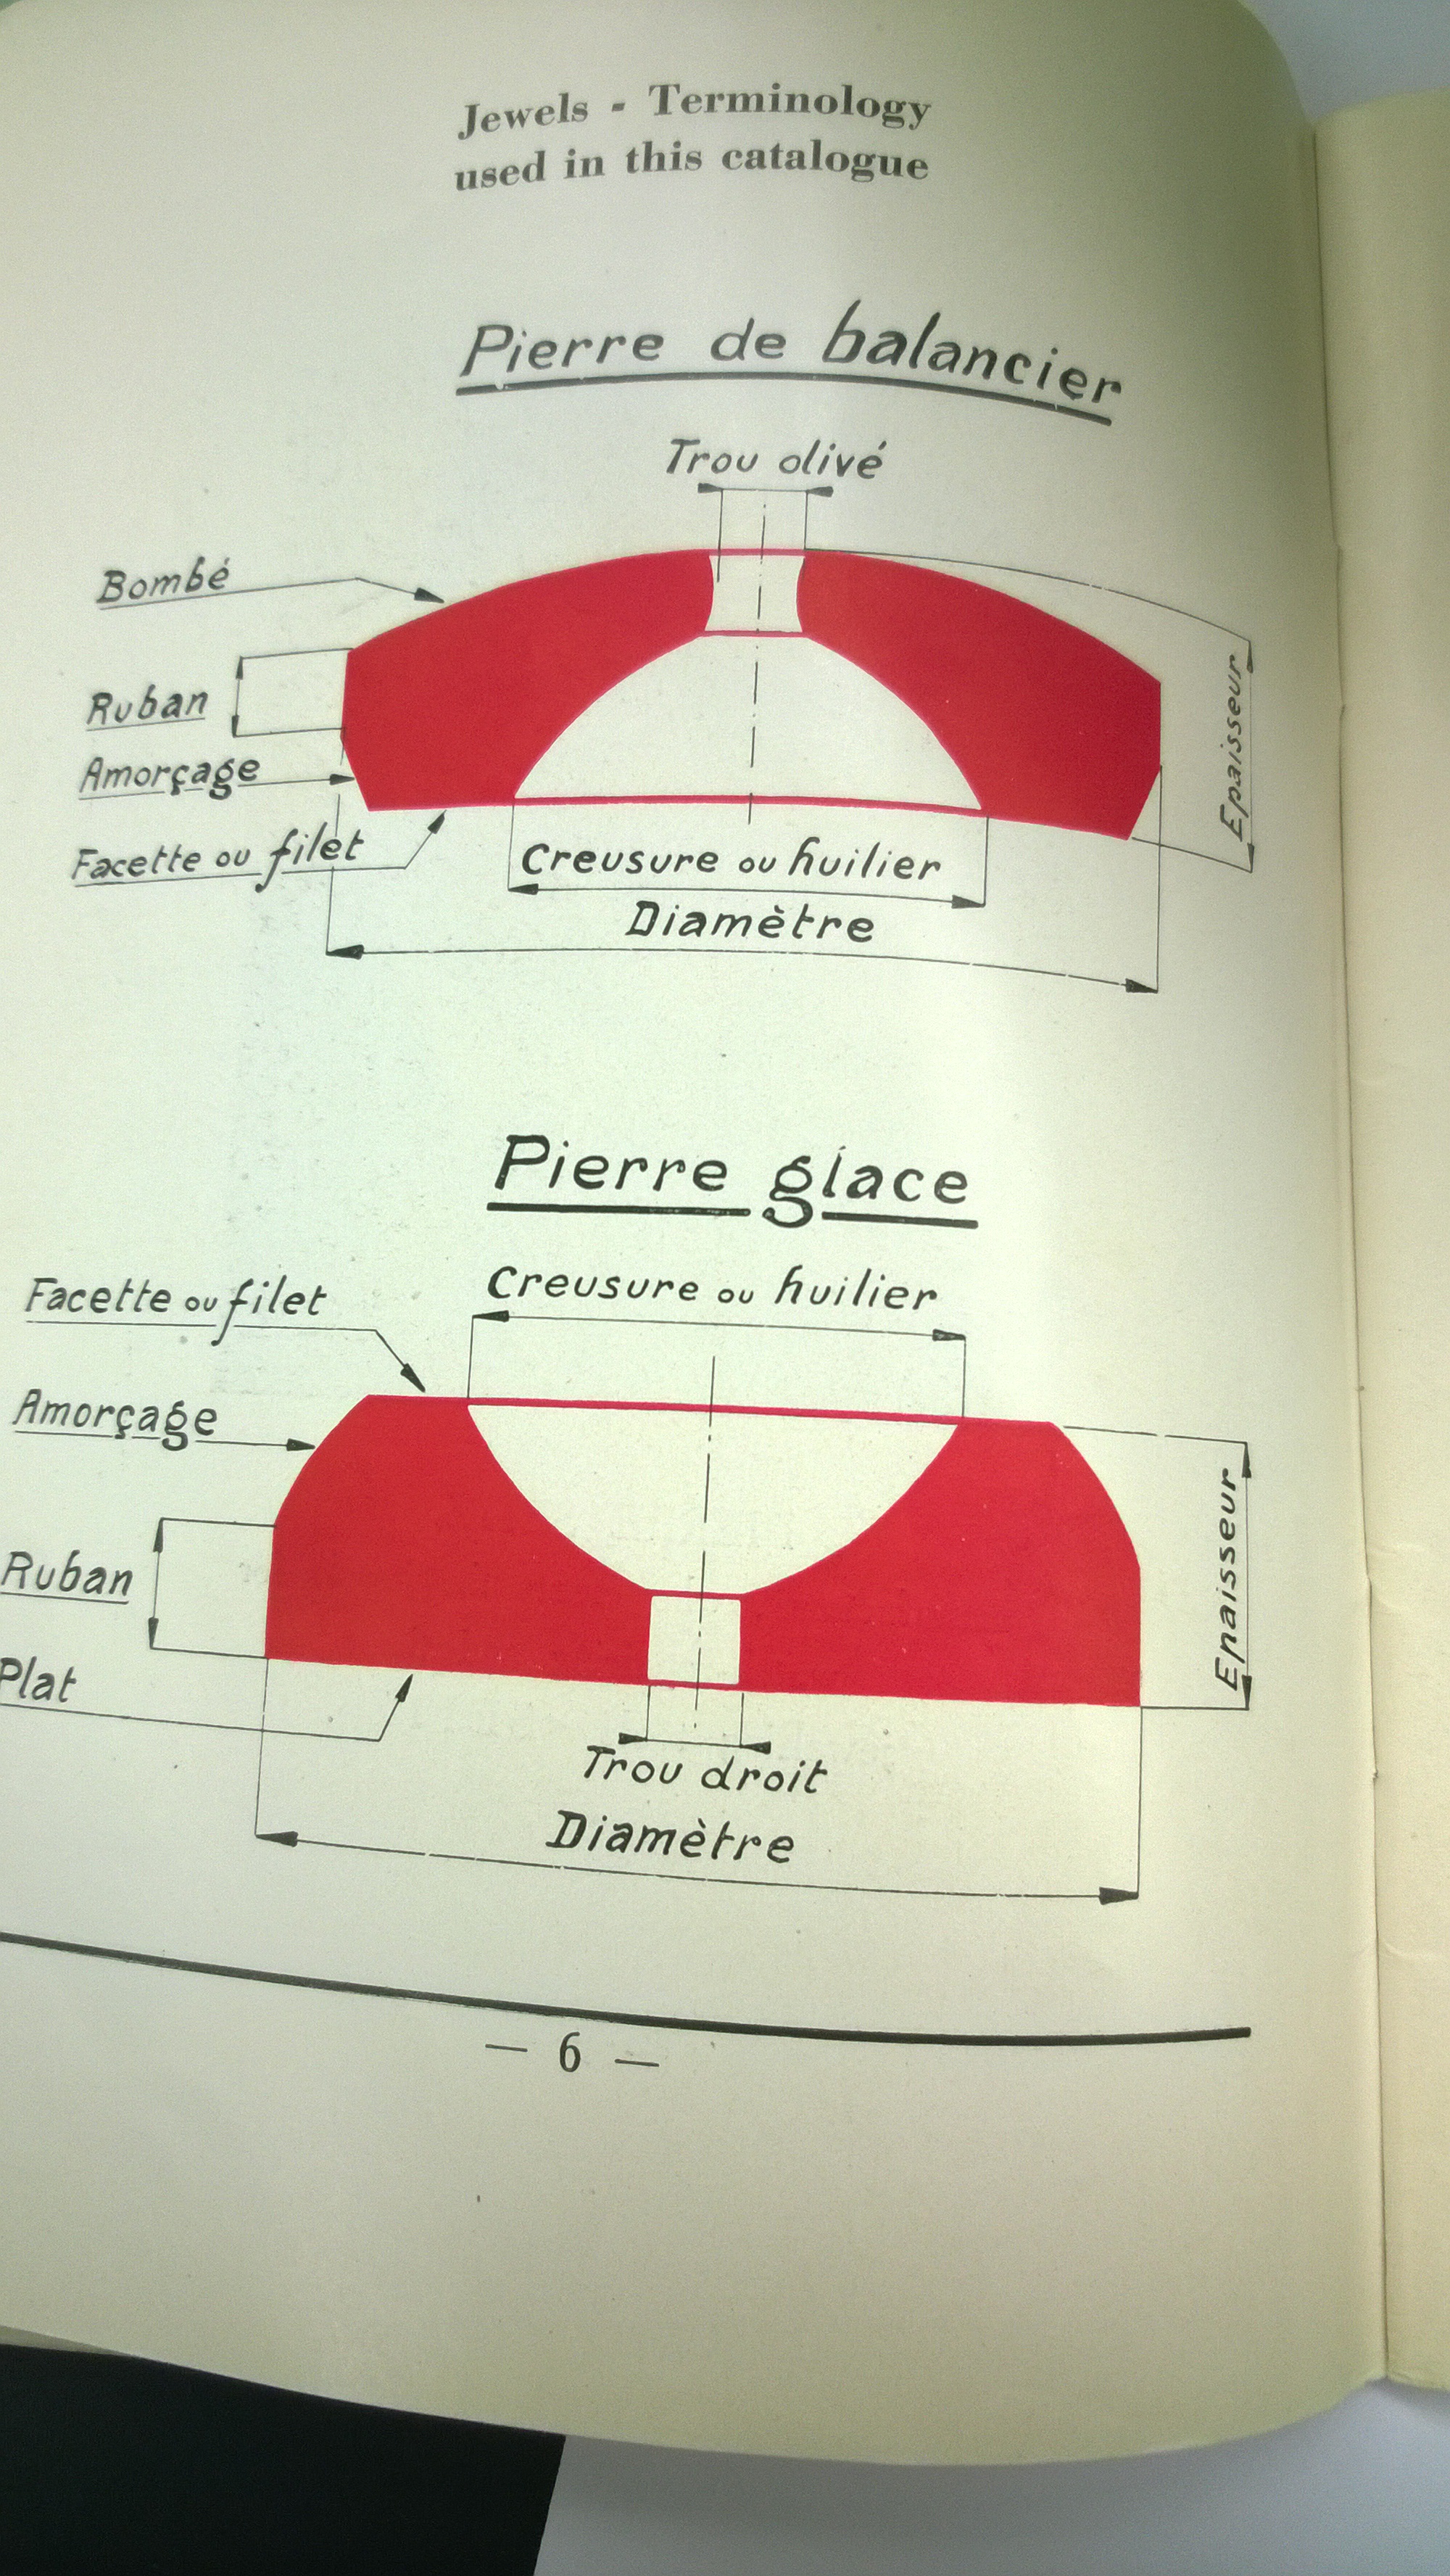 In the above picture, the cap jewel is shown up top and the plate jewel is down below. Besides looking different, they have different ways of working. The cap jewel is curved up because it has a second jewel that sits on top and holds the oil in place. The interior of jewel (the half dome space) is where the pivot of whatever wheel is in the jewel sits. The plate jewel is kind of the opposite. The flat side is where the pivot sits and the cured part is where the oil sits.
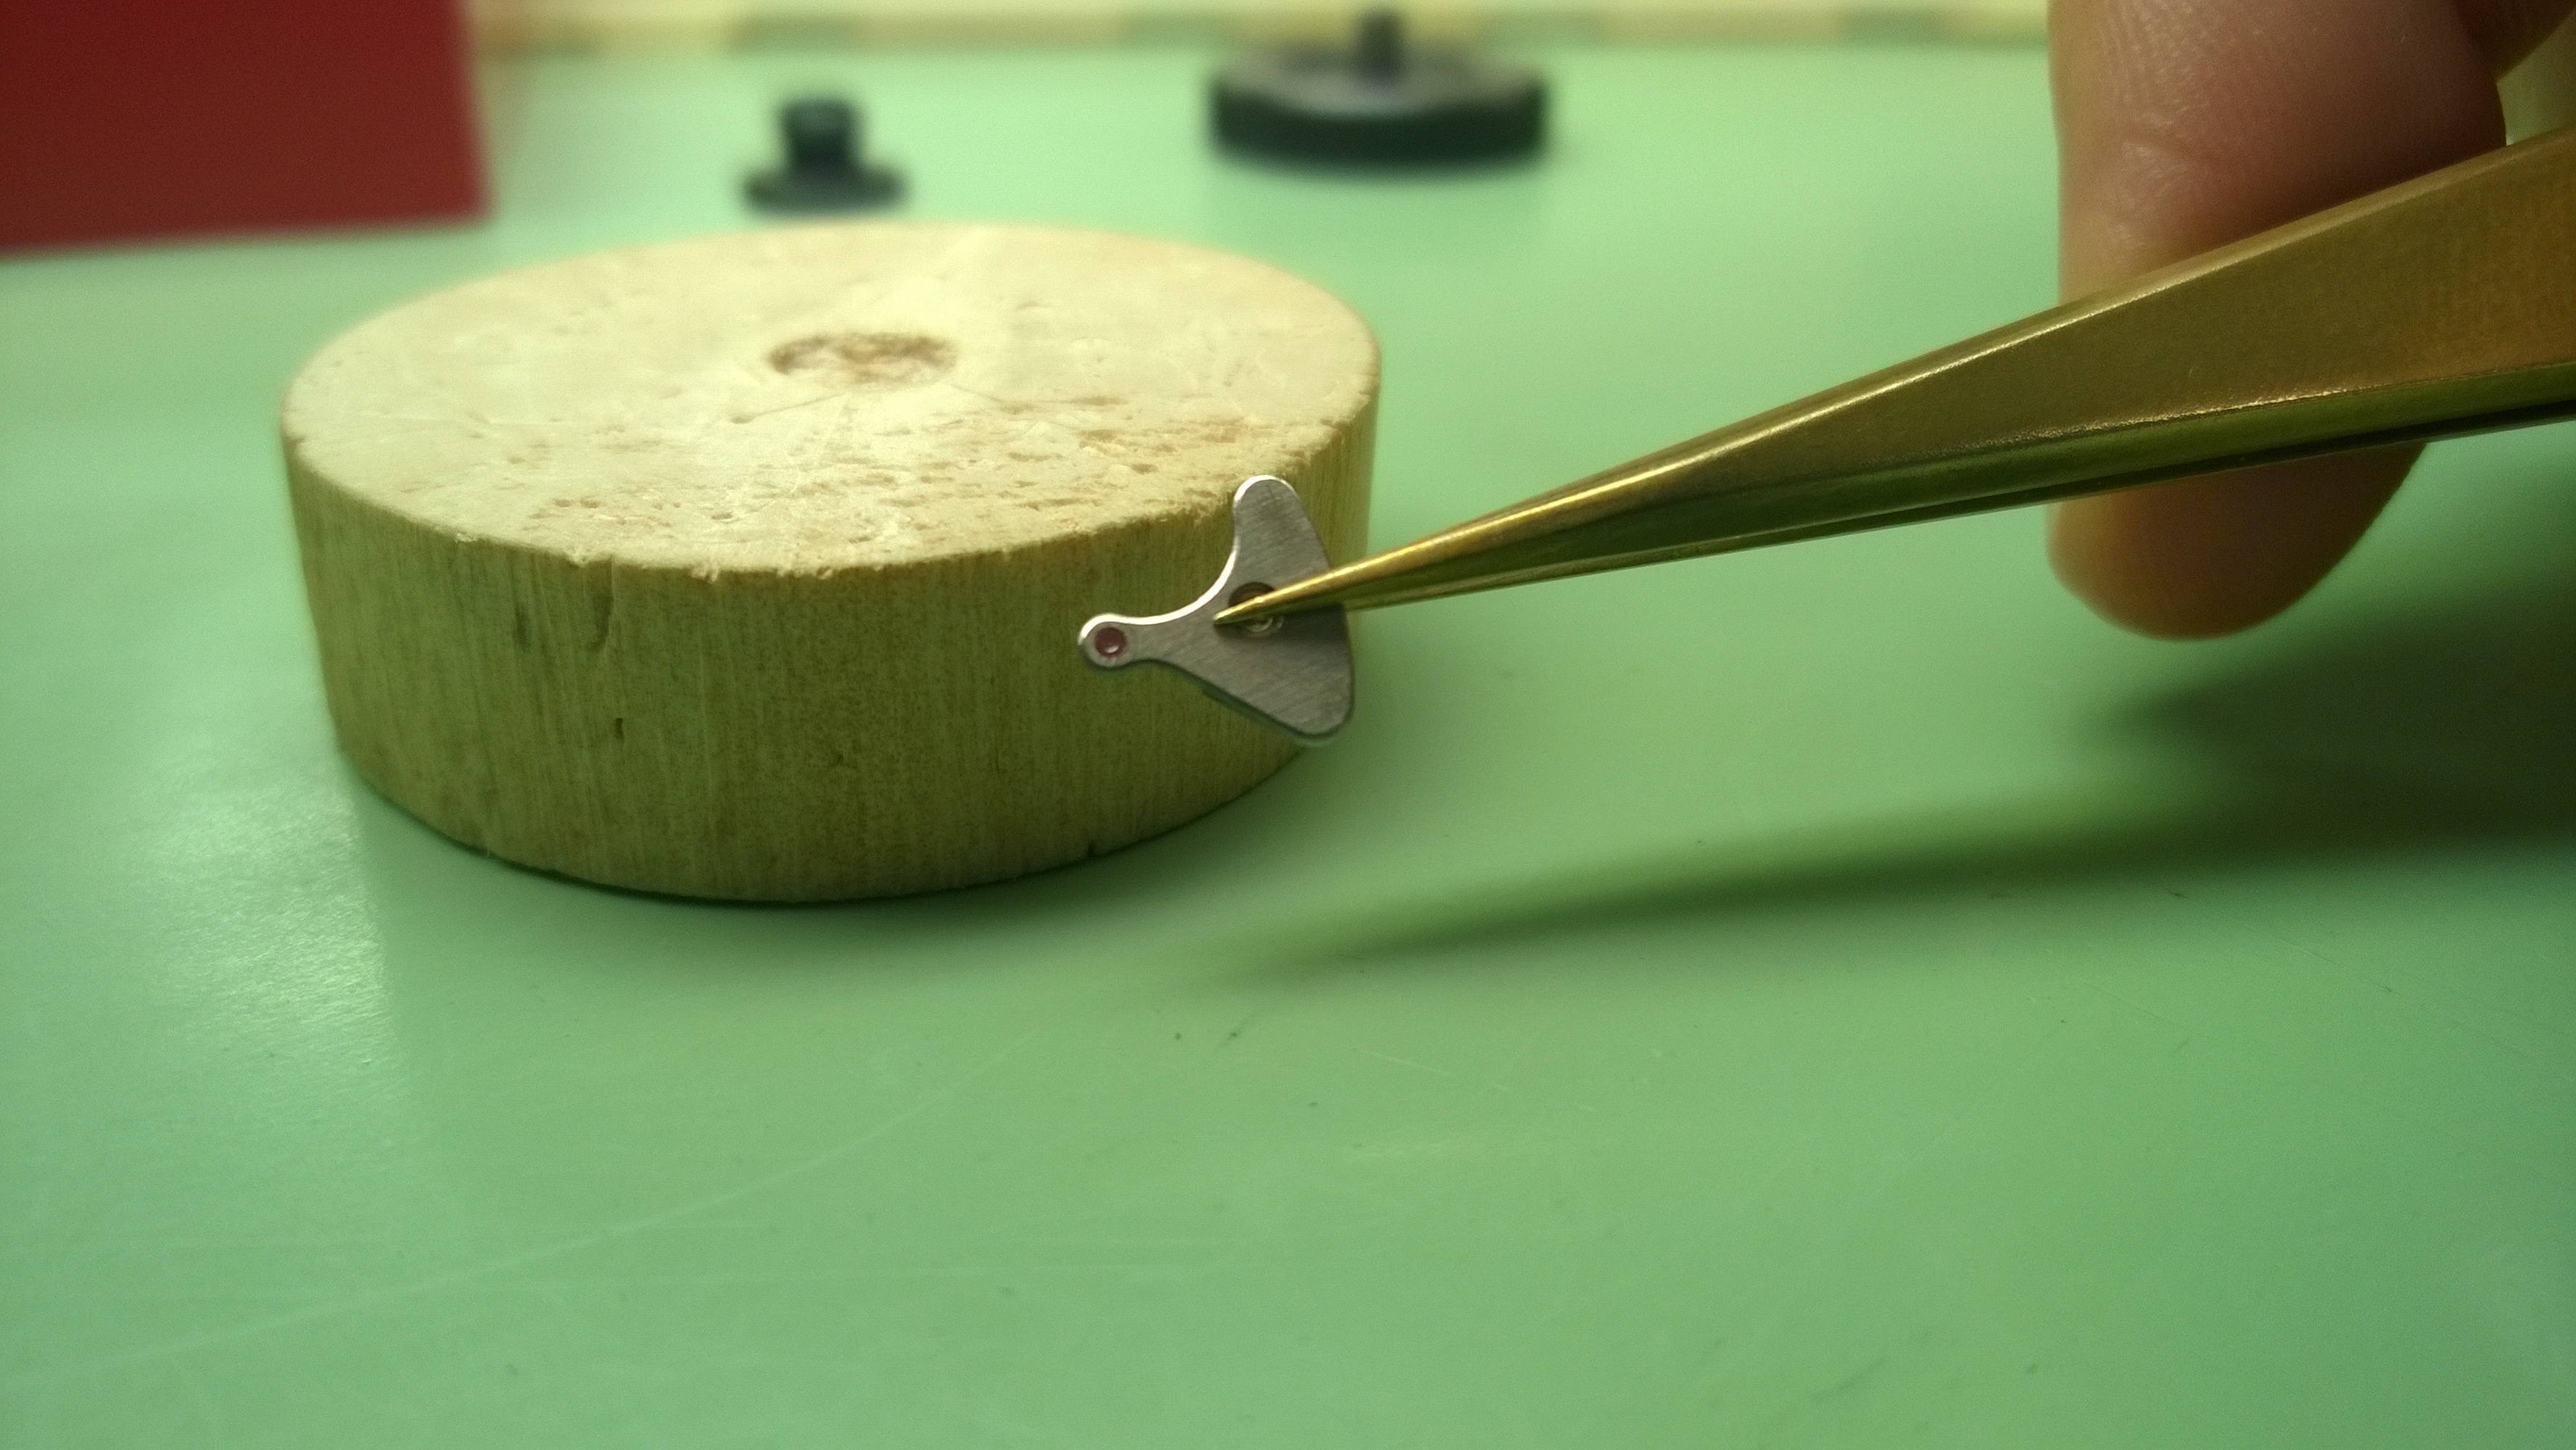
If you look at the picture again, the word “Armorçage” translates into “priming,” but colloquially in watchmaking we refer to it as a bezel. When pushing in a jewel, you push the bezel side in first.
For this section, my first project was to remove and then re-insert jewels from various bridges and plates.
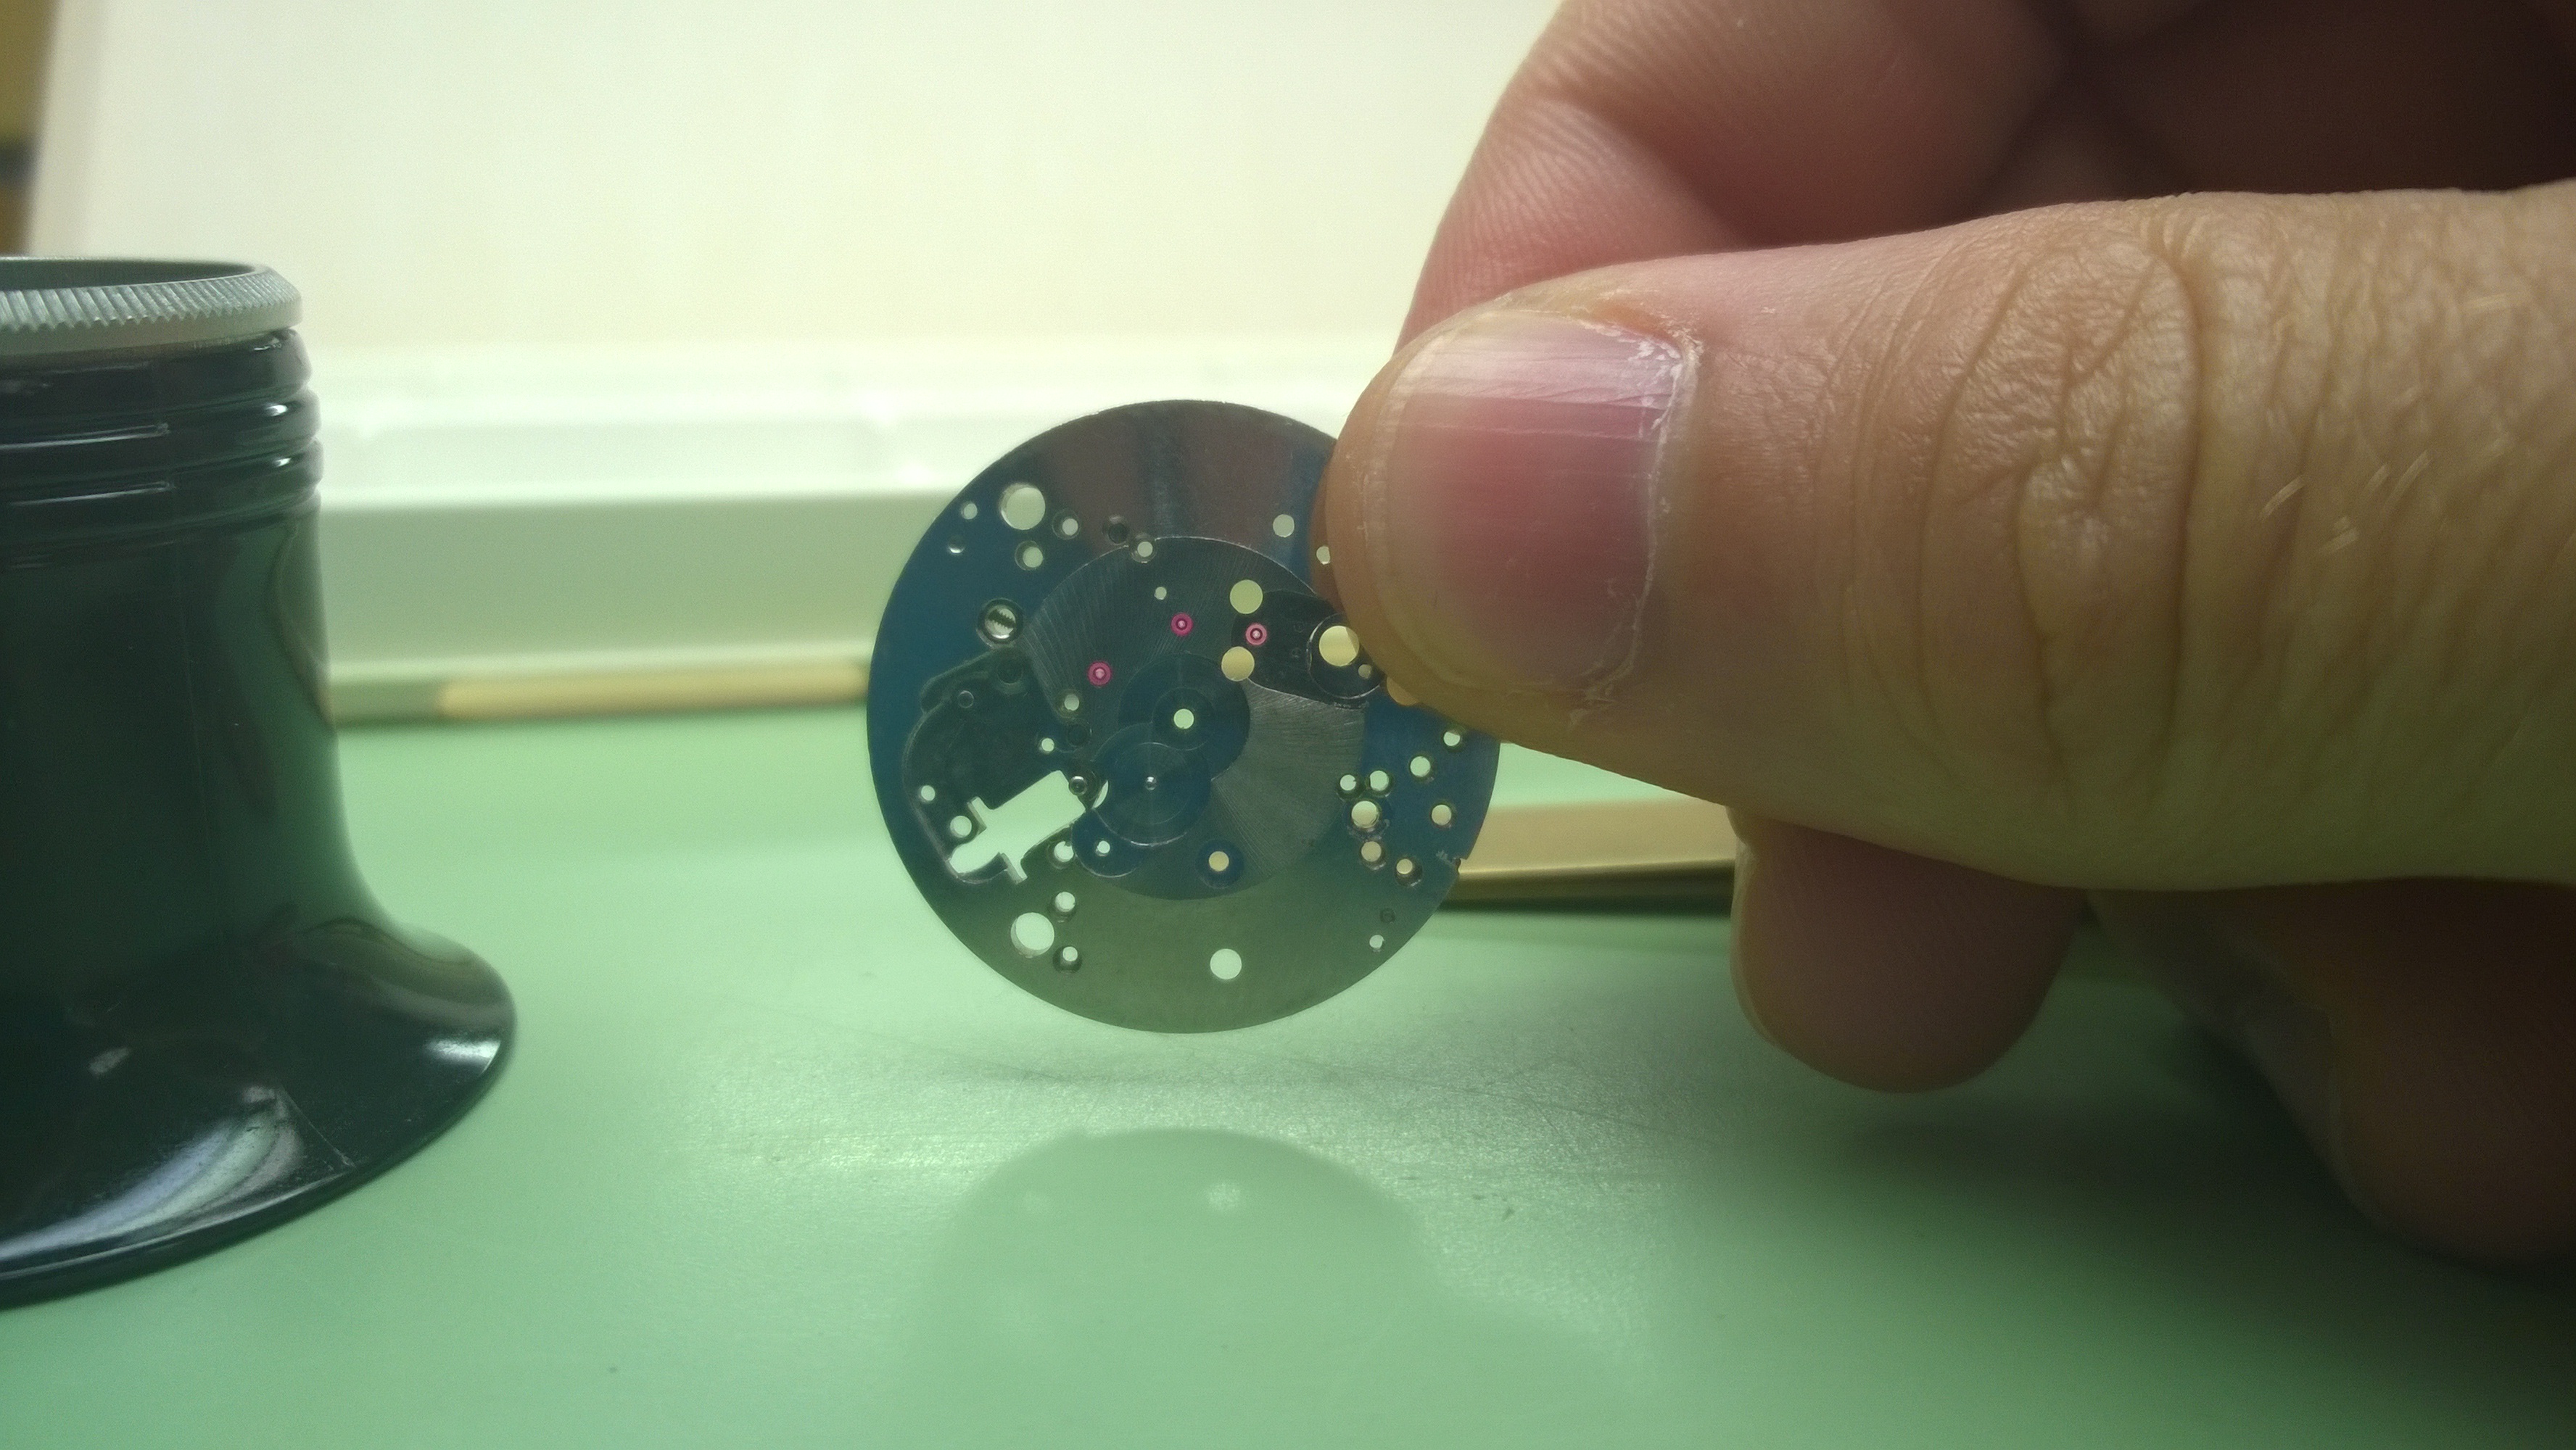
 I had eight pieces to work with, going from left to right (top to bottom), I had to do a main plate, balance bridge, escape bridge, another balance bridge, and four gear train bridges.
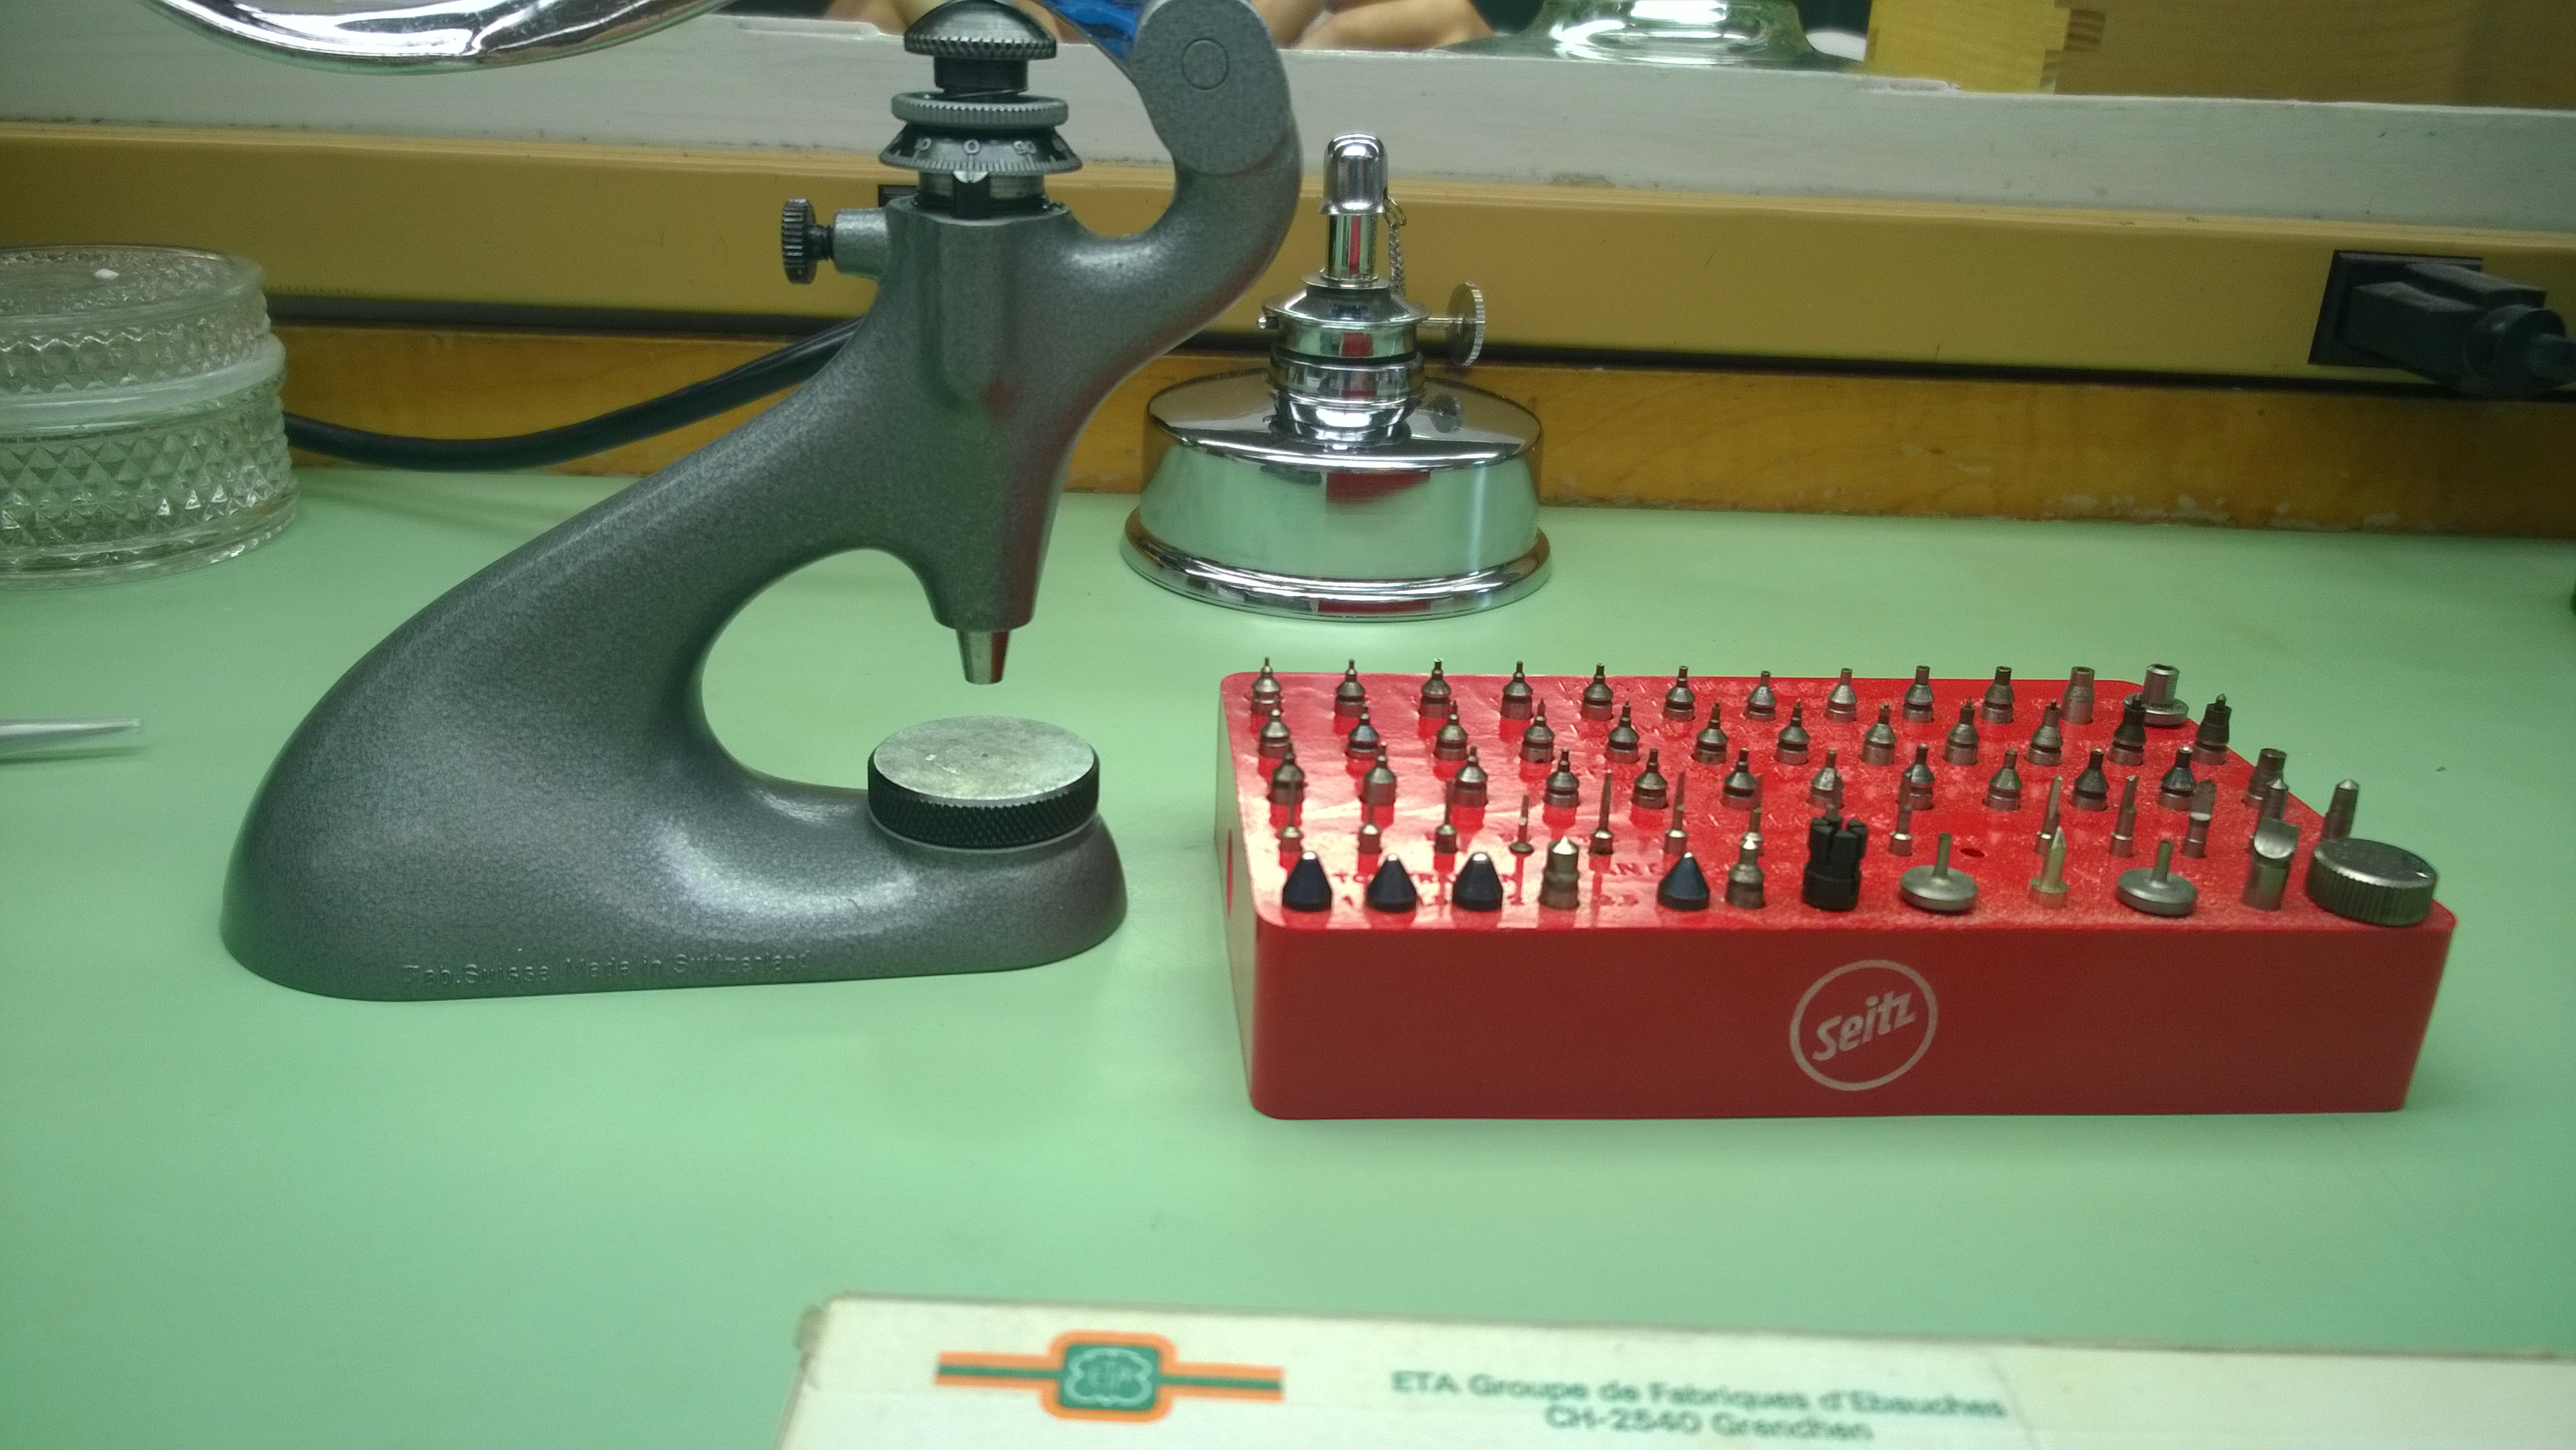 Last tie I used the jeweling tool, I had one specific stake and stump that I was able to use. This time, I had a full set to choose from. Just like with a staking set, there are different stakes that are used for different purposes:
- Flat Stakes-these are multi-purpose. They are used for pushing jewels in and out.
- Concave Stakes-these are used for pushing in cap jewels.
- Pump-these are Concave stakes that have a telescoping pump that are used to ensure the jewels are lined up before they are pushed in.
- Reamers-these are used for spreading open jewel holes
- Deburring Tools-used after reaming a hole to remove any metal shavings
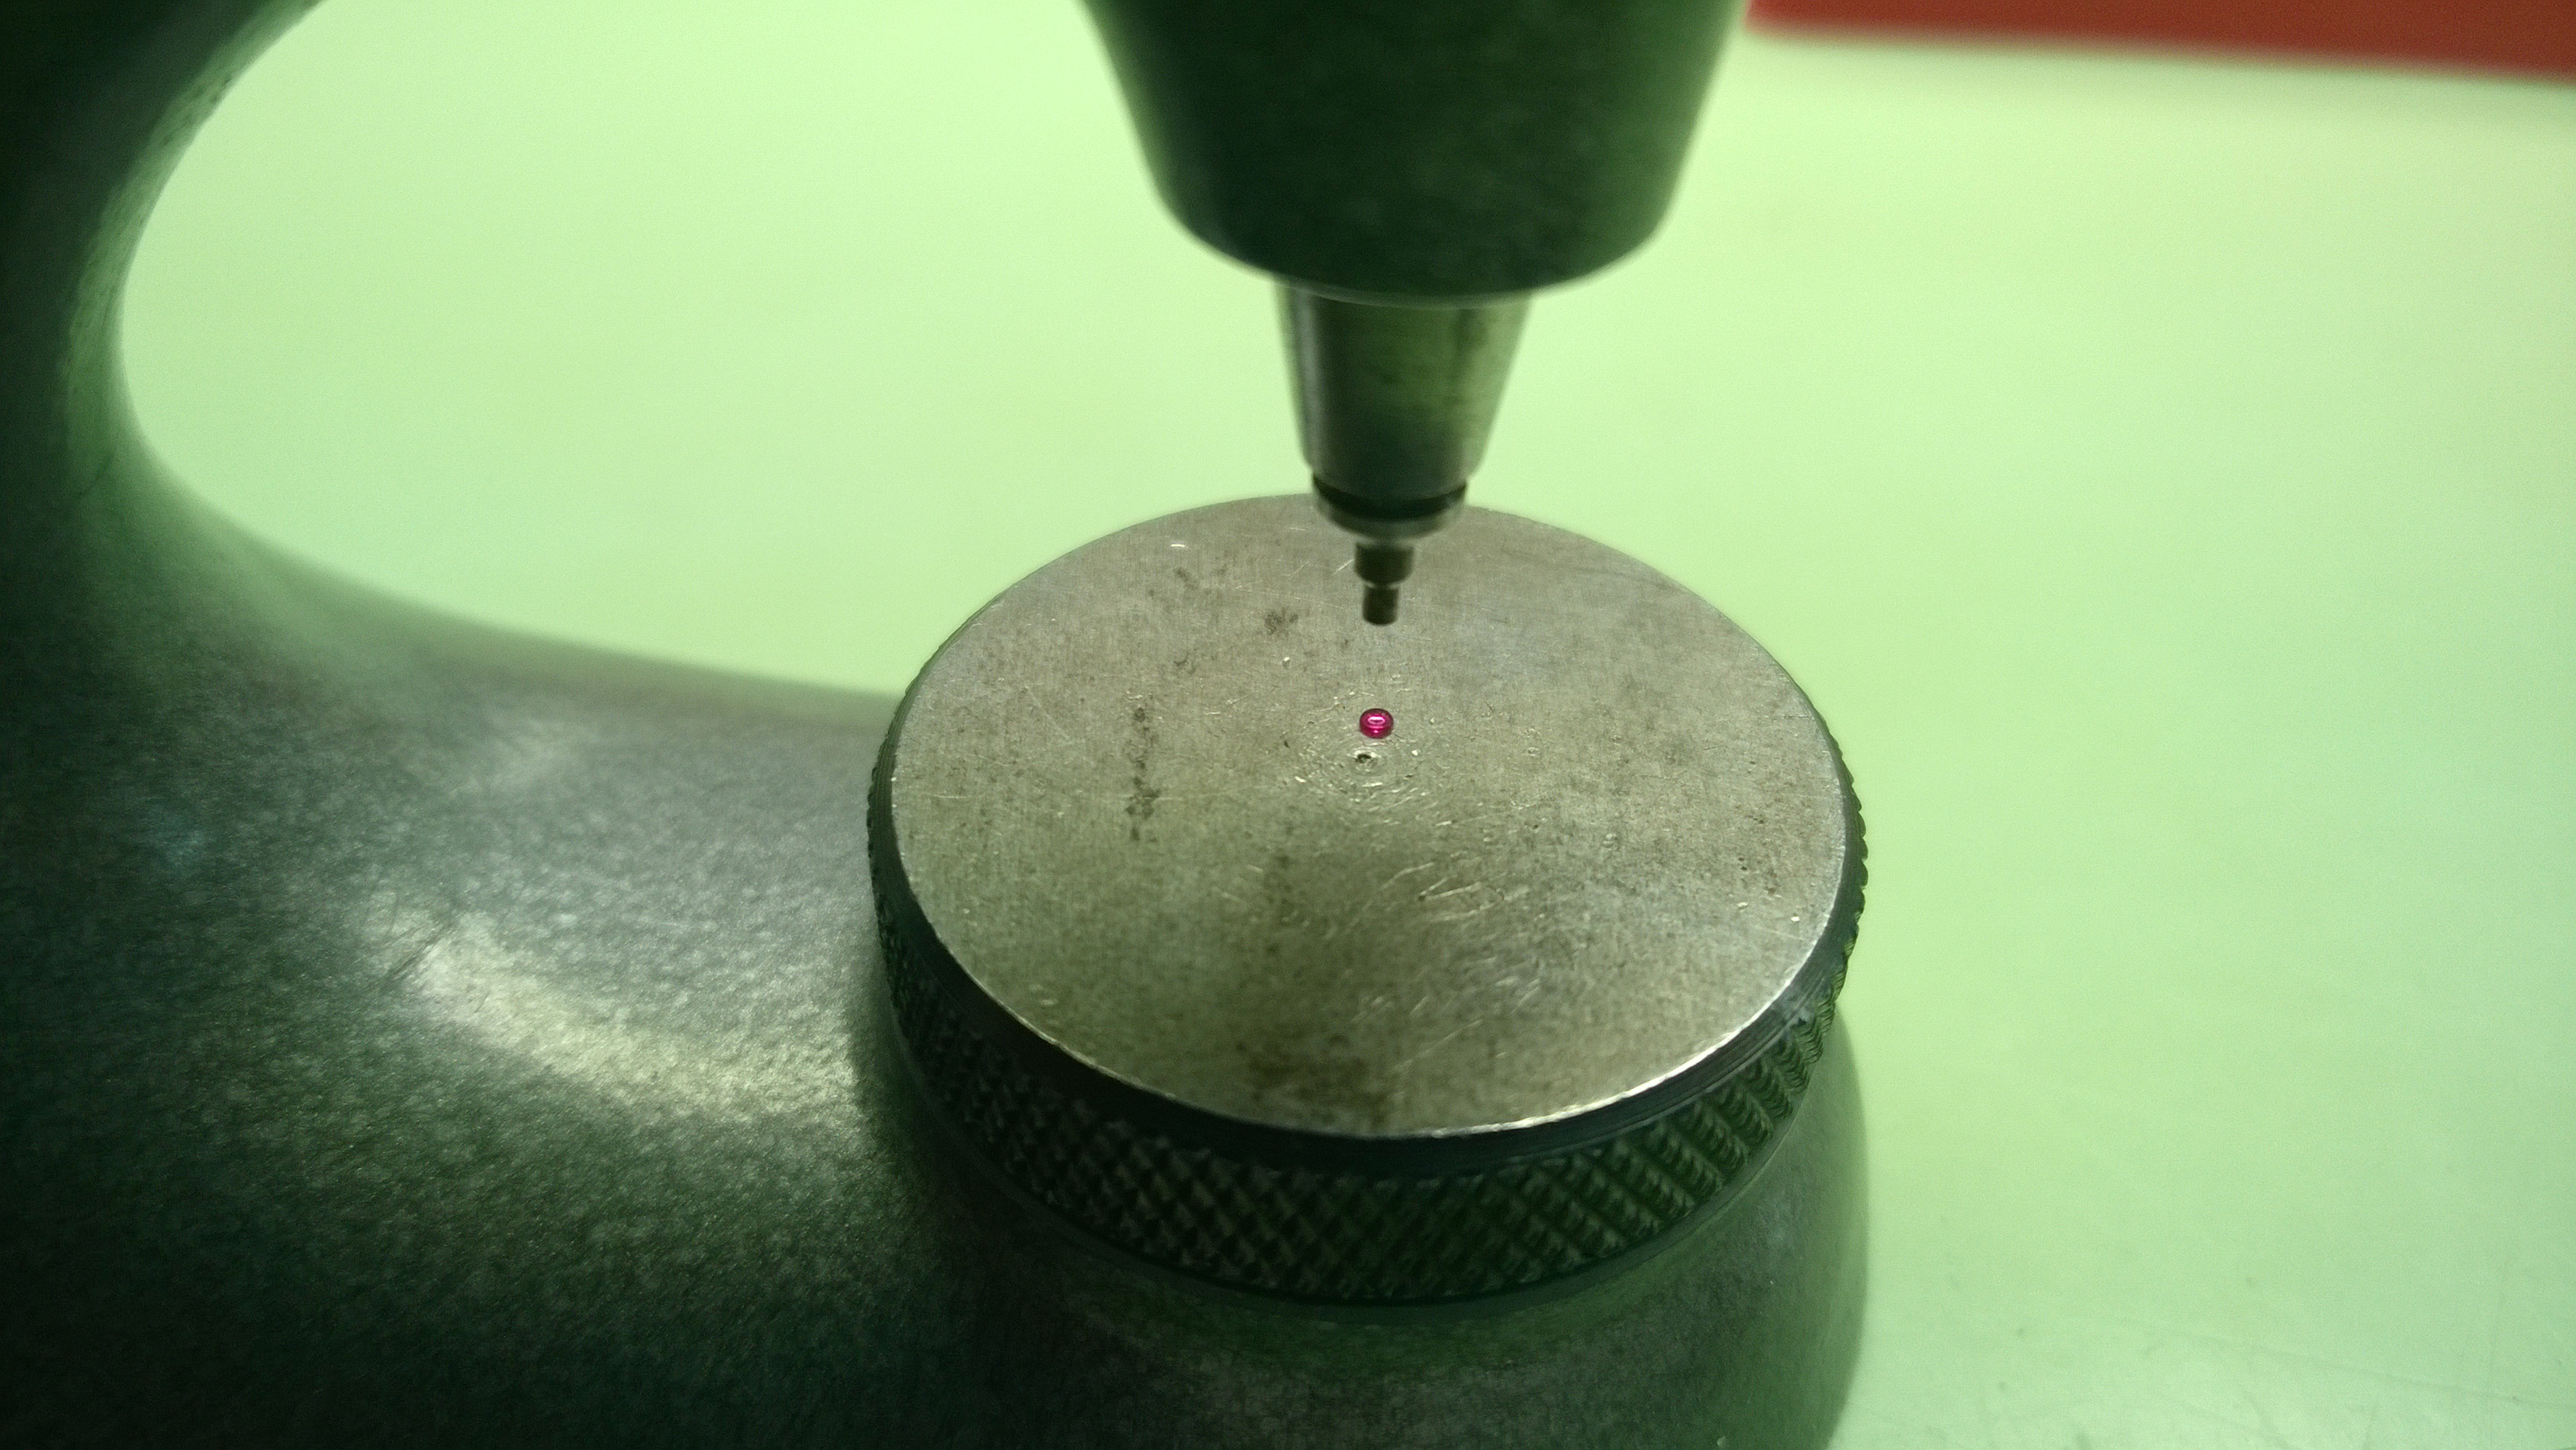
When you remove a jewel, you need to use a punch that is slightly smaller (.10mm) than the jewel and press it out from the flat side. Like when pushing out the pallet arbor, the micrometer adjust plays a big role in friction jeweling-moreso when pushing in jewels, but it helps when pushing them out as well. When pushing a jewel out, you press from the “sink” side of the jewel.
 Once I got all the jewels removed, I had to get my work checked out. Thankfully I didn’t drop the parts tray while walking to and from my desk to my teachers. That would have been bad.
Like I said earlier, when you put a jewel back in, you need to put the bezel side in first. You also need to make sure that you are pressing the in from the correct side of the bridge/plate. If it is a plate jewel, you want the oil sink side placed upwards/to the outside. If it is a cap jewel, the convex side needs to face outwards. When dealing with putting jewels in, you have to take into consideration if a jewel was proud, flush or below flush-this will determine the size of stake used as well as the micrometer adjust.
If the jewel needs to be proud, measurements should be taken before removing to make sure you get the right depth. A flat stake can be used. If the jewel is supposed to be flush you need to use a stake that is slightly larger than the jewel. If the jewel is supposed to be below flush, a slightly smaller stake is to be used. Again, like with a proud jewel, you need to take measurements before removing them. If it is a cap jewel that you are putting in (cap jewels are fit below proud), you can use a straightedge instrument placed across the jewel to see if there is .02-.03mm of space between the edge of the instrument and the highest point of the jewel.
 Once I got the jewels placed, my next project was to take a functioning watch and remove the friction jewels, replace them with proper endshake (the amount of vertical movement a a wheel or pallet fork has when it is between the plate and bridge), as well as making sure it worked.

 All in all, it was a fun project to do. I had some slight reservations about how easy/difficult the endshake would be to adjust if I screwed it up, but it wasn’t that difficult.

After replacing the jewels, the process for checking endshake is relatively easy. You place the wheels in their spot and screw down the bridge. If you have enough endshake, you should be able to grab one of the wheels and lift it up and down a few hundreths of a millimeter. If you can’t move it, or if there is too much movement, you need to adjust the depth of the jewels. The same thing goes for endshake with a pallet fork.
I’m starting a new project tomorrow, so I’ll have a good update on Saturday. Until then, here are some extra pictures I took.