This week has been a nice change of pace. Monday, I was expecting to do more hairspring work, but instead got a double lecture on Mainsprings and Polishing. That, combined with the cleaning lecture from last week made late Monday afternoon and all day Tuesday to be a nice step towards overhauling.
As I have stated before, in a mechanical watch, the mainspring is the power source of the watch. The mainspring is housed in a part called the mainspring barrel. If you remember how the spring gets wound, skip the rest of this paragraph, otherwise here is a quick refresher: The crown is attached to the winding stem. The stem slides through the winding pinion. The winding pinion engages the crown wheel. In turn, the crown wheel engages the ratchet wheel which sits on top of the barrel arbor. When the ratchet wheel turns, it turns the arbor which in turn tightens the mainspring.
Like everything else regarding watches, mainsprings have gone through many evolutions. They originally started off as a plain coiled spring, but now they are in a shape known as a reverse curve.

photo courtesy of wikipedia
Mainsprings today employ many of the same alloys as hairsprings. They come in a variety of lengths, widths, and strengths. Most mainsprings are housed in a Going Barrel. Very rarely (for modern watches, most common in early American watches) you will find them housed in a Motor Barrel
There are two anchor points for a mainspring inside the barrel. The center anchoring point is a hook on the arbor that the mainspring attaches to. The second point is a hook/ridge that is on the inside of the barrel itself. The expanding pressure from the spring pushes the end of the spring (also called the tongue) until it catches the hook on the barrel wall.
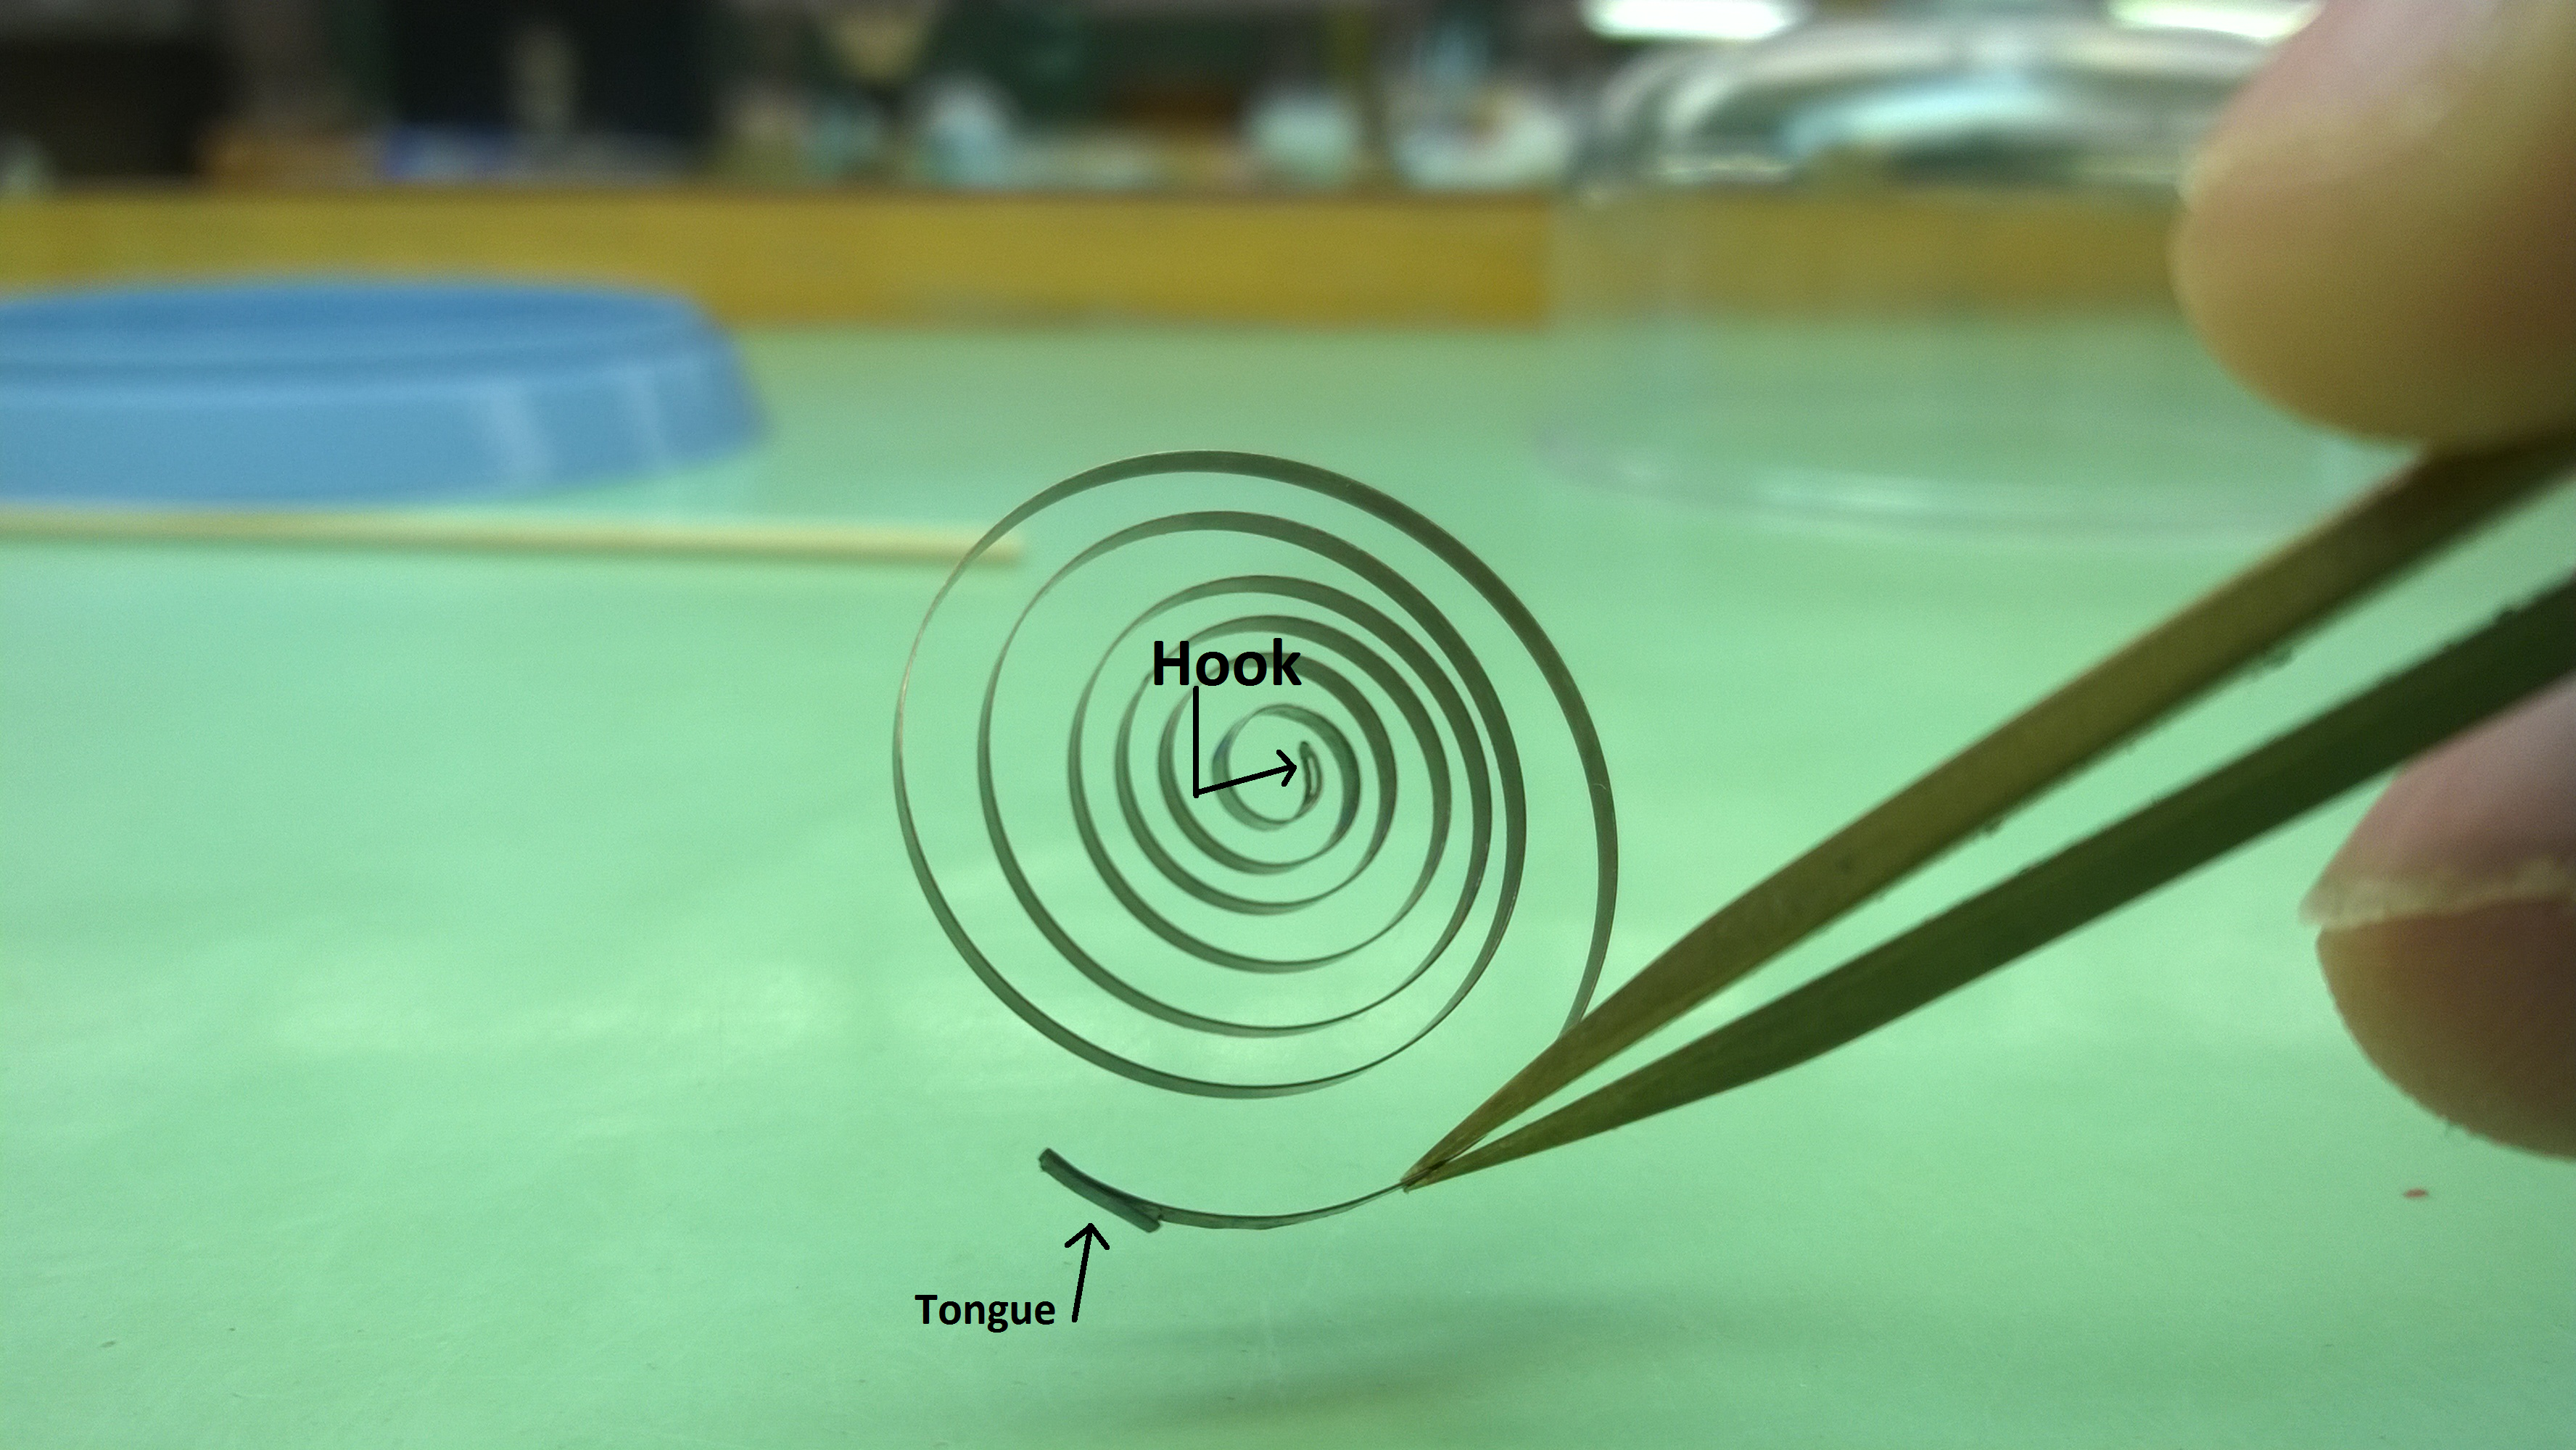
Note-this spring is an older spring and is considered “set” which is why it doesn’t have the reverse curve.
Servicing the mainspring is important to do for a variety of reasons. First and foremost, if the mainspring isn’t functioning properly, the watch will not function properly. In order to service (or replace) the mainspring, one must know how to remove and install a mainspring.
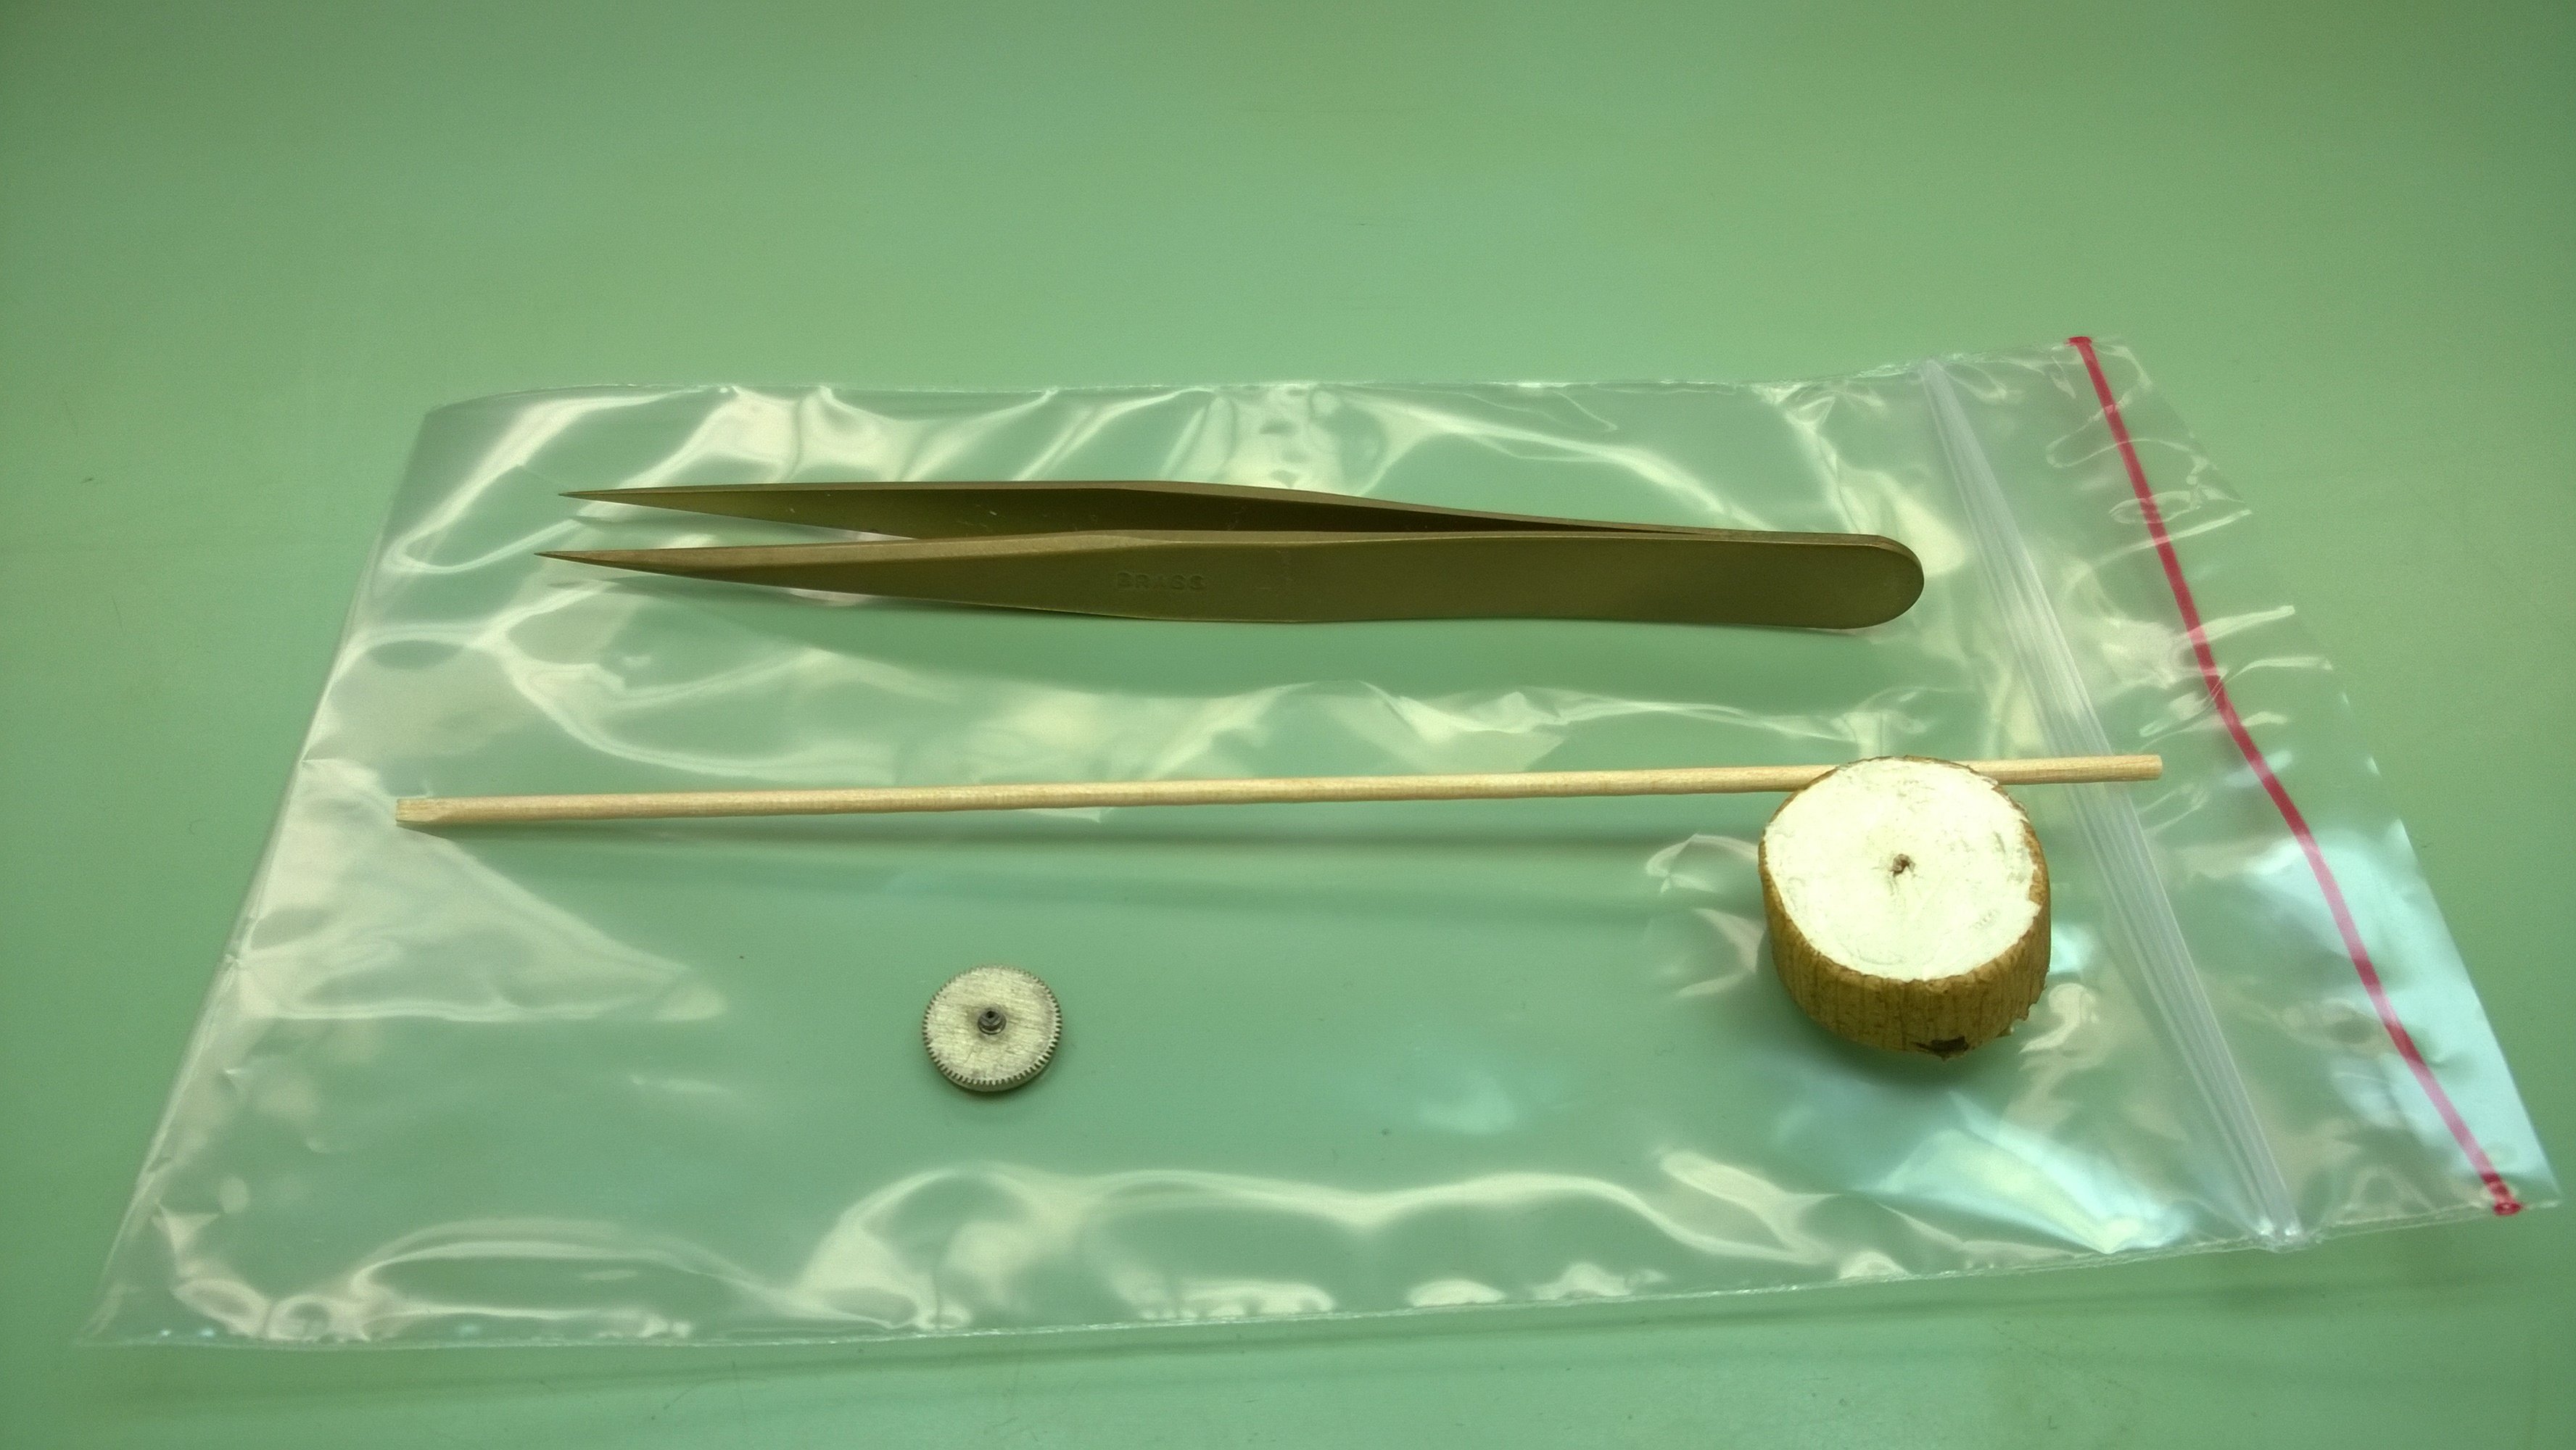 To take apart a mainspring (bottom left) is pretty easy and doesn’t require much fancy stuff (not pictured here is the mainspring winding tool). The bag is used for making sure nothing goes flying when separating the barrel cap from the barrel. The peg-wood is used for cleaning the barrel, the pith-wood button is used for putting the arbor back in, and the tweezers are used to get the arbor and spring out.
 The first step is to put the barrel in the bag. Using your nails, you gently press down on the teeth of the barrel (one finger on each side, left and right). There will be a light popping sound and the barrel cap will be off. This is due to the downward pressure on the barrel and the upward pressure on the arbor.
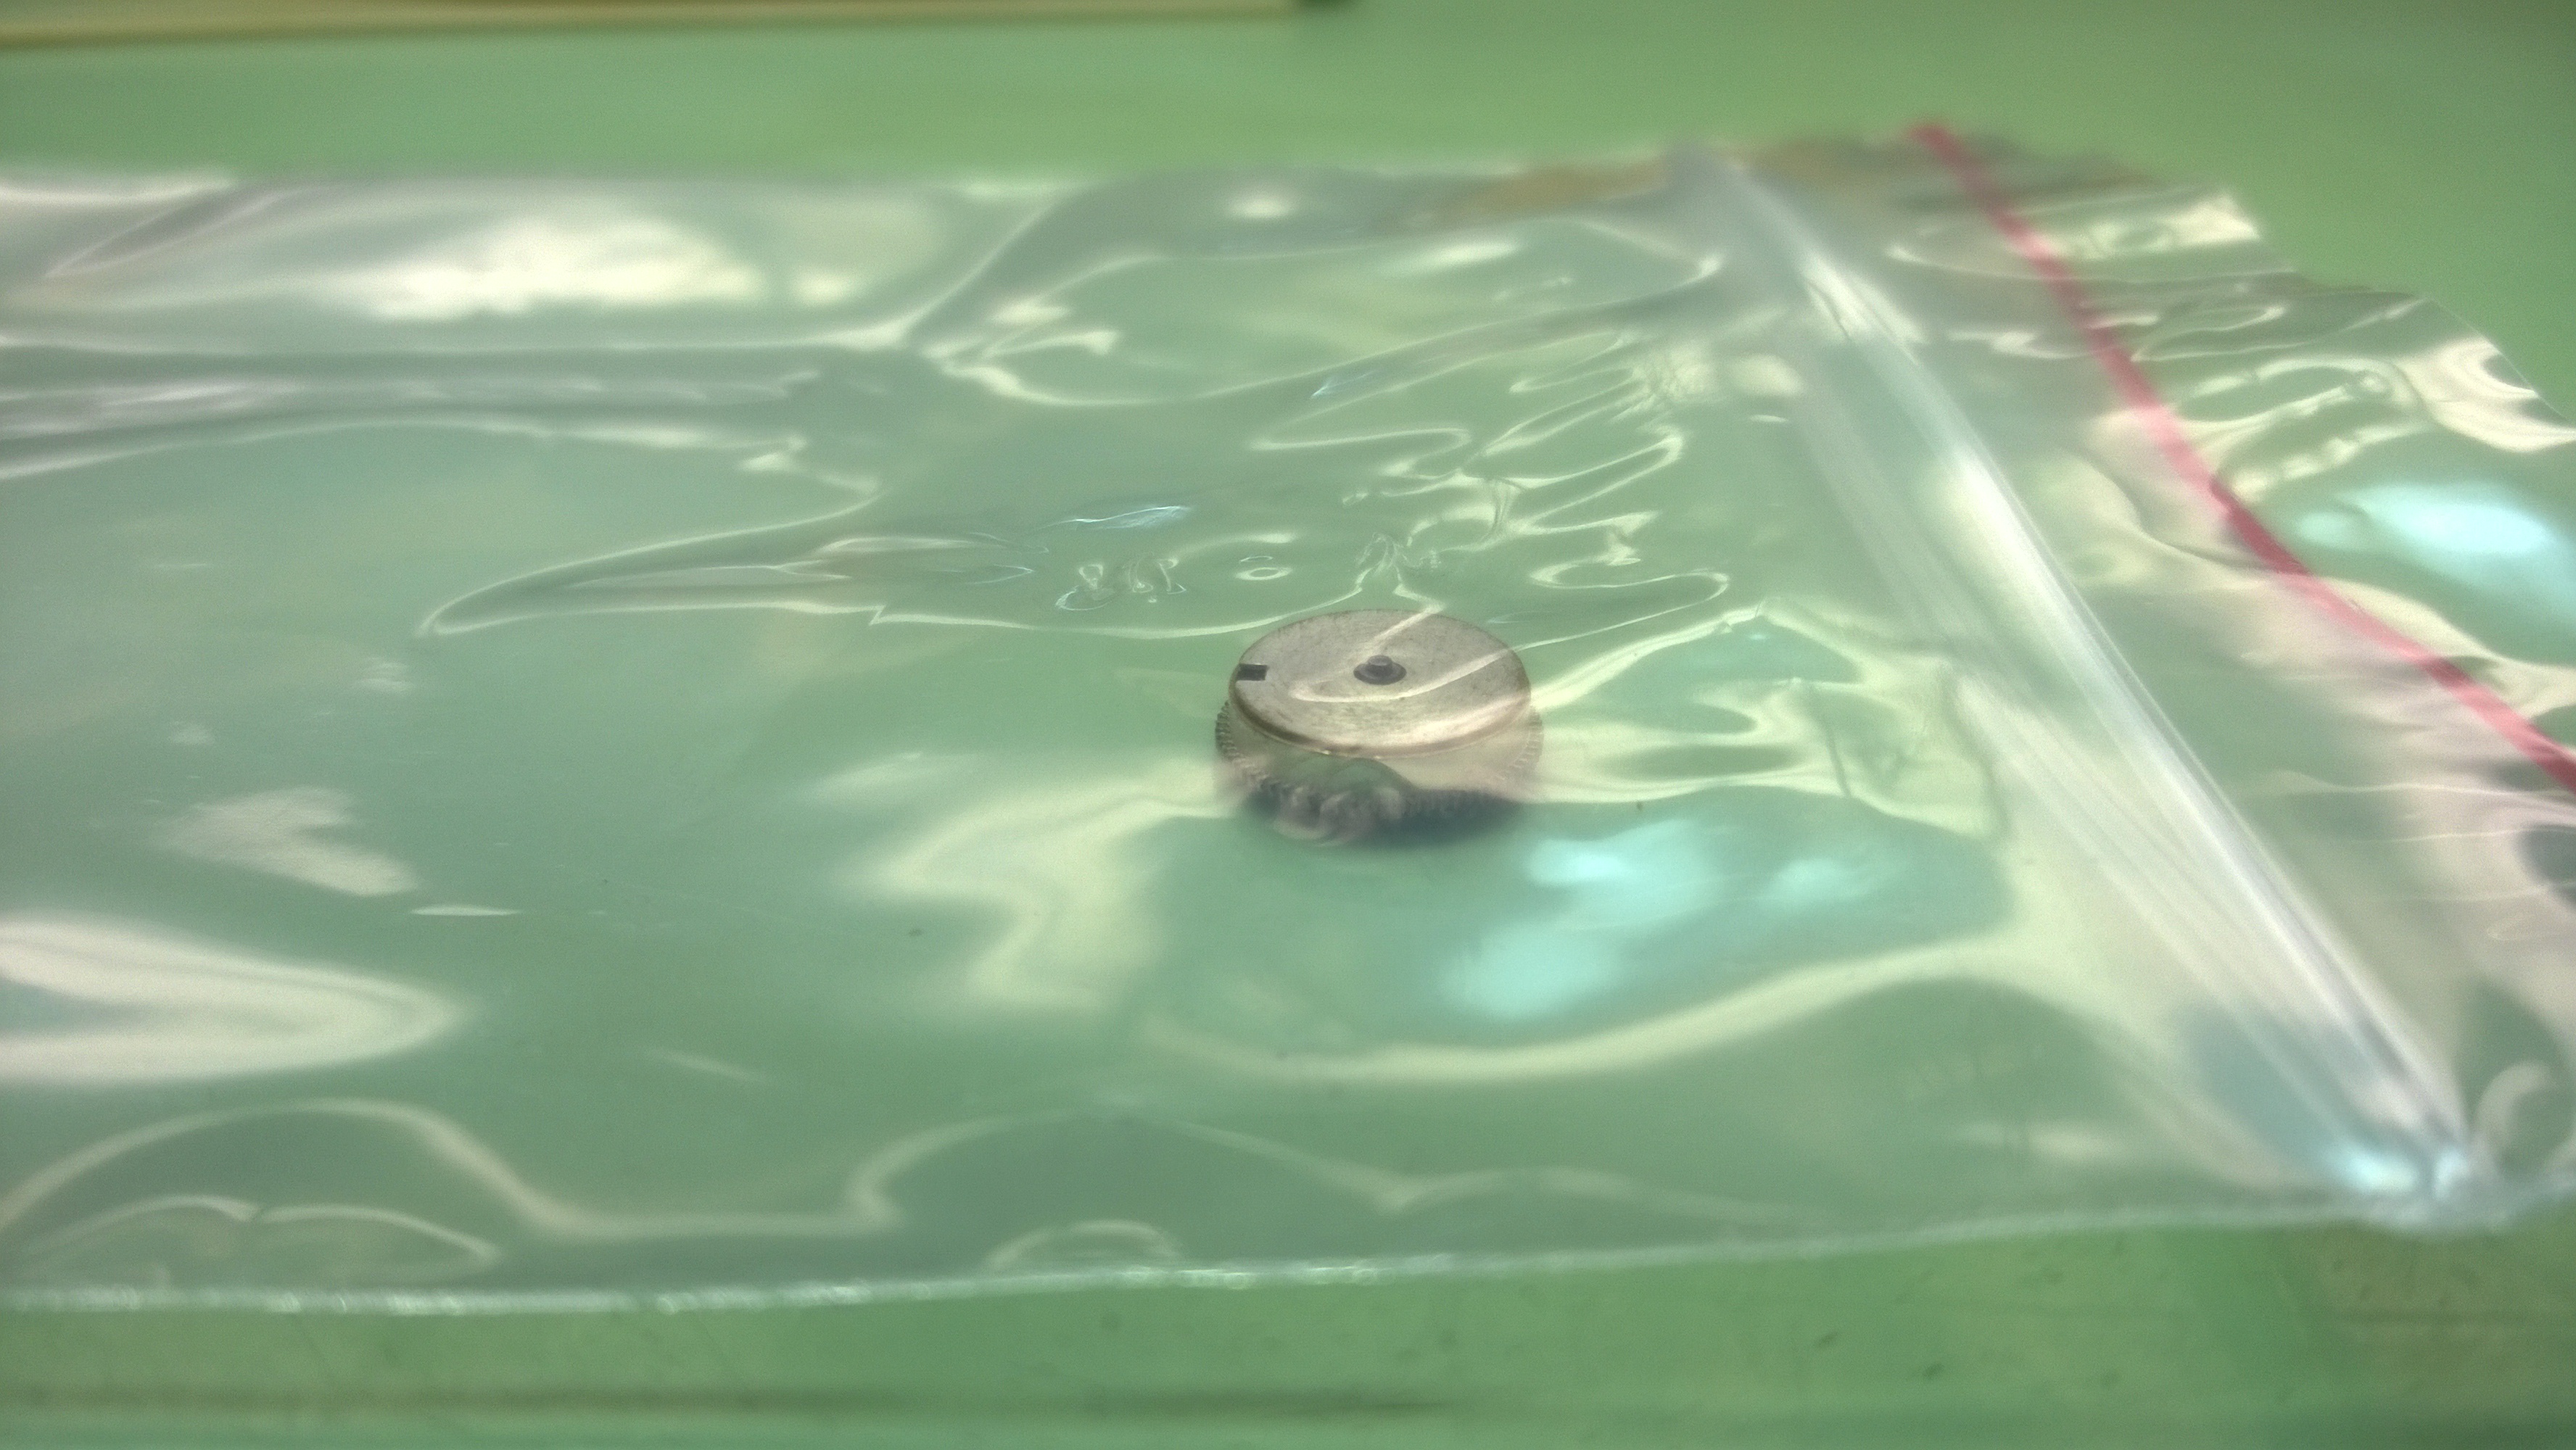
 Here is what the mainspring looks like when it is in the barrel. The center point is the arbor. To get this out, you place it back in the bag and use a pair of tweezers to push on the arbor in a few different places with a lateral pressure, and it will essentially spin out from the spring.
 In the above picture, the arrows are pointing to the areas that you can push on to move the arbor around and out of the barrel.
 Here is what the arbor looks like. Unfortunately, I didn’t have it turned to where you could see the hook. The right side (in this picture) of the arbor is what sits in the bottom of the barrel. The left side is where the screw that goes with the ratchet wheel screws into (it would be the top of the barrel).
Once you have removed the cap and the arbor, it is time to carefully remove the spring.
 Using a pair of tweezers, you gently slide one side under the center of the spring and have the other side of the tweezers grasping the barrel. With your other hand, you gently slide the barrel around continuing to slide the tweezers underneath the coils of the spring.
 After doing this a few times, there will be enough coils freed that you can hold the barrel in both hands and use your fingers to slide under the spring and release it coil by coil (you continue rotating the barrel around).
 After a short while (assuming you didn’t have the spring fling out at you), you will have the spring completely removed from the barrel. Once the spring is removed, you can clean it and inspect it. If it is good, you can oil it up and put it back. If not, you would replace it with a new one. Re-inserting the spring (at least with the old springs we are using for now) took the longest out of the whole process.
 This is the mainspring winding tool that we are using for now. Like any other tool for watchmaking, there are endless varieties that can be used. The cap on the right has a hook on it to catch the center opening/hook of the mainspring. You place it along with the spring in the cup part of the handle (the spring hangs out through a hole that you can’t see yet) and twist it tight. Once you have it fully wound, you invert the tool into the barrel and press the button on the left-side and the spring comes out into the barrel.
 Here you can see the excess spring coming out of the hole in the winder. I am pulling it tight in this picture because the spring is ridiculously old and loose. If you don’t want to replace the spring if it is old, you can use a pair of pliers to tighten the very inner coil to get it to catch on the winder. This way works as well.
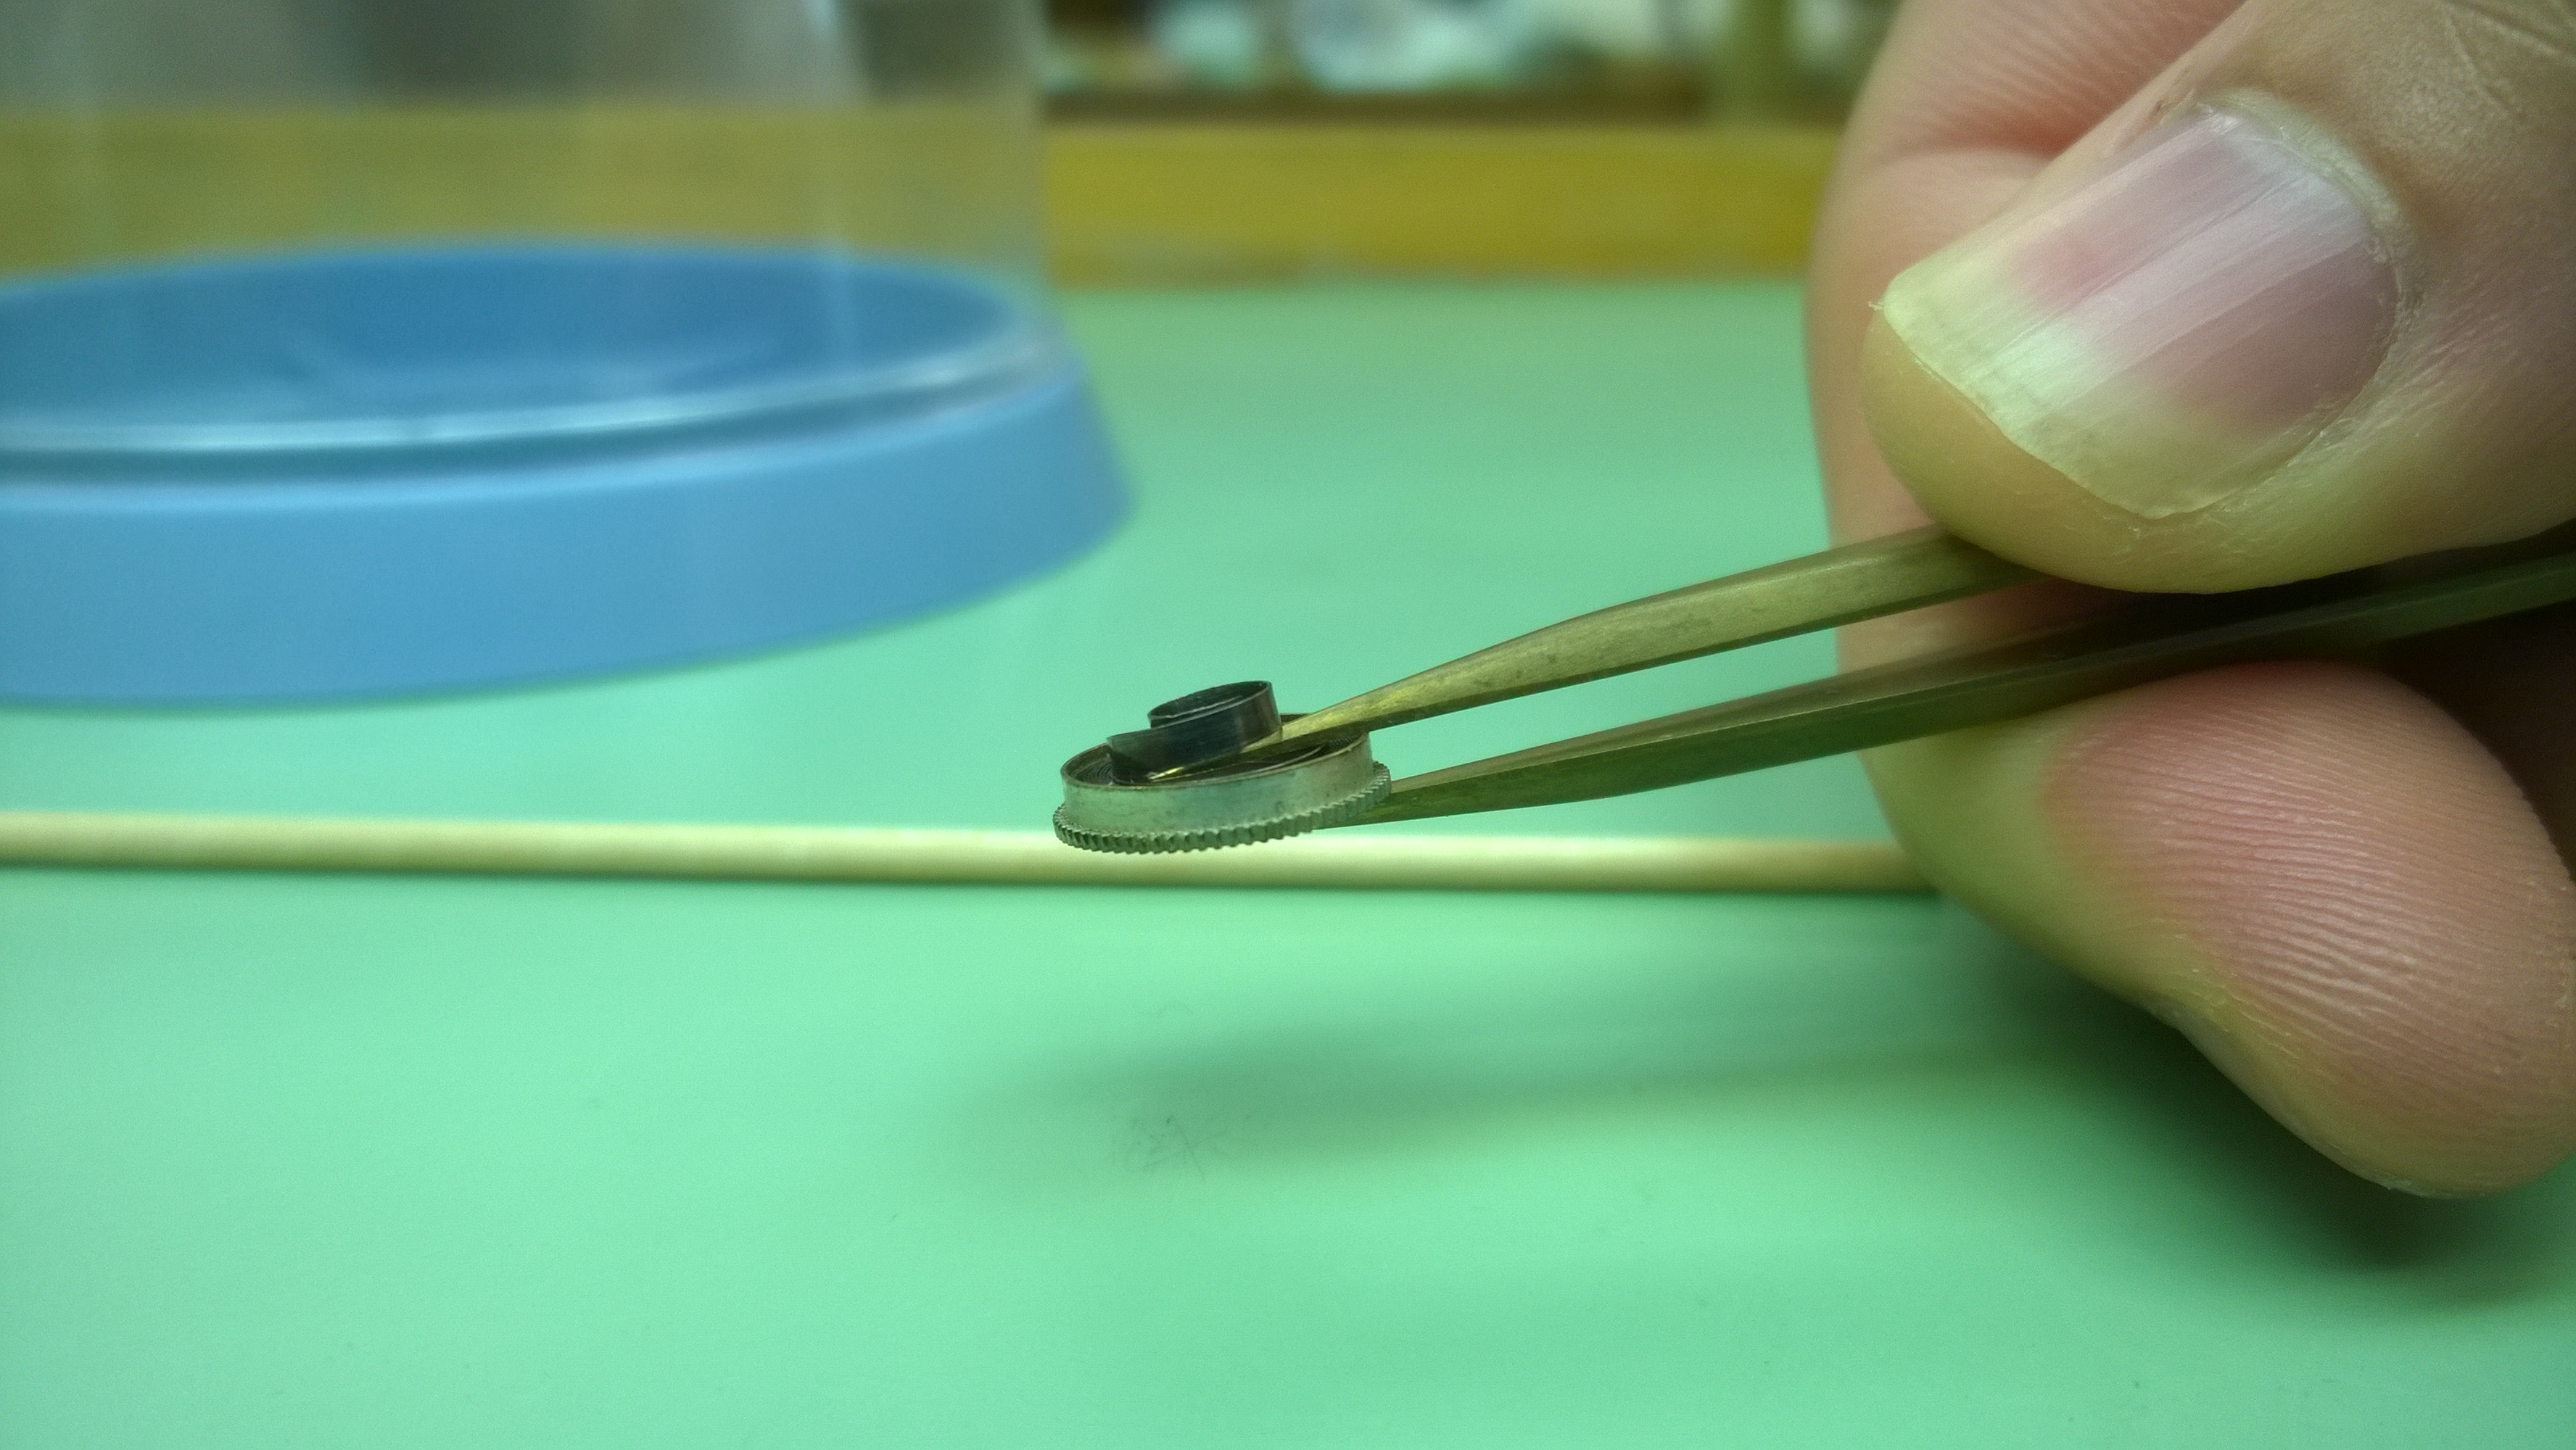
 Eventually, after a lot of winding, the spring will get to this point. The tongue of the spring is sticking out just a little bit. Using the tip of the tweezers, you gently depress the tongue until it slides into the winder.
 Here is what the wound spring looks like in the winder. Pretty much the same as the barrel, just a little smaller space. As I said earlier, now you invert the tool, place it into the empty barrel and pop the spring in.
 After getting the spring in, the barrel is ready for the arbor. You use the pith-wood because you can make a hole in it so the arbor doesn’t encounter any resistance from a hard surface. You want to turn the arbor so the hook is just a little behind the opening. Since the inner coil is pretty tight, you need to work it in by rotating it around and down in. If you have the hook behind the opening in the spring, you won’t have to do a full rotation to “catch” the hook.
 All that is left is to put the cap back on (it is as easy as it sounds, you just press it down).
So, all day Monday was mainspring work. The last one that I had for the day had a cracked inner hook, so it wouldn’t catch with the winder. I got to learn how to put it in by hand, which is essentially reversing the step where you are removing the spring with your fingers). You start by putting the tongue end in first and working backwards.
Polishing
Tuesday started with our introduction to polishing lecture after we finished up the barrels we were working on. The polishing that we were going over was cases, bracelets and acrylic crystals. The basic idea behind polishing is to restore the look of a material to as close to its original state as possible. You do this by removing small parts of the material until you have an even surface all over-or have at least reduced the depth of the scratches that are in the surface.
For now, there are two compounds that we are going to use for polishing-one is a plastic polishing compound for crystals, and the other is Yellow Rouge. Rouge is a compound that is designed to smooth and shine metals. When used in conjunction with cloth buffing wheels, you can get rid of most surface level scratches and leave a nice mirror polish.
There are tons of different polishes that can be applied to watches-mirror, matte, satin, bead-blasted. Some bracelets have two kinds of polishes in them. For now, we are going to focus on mirror polishing. When I have some pictures of what my polishing set-up is, and some examples, I’ll put them up on Friday.
Intro to Overhauling
After we finished with our polishing lecture, Mr. Poye picked out a watch that we had previously worked on and he asked us to strip it down (including the mainspring), clean the movement and the case, and polish the case if applicable. I was able to strip my movement, clean it (as well as the case), and get the assembled before we ran out of time. Even though I wasn’t able to polish the case, I was pretty excited because when I was putting everything back together, all the movements I was going through felt very smooth and some of the things that I had trouble with weren’t much trouble (re-assembling the balance, getting the pivots to seat and stay seated while putting the bridge on, etc). I’m trying to not get cocky, but I think working with the hairsprings for so long helped me get comfortable with some of the smaller movements.
All in all, Monday and Tuesday were pretty fun days. I’m looking forward to getting my hands dirty with polishing. Literally.

Pingback: Week 8, Days 1 & 2 (Wheel Truing and Staking Set) | watchmaking journey·