At the end of last week, we had our introduction to Poising lecture. Poising, in essence is manipulating the weight of the balance wheel in order to ensure that the weight is evenly distributed across the wheel. This can be done in a variety of ways, and is dependent on the style of the balance wheel. You can:
- Remove weight from the screws (if applicable)
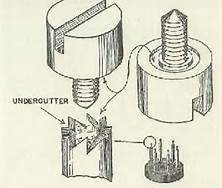
- Undercut the screwhead
- Increase the depth of the screw slot
- File away part of the screw
- If no slot is available, drill into the head of the screw
- Remove weight from the wheel
- Add timing washers (if applicable)
- Any combination of the three
Whatever you decide to do, you obviously want to go for the route that will be least noticeable
 Starting with the simplest balance wheel, the only way to poise this style (screwless balance) is to remove weight from the wheel itself. In order to do that, you need a very small drill. Using the drill, you would find the heavy spot and drill away part of the balance wheel. I have yet to do this, so I don’t have any pictures of the process.
 In a screwed balance, you have more options for getting it poised. The way that we are doing it for now is by removing weight from the screws by filing them down. While it isn’t the prettiest method, it is the simplest. Other ways to poise it would be undercutting the screws.
Copyright H. Fried
An undercutter is just as it sounds-you place the screw on the undercutter and screw it down. You need to be very gentle and go slowly. This would be the most ideal way since it is not visible without removing the screw.
Another way to do it would be using a screw slot file and increasing the depth of the screw slot. This would be a good way to do it because most people won’t be able to tell the difference in depths of screw slots. The downside is you will need to polish the slot and remove the burrs that you caused from filing. It’s not a big deal, but imagine if the screw slots have been black polished or blued (well, you aren’t going to find blued screws on a balance, but you will see a high polish on them)?
You can drill into the screw head or create a slot if the screw doesn’t have one, but again, the aesthetics will be off if two or three screws have holes or slots in them and the rest don’t. You can also drill into the wheel itself if you need to.
If you don’t want to physically remove material from the screws or wheel, you can add timing washers. 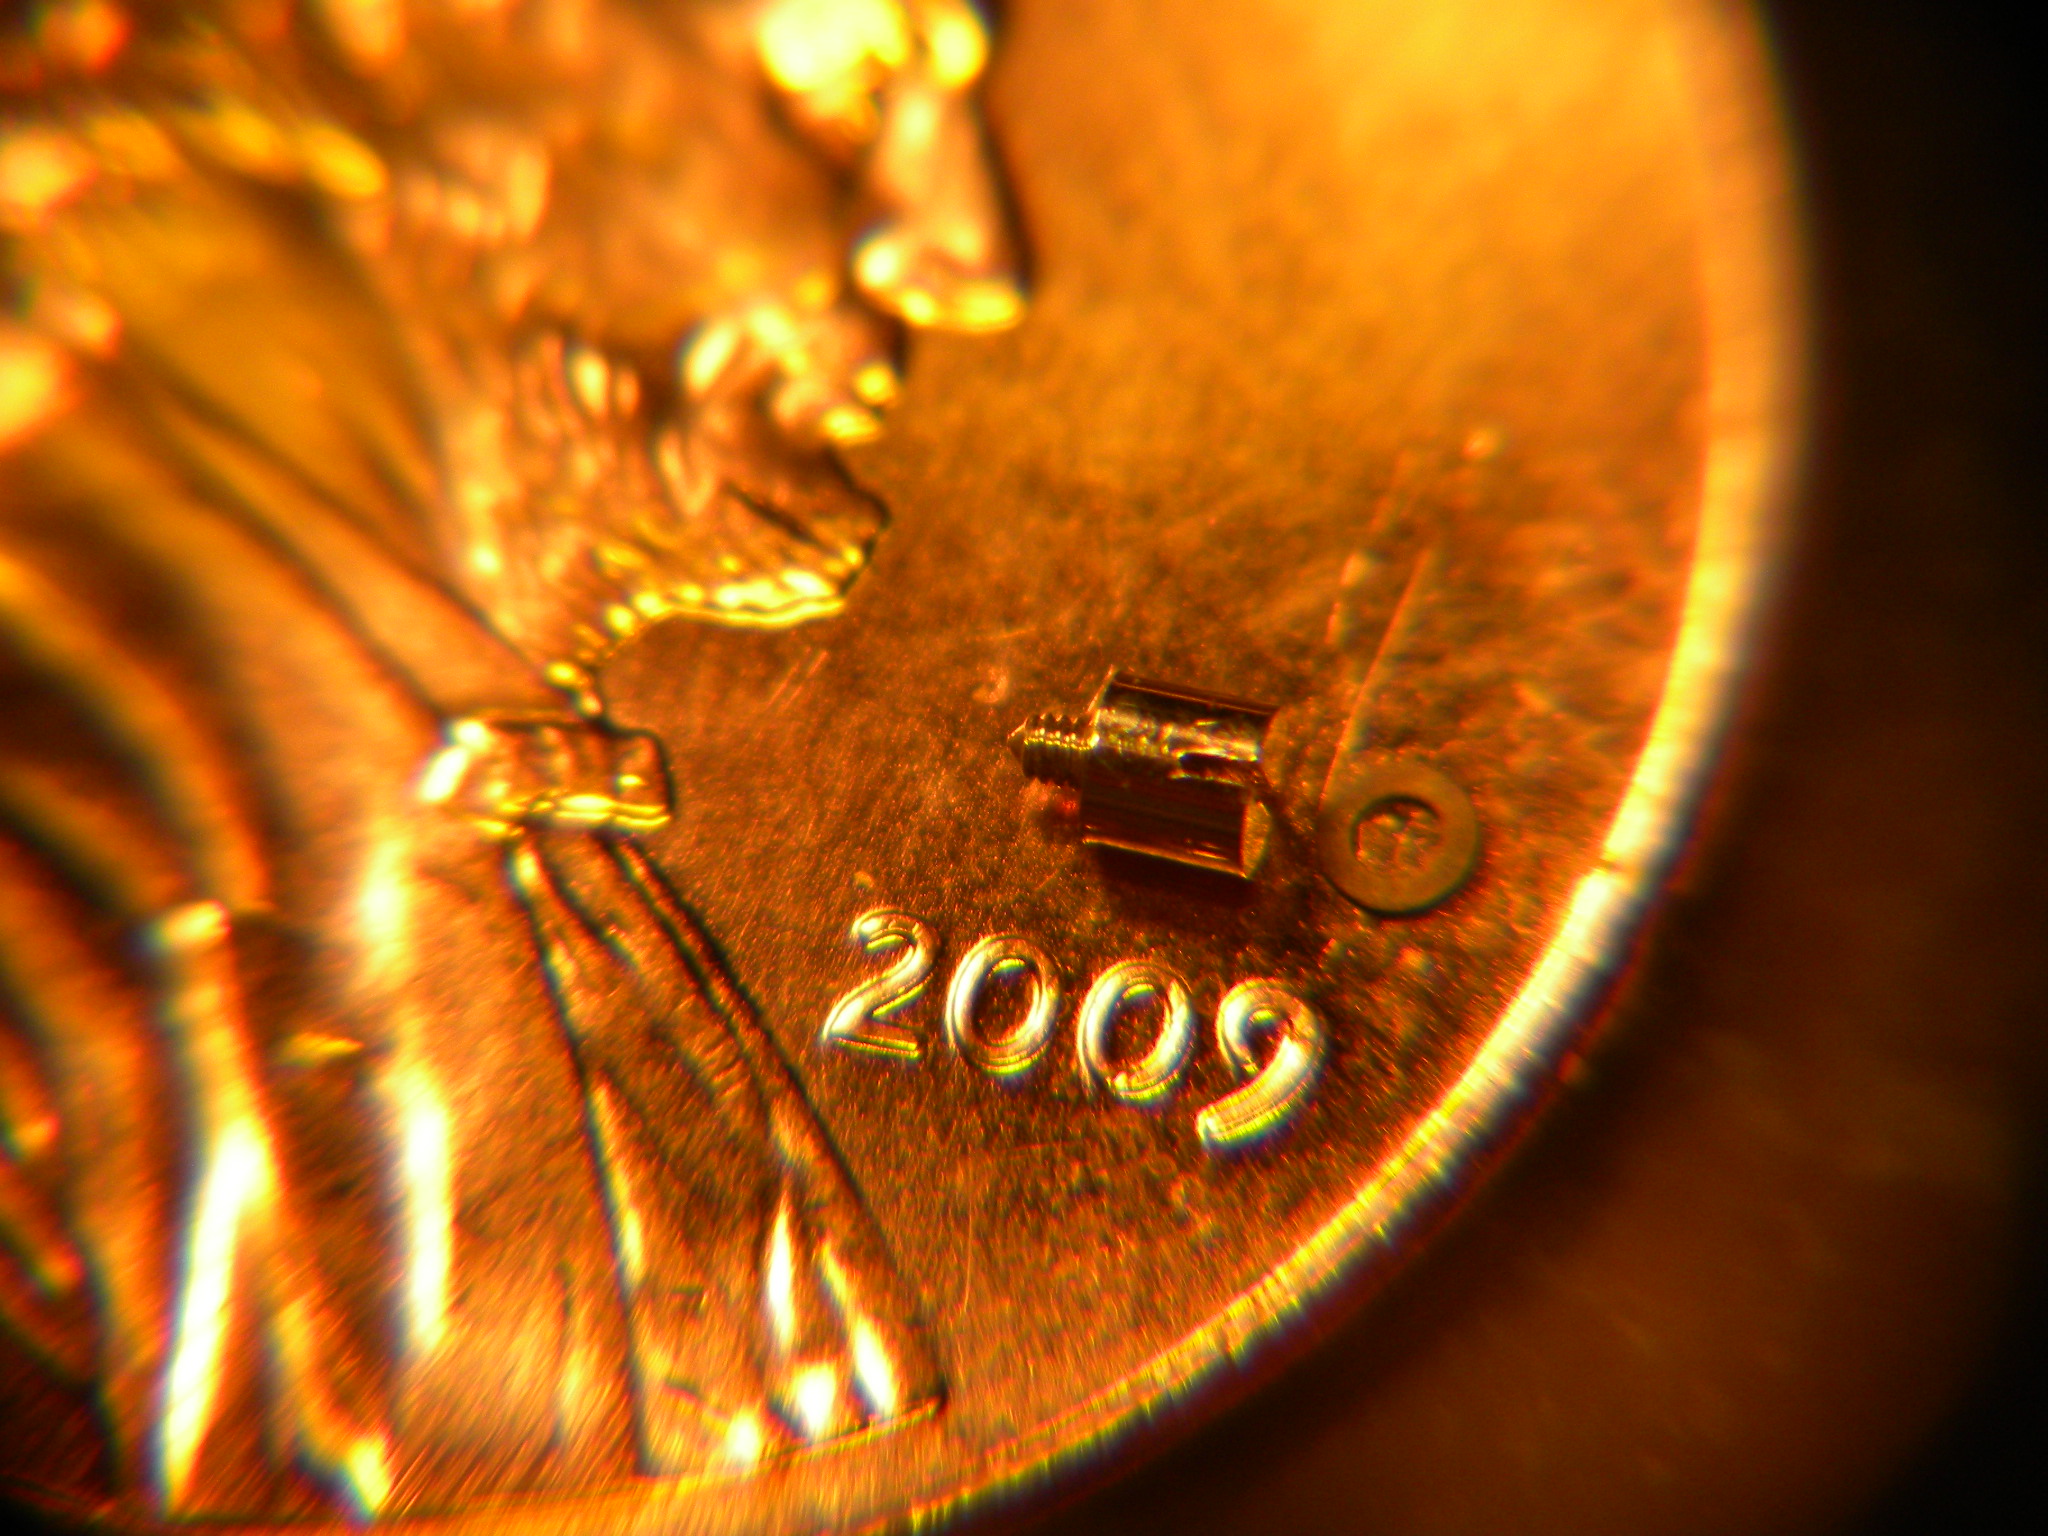
When adding timing washers, you have to add them in pairs. With a balance wheel, all the screws are paired up (across the arms).
 A quick explanation-the reason some screws are labeled “BR” is because they are on the side that the “R”oller jewel (if this wheel had one) would be pointing at. BR1 and B1 are a pair. BR2 and B2 are a pair, and so on. If you add a washer to BR1, you have to add one to BR2.
All of this is well and good, but the first thing you need to do is find the heavy spot. In order to do that, you need to use a poising tool.
 This is a poising tool. It is a base that has at least two adjustable legs (this one has three) that has a set of jewel tipped jaws on it. One jaw is stationary and another is moveable with the knurled screw on the side. The indentation on the left is a spot for a spirit level so you can make sure that you have the base level.
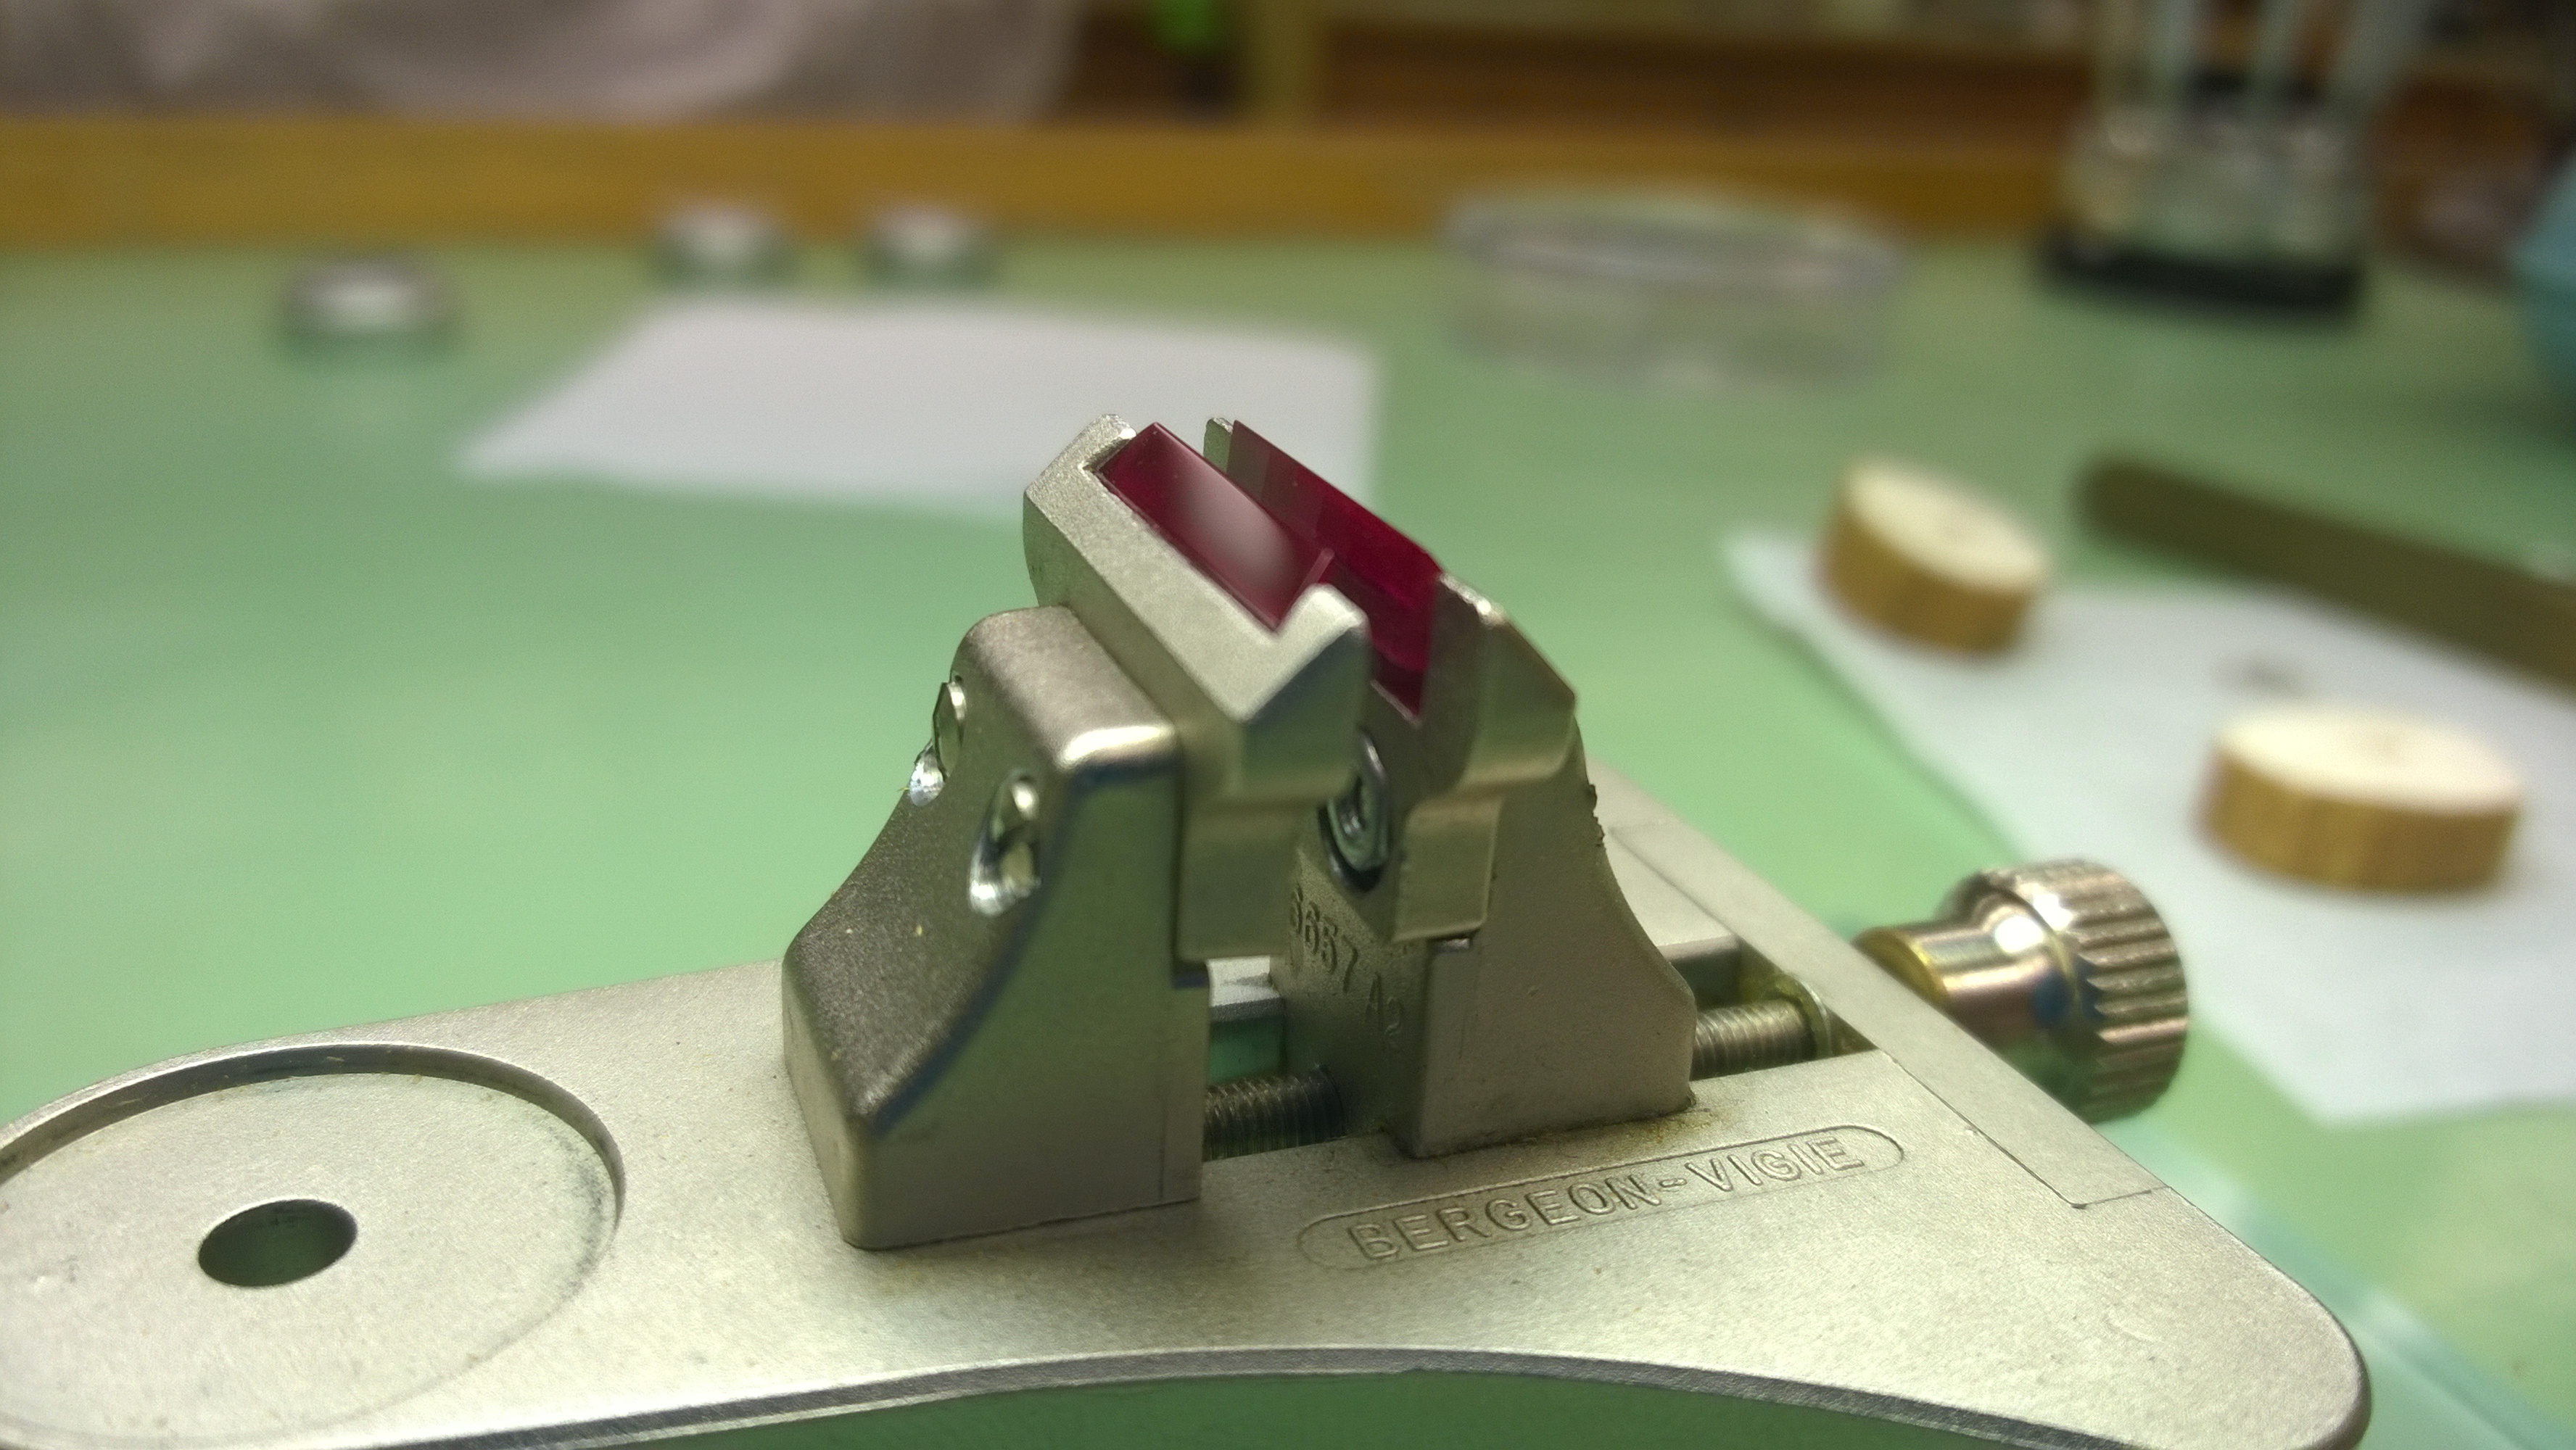 So pretty. The jewels in this one are made of synthetic ruby. The jewels need to be clean (no dust or fingerprints), and they also need to be impeccable in their condition. If there is a chip along the edge, the balance wheel will catch on it and you will get false results, or the wheel will catch and not move properly.
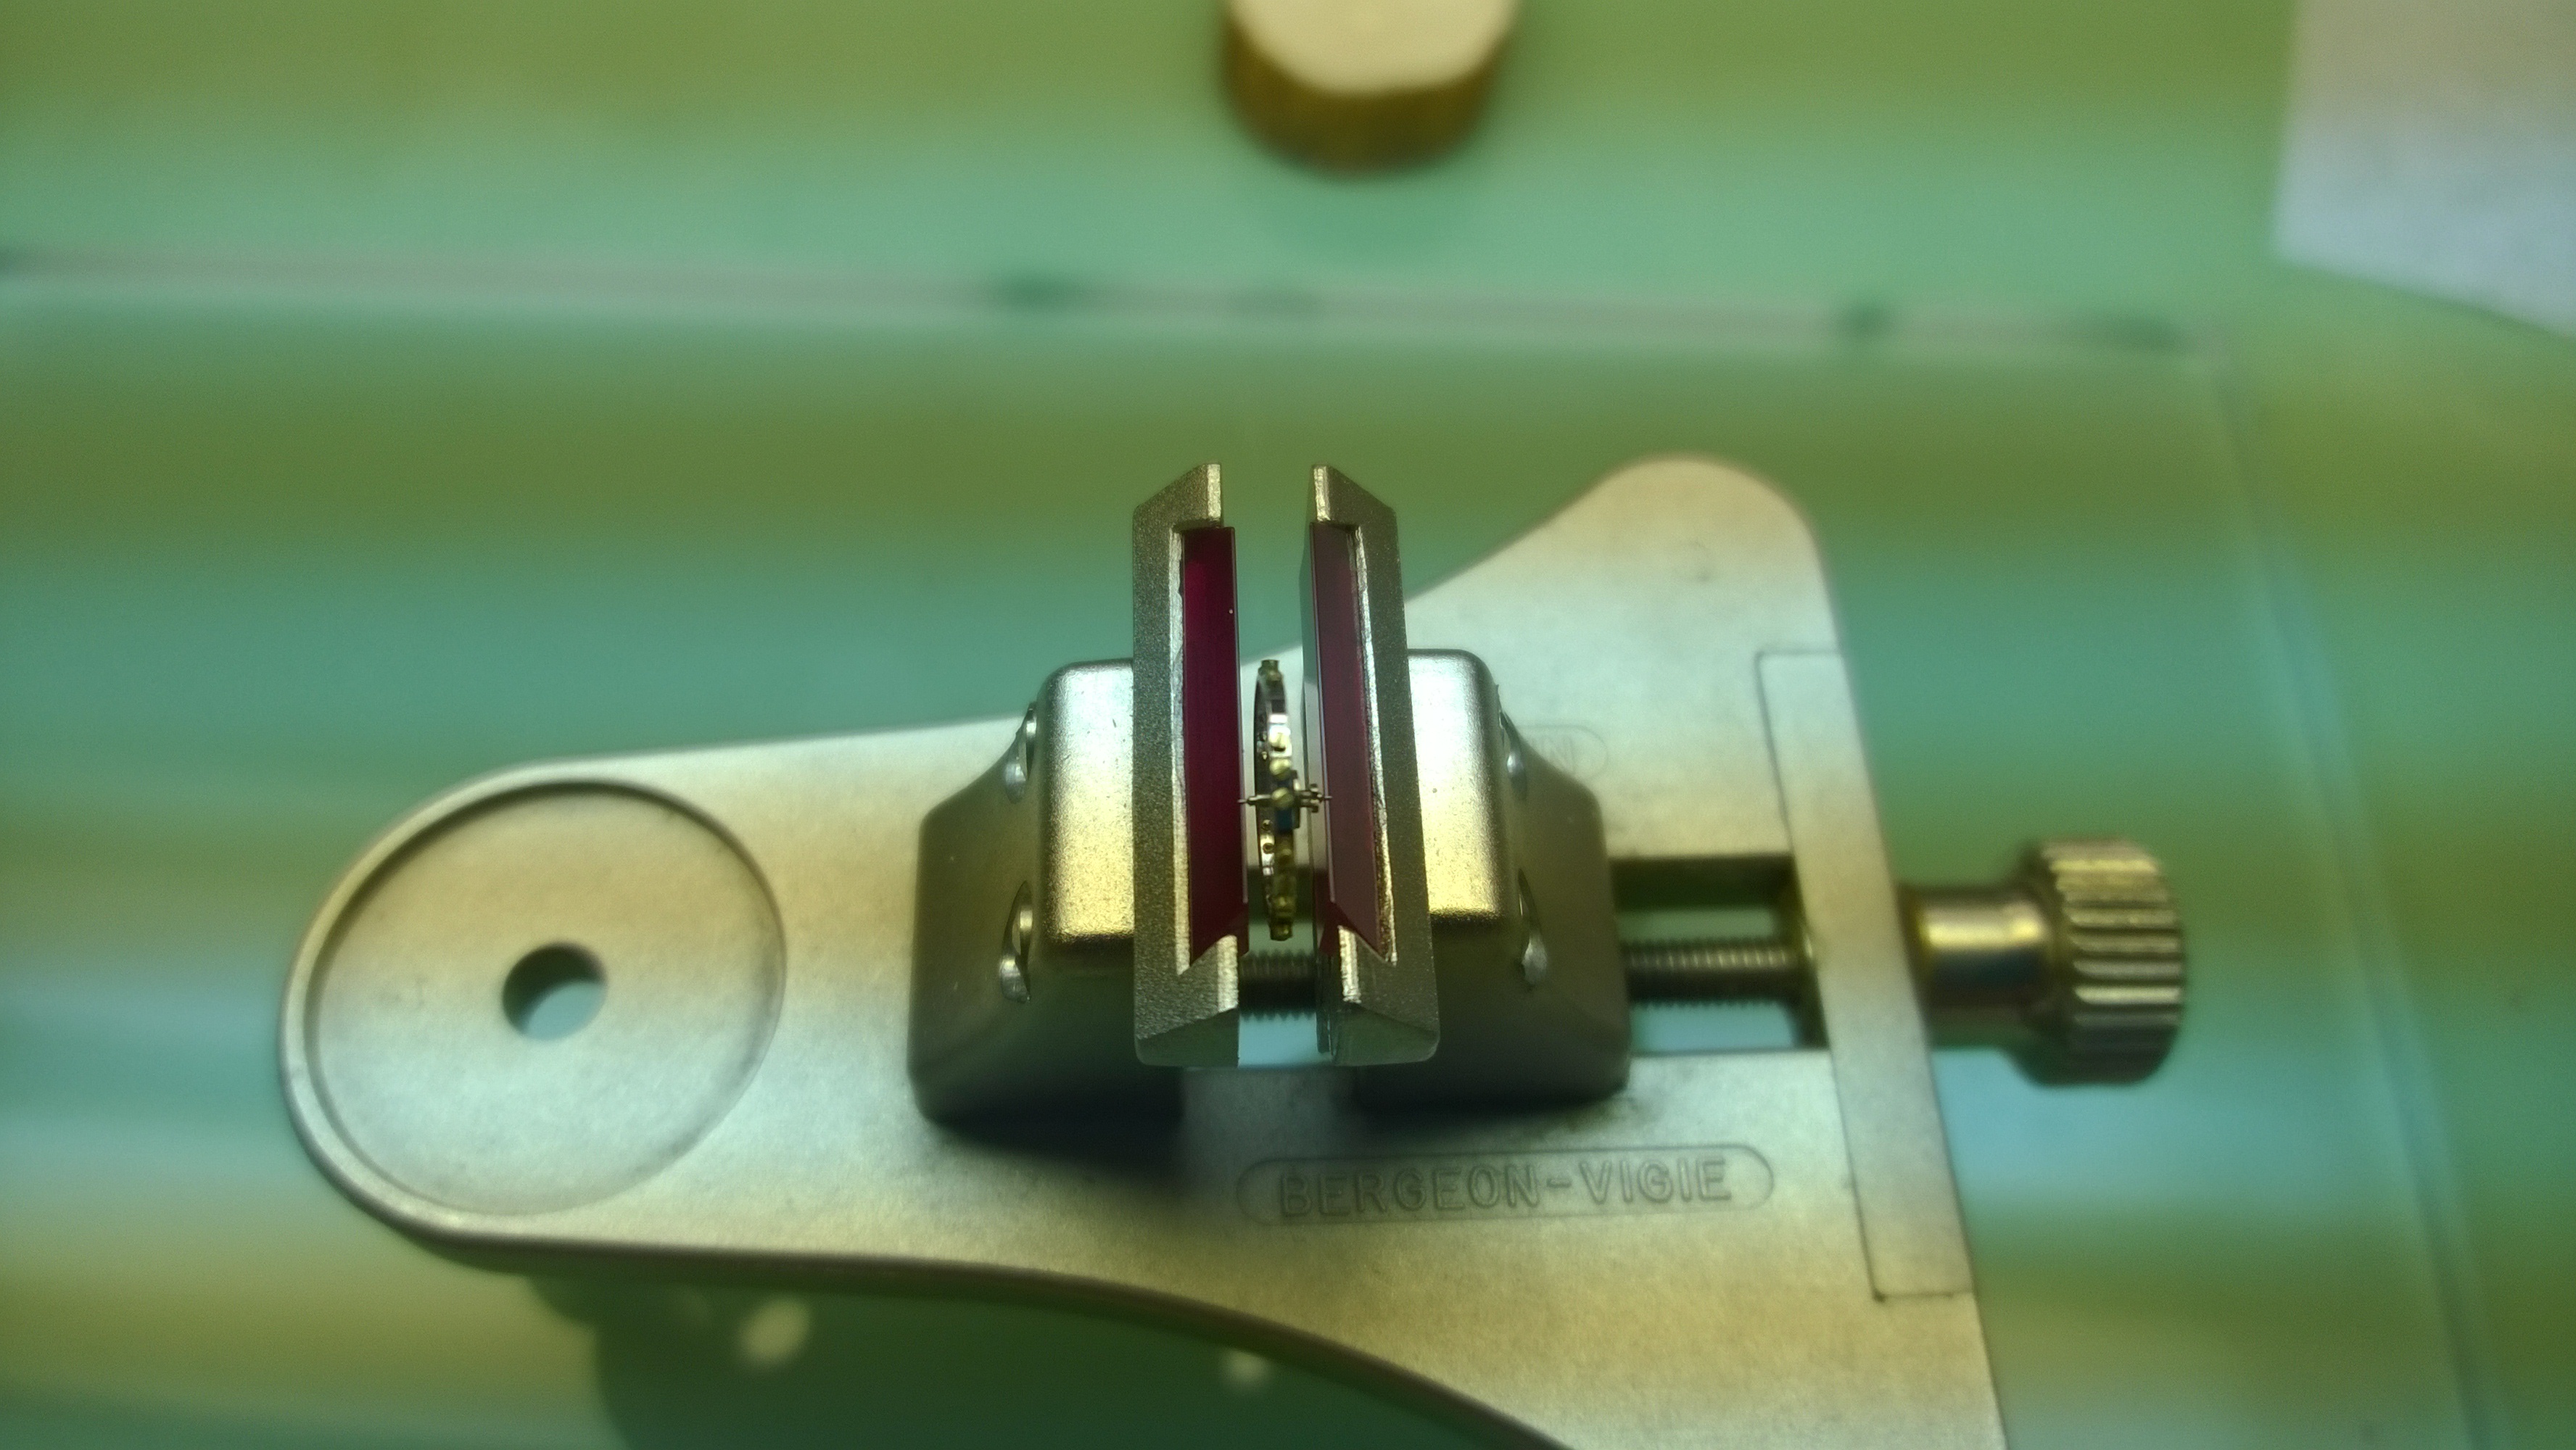 When you first start, you need to place the balance wheel in the jaws so the conical portion of the staff (the cone part of the pivot before you get to the cylindrical end of the pivots) is resting on the jaws. You then give it a small spin so you can check the condition of the pivots. If the pivots are damaged in any way, you will see them “flash” at you as it spins.
Once you have verified that the pivots are good, you slowly spread the jaws apart so the cylindrical part of the pivots are resting on the jaws. Using a blower bulb (or nasal aspirator), you do little puffs of air to move the wheel down the length of the jaws. Eventually, it will settle and slow down into a position where it starts to rock back and forth.
Once it gets in this spot, you can cover the whole set-up with your hands or a glass dome to get rid of any air currents that may be causing it to rock. When it stops, the spot that is the highest (or 12:00 position if you look at it from the side) is 180° opposite from the heaviest spot of the wheel. You want to gently remove the wheel and sandwich it between two pieces of pithwood and then file a little bit of the screw away.
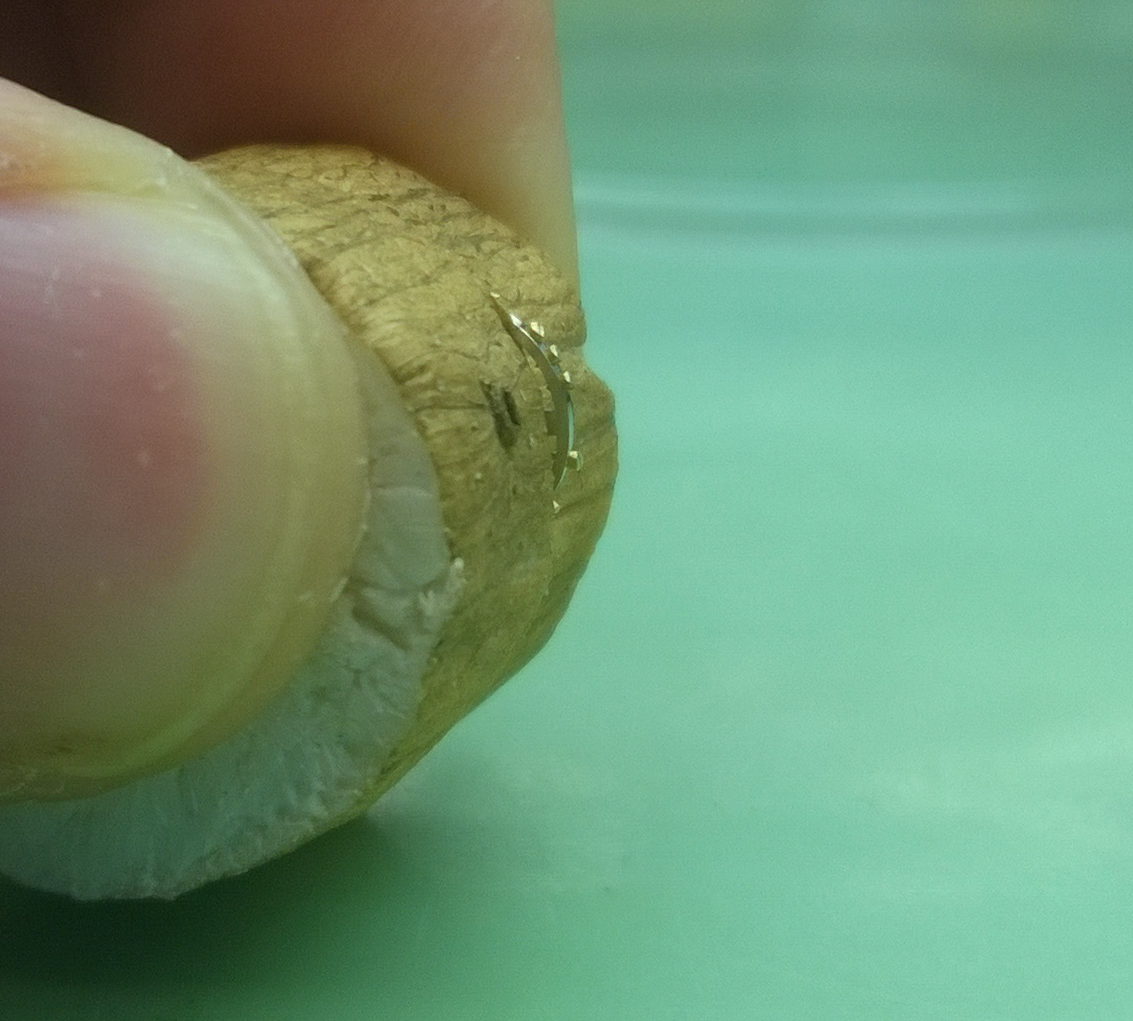 (If you notice the small dots on my thumbnail, those are from me testing the blade of the drills that I made a couple weeks ago)
You then place it back on the poising tool, puff it with air and hopefully you removed the right amount. If you removed too much or too little, you will need to repeat the process. Eventually, you will be able to place it on the wheel and start and stop the movement of the wheel with puffs of air, and there won’t be any rocking back and forth.
This definitely is a delicate process. When filing, you need to make sure the file stays level so it doesn’t remove the edges of the screw or remove material from the screws that surround it. You don’t want to press too hard in case the file slips and you mar the finish of the balance wheel’s rim. You can sit there and file lightly, but you are probably going to burnish the screw (move metal around instead of removing it).
I am still working with my three balance wheels and have two out of the three poised. Once I finish my third one, I believe I’ll be replacing the hairsprings before working on staffing and poising my next three.

Amazing! The exact same process (with much less precision) is used to balance a 40 lbs. car wheel/tire. It’s really cool reading your blog and getting an understanding of not only how watches work but the amount of skill required to fix and maintain them.
Pingback: Week 9, Days 3 & 4 (More Poising, A few Different Tools) | watchmaking journey·