Wow. It’s been a while since I have done an update. First, I want to say I am still in school. I haven’t taken a break from school, just a planned break from the blog. The section that I just completed, in my opinion didn’t really allow itself for weekly updates (which I’ll get into later). That being said, I am planning on doing about five updates for covering my experience and musings on the lathe before I get back into my regular update schedule.
The section of school that I just finished was the lathe section (I am including the Jacot tool in with the lathe, but that will be in another post). Learning how to use the lathe served two purposes:
- to learn how to use the lathe
- learn to see better. Like many of the projects I have done, and will do, learning to see is a skill that gets developed over time. When working on the lathe, you are routinely working with tolerances in the hundreths of a millimeter-it’s hard not to get better at seeing smaller things after spending a few months on that.
Before I could even touch the lathe, I had to learn to polish and sharpen my gravers. Gravers are what you use to work on the lathe. They come in different sizes, but aren’t ready to use until you prepare them. There are different ways of going about this, but the way that we do it is by way of combination bench stone, emery paper and a graver sharpener.
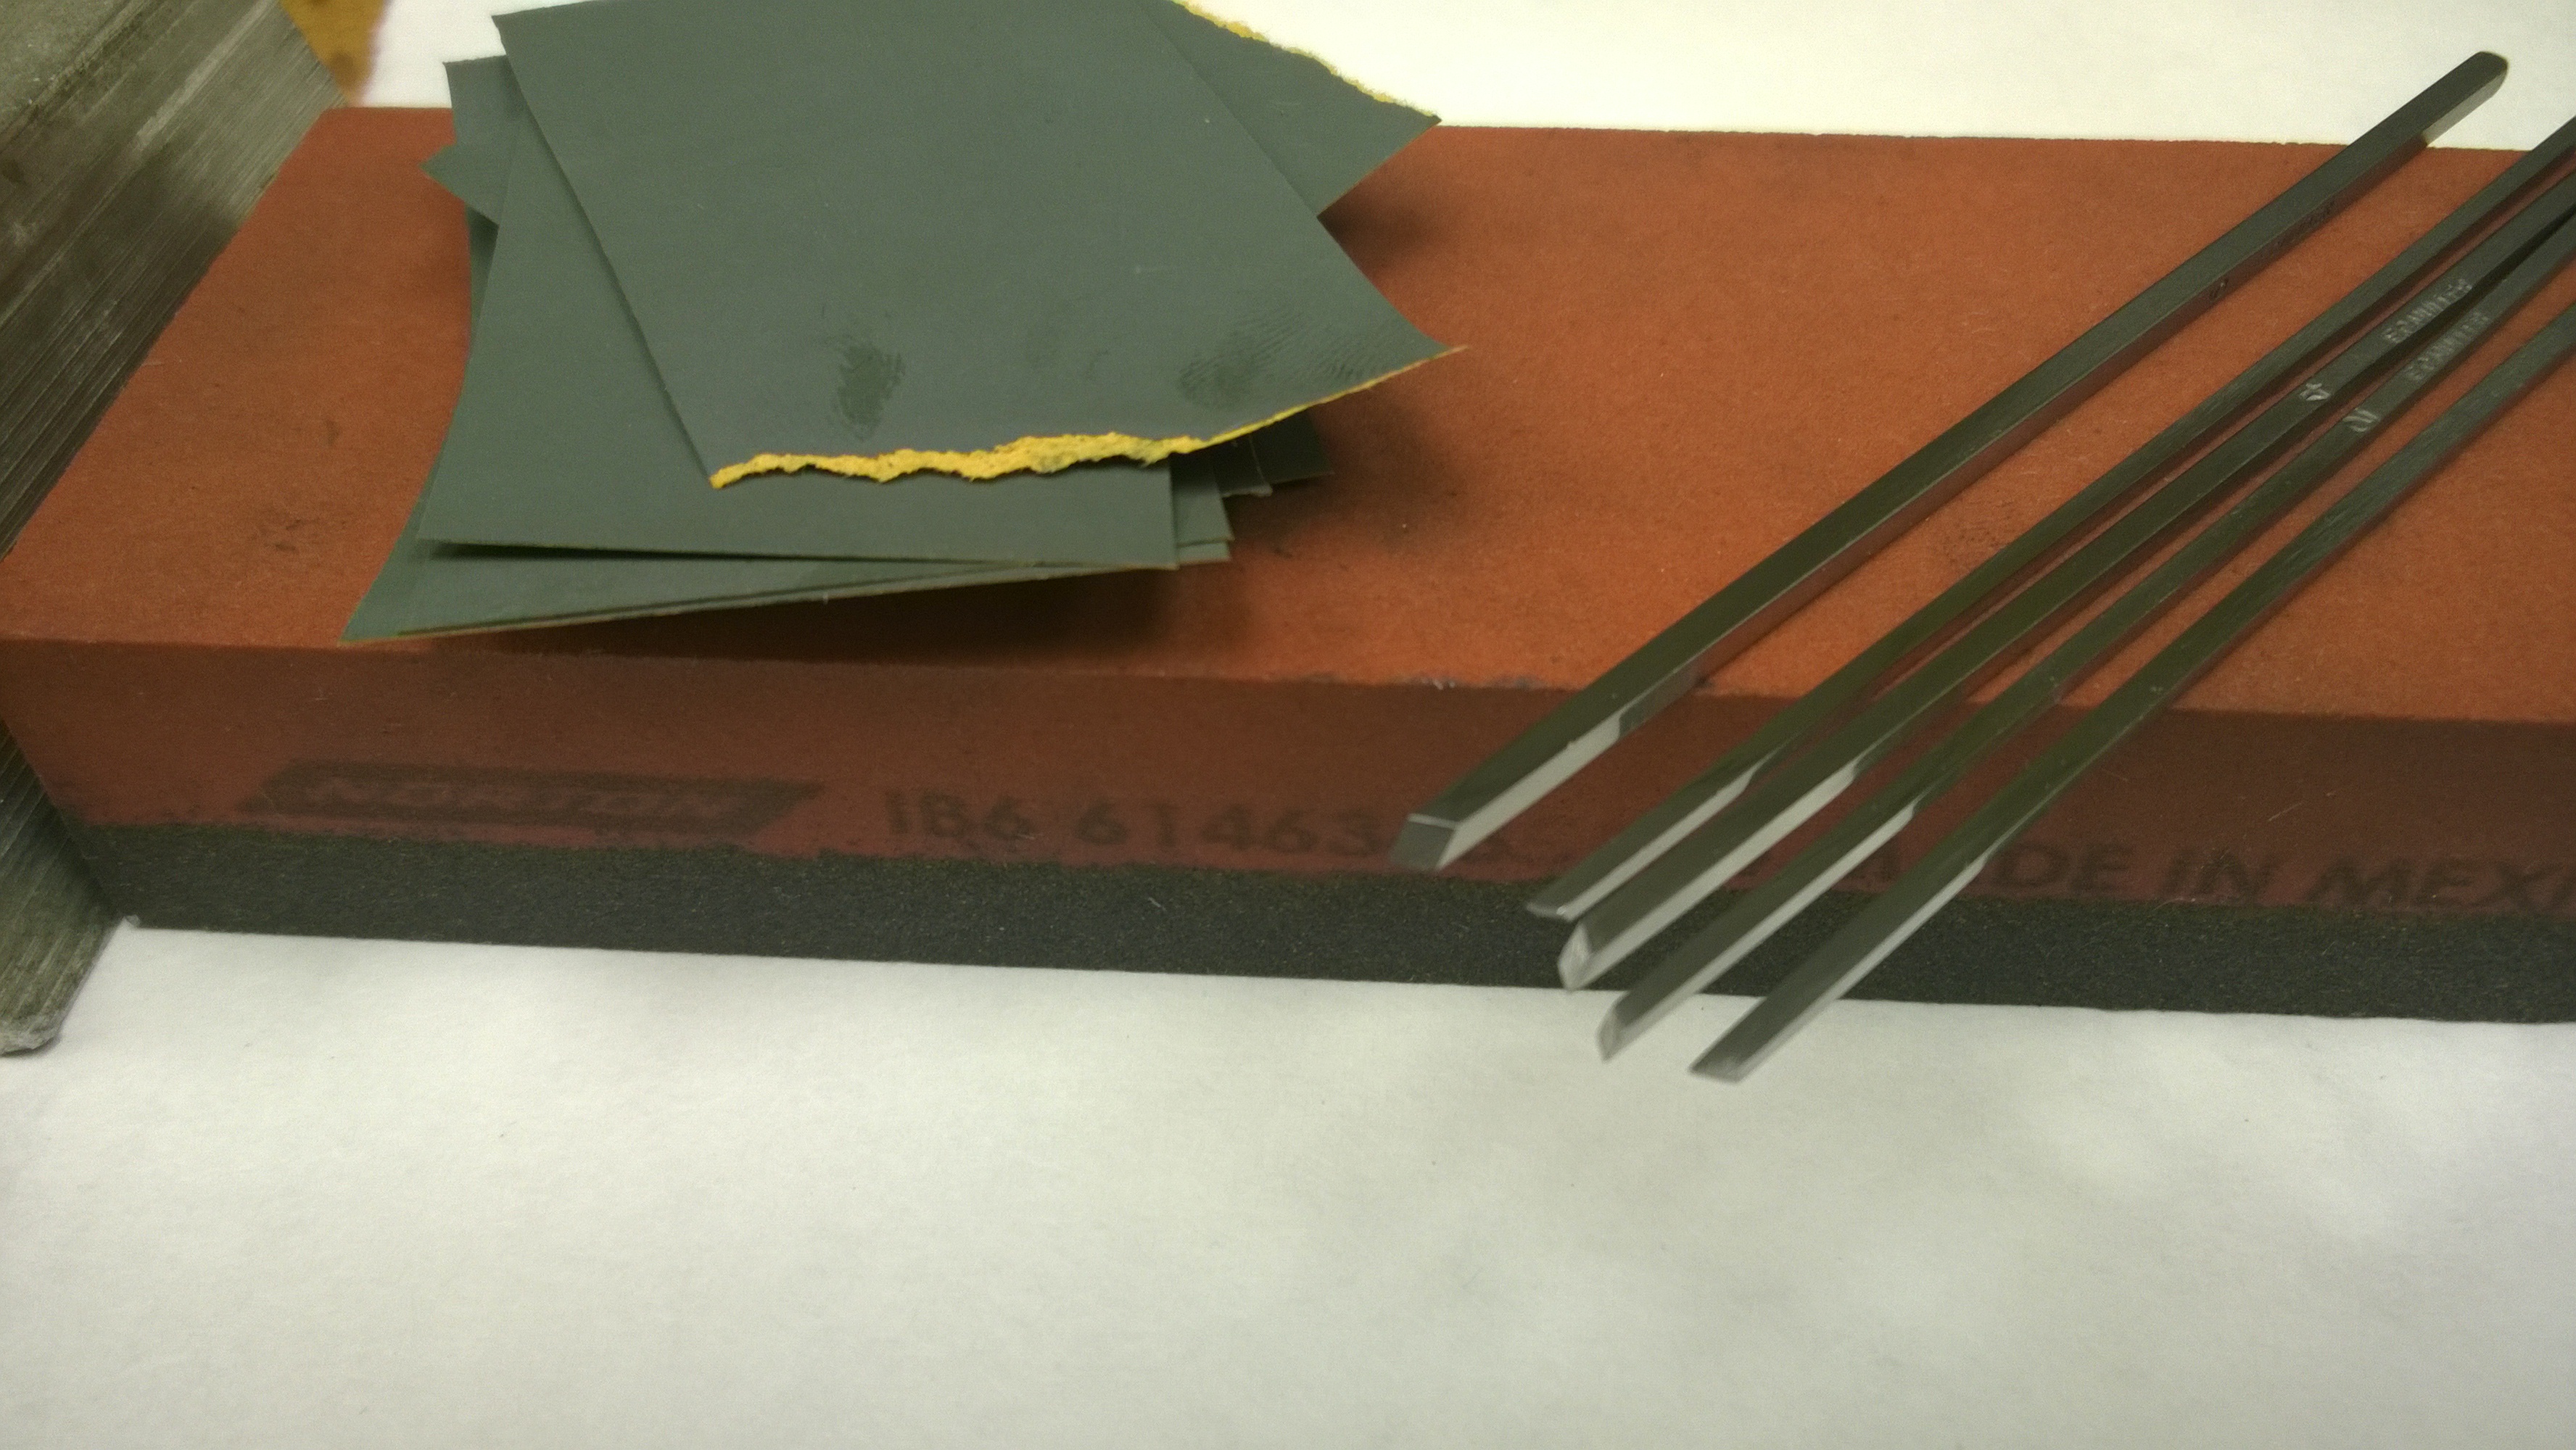
What you see above is the basic setup for polishing the gravers (though typically, the emery paper is in strips long enough to cover wrap the length of the stone). Though the lighting isn’t the best, you should be able to look at the handle-end of the gravers and see that they have a different finish compared to the tips. While a mirror shine is ideal, if you don’t do it properly, you can have a mirror shine, but improperly prepared gravers.
When you look at an unfinished graver, not only is it dull in appearance, there are very fine grooves that go throughout the gravers that need to be removed. If you don’t, when you are cutting your stock, you will either have rough cuts that show up in your work, or you will rip chunks of metal out, instead of smoothly cutting it.
Polishing the graver not only gives you a nice finish, but it also maintains the square shape of the gravers. If, when polishing, you round the gravers shape, or even taper them, you are going to have a hard time using them-instead of presenting to them to your work properly, you will have to angle the the graver on the tool rest if it is tapered, or roll it if it is rounded. Either way, presenting your graver like that will ultimately end up with uneven cuts, and an out-of-center piece.
Polishing a graver is relatively easy. If it is your first time to do it, be prepared to have a sore (and possibly bloody) fingertip. After a while, you will develop a callous that will hold up to polishing as many gravers as you need. Take a combination bench stone and spread some oil on the coarse side (in the picture above, the dark side) and hold one side of the graver flat on the stone with an even pressure at the tip. Using a back and forth motion while keeping the pressure even, rub the graver against the stone while slowly moving your finger tip back a bit at a time. Keep this up until you have achieved a coarse matte finish that runs about 15-20mm. Flip the graver 180° and repeat the process on the opposite side. Once you have achieved the same finish, turn the graver 90° and repeat the process with the other two sides. When you are doing this, you want to make sure that you don’t use the same spot on your stone as you do this, or else you can create a groove in your stone that can present a problem later.
Once you have achieved a matte finish on all four sides, flip the stone over and repeat the process using the finer side of the stone. The finish should be a finer matte finish. You should go from a dark grey to a lighter gray by the time you finish with the fine side of the bench stone. If you have maintained proper pressure and shape, you should be able to rub your finger across the edges/corners of the graver like you would with a knife and feel that they are sharp.
Clean the stone and wrap some fine grit emery paper (2000-2500 grit will be perfect) around the length stone and repeat the process. This process is how you change the matte finish to a mirror polish. Once you have done this, you will be able to see and feel for any deep grooves left in the graver. If there are any grooves, go back to the fine finish and repeat the process.
Once all the grooves have been removed, you need to sharpen your gravers. For most of your work, a 45° angle will suffice, some specific work may require specific angles, but I’ll cover that in a later post. The easiest and most consistent way to sharpen your graver is to use a Crocker Graver Sharpener. What’s nice about the Crocker-style sharpener is you can set your angle and depth very easily. If you need to make a specific shape (like a part-off tool), being able to rotate your graver around without loosing depth or angle is great. That being said, to sharpen your graver, you will need to basically repeat the process used when you polished the graver. Before you use the stone, you need to set your angle. For a 45°, place the graver in the sharpener with about 10-15mm sticking out and resting on the stone. Take a piece of watch paper and fold it in in half on a diagonal. Now you have a right triangle where the hypotenuse is at 45°. Place the tip of the triangle near the tip of the graver, and change the angle of the graver until the graver handle lines up with the hypotenuse of your triangle.
Once you have the proper angle set for your graver, follow the same process you did when polishing your gravers. Start with the coarse side of the stone, flip to the fine side and then finish with emery paper. Instead of just going back and forth with the graver, you can make a circular motion or a figure eight. Even though your graver is locked into position with the tool, doing a circle or figure eight can help to minimize and/or cancel out any potential rocking you may be doing with your hand when you are applying pressure. Once you are done putting an angle on your graver, you should have a sharp graver with a nice polish on the tip and sides.
Occasionally, as you are working, you will need to re-polish and sharpen your gravers (unless you are using carbide gravers-more on that later) due to them getting dull.
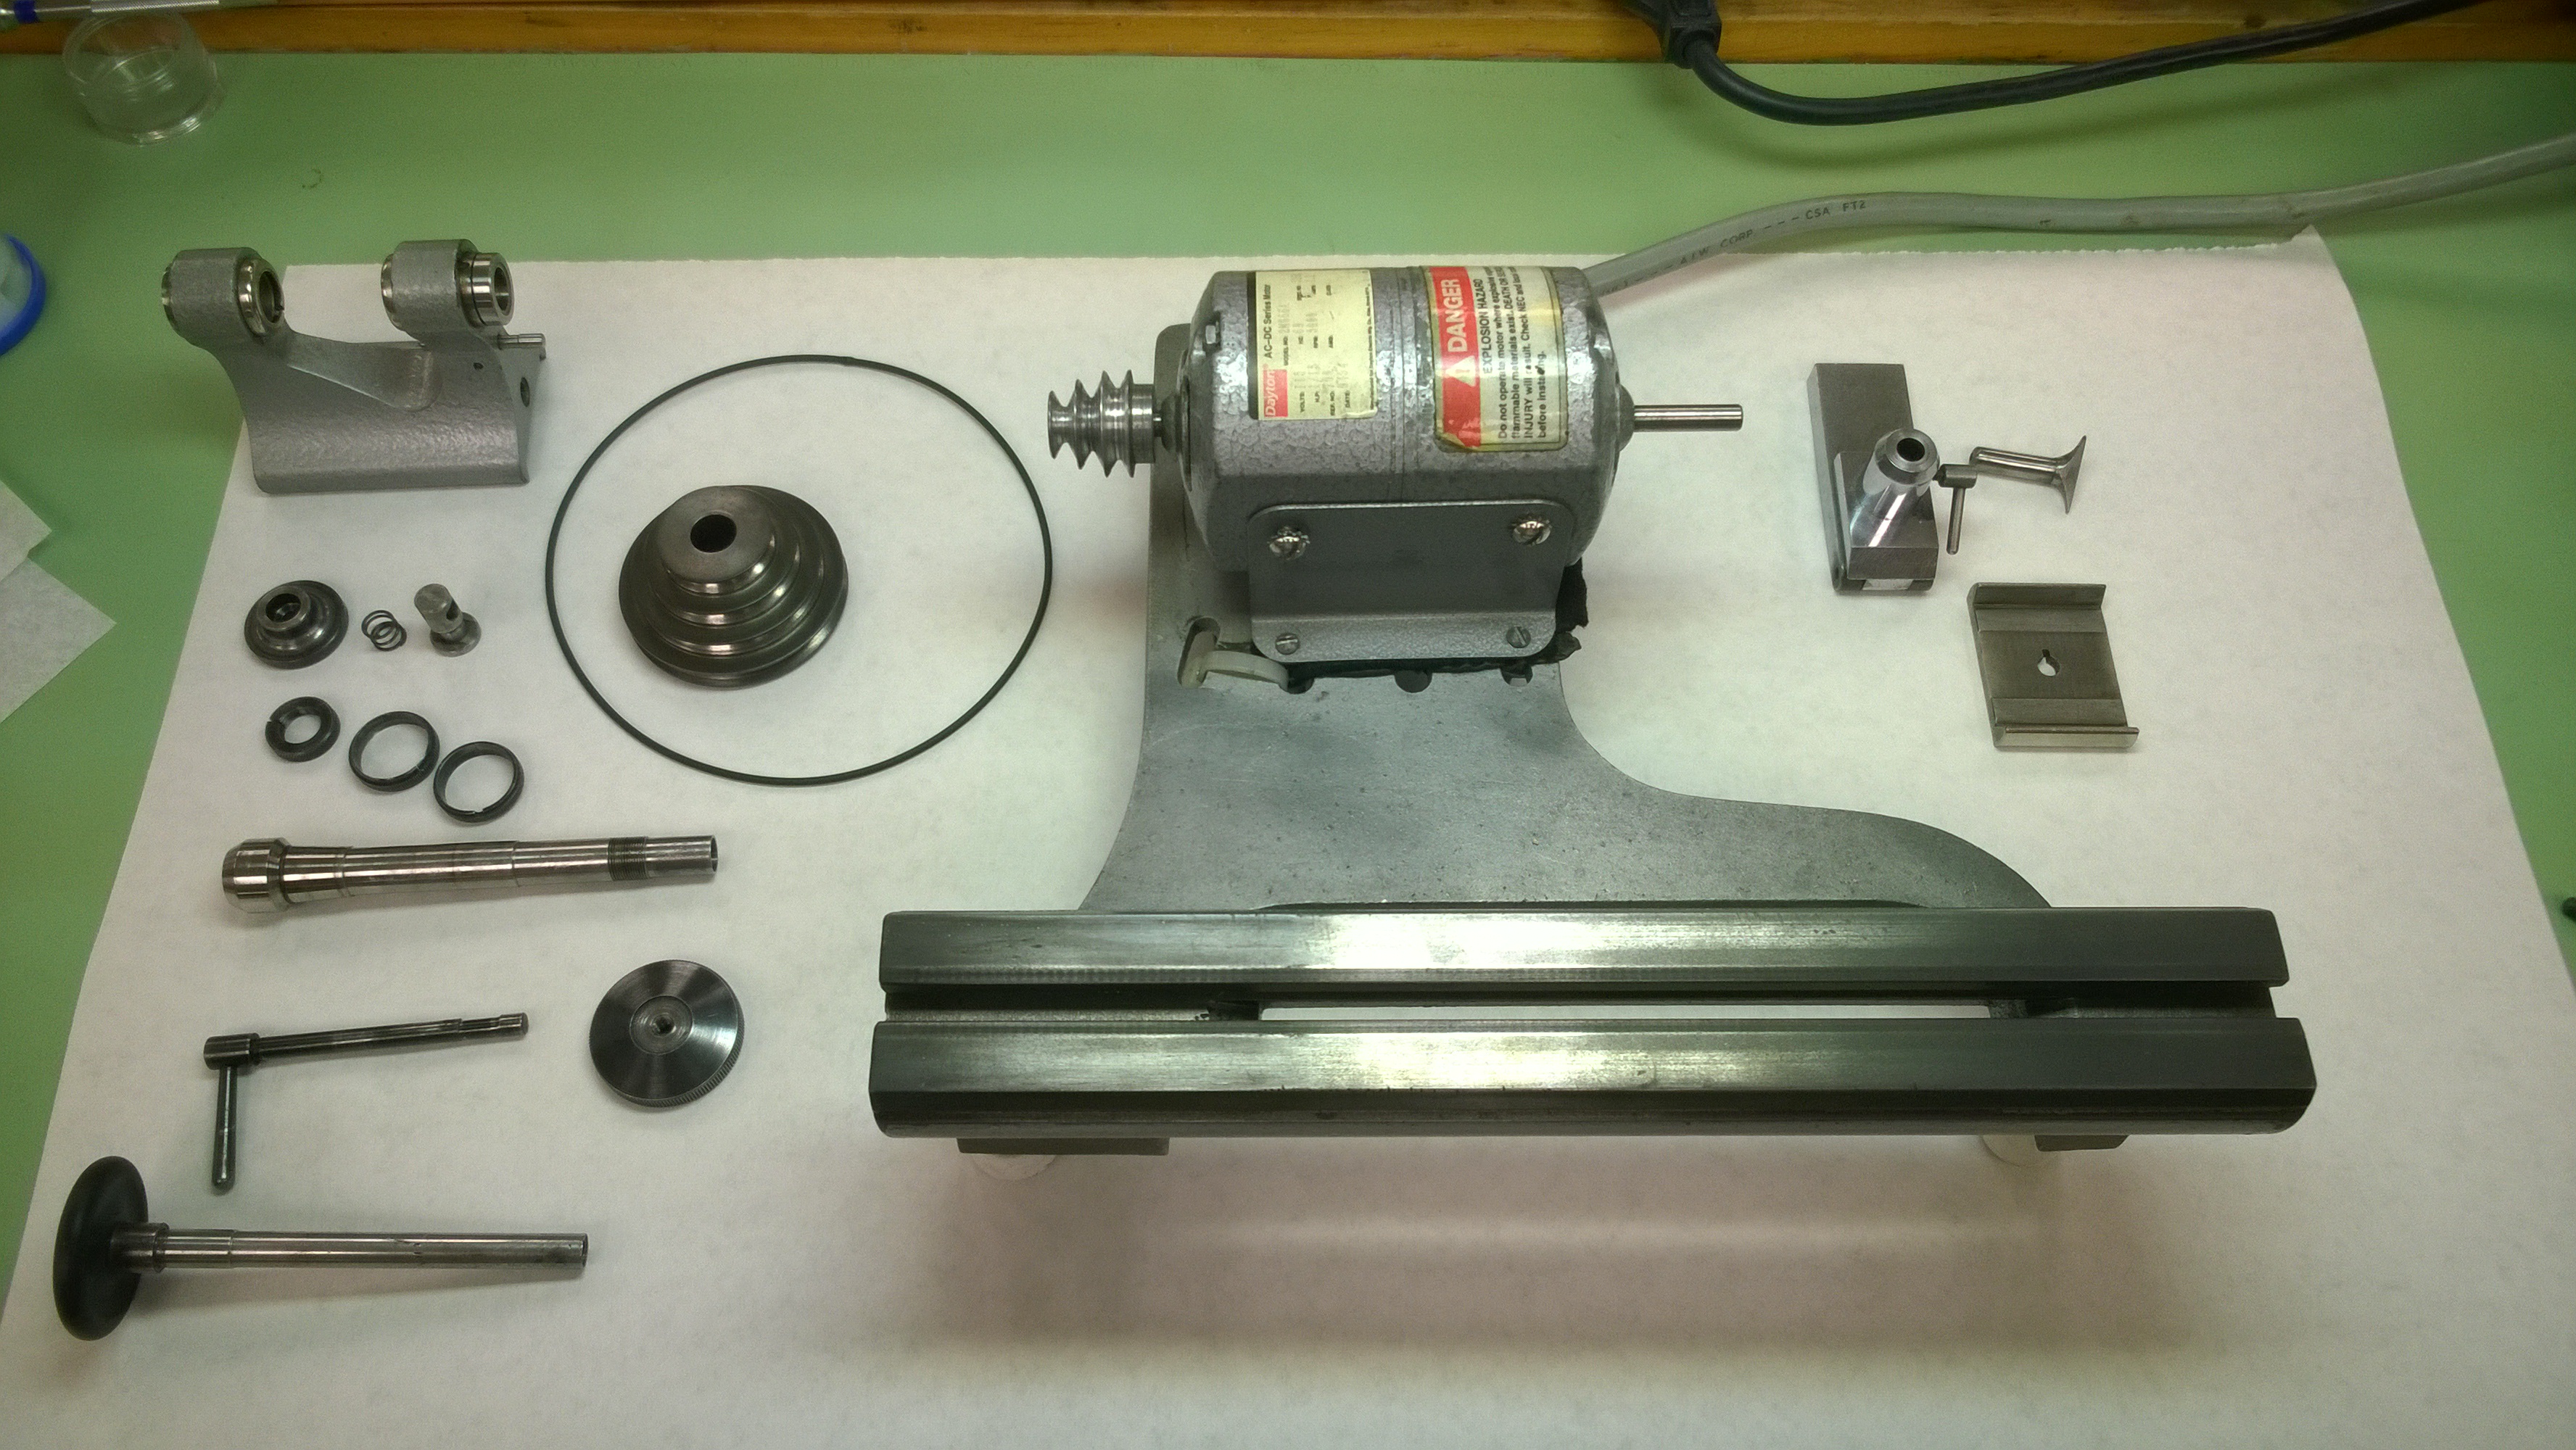 Once I got my gravers prepared, I learned how to take apart the lathe, clean and oil it. The basic process is as follows:
- Remove the tool rest from clamp and then remove the clamp from the bed by loosening the clamp screw and washer.
- Use the hand wheel to loosen and remove any chuck that may be in the head stock.
- Remove the hand wheel/draw in spindle.
- Remove the bearing dust covers
- Loosen the screw in the pulley
- Remove the split adjusting nut
- Remove the lathe spindle
- Remove the pulley
- Remove the pulley band
- Remove the head stock
Wipe everything down with a clean paper towel and a dry brush. If you need to, use a damp paper towel as a follow up but dry immediately. Once everything has been cleaned, lubricate the parts with a thin coating of oil.
- Place the headstock back on the bed
- Place the pulley band on the headstock
- Slide the spindle part way through the headstock and then through the pulley while making sure everything is lined up
- Screw the pulley to the spindle
- Replace the split nut and follow that up with the washers
- Replace the bearing dust caps
- Put the tool rest clamp on the bed and make sure the clamp screw and washer are put back the right way
- Replace the tool rest in the clamp
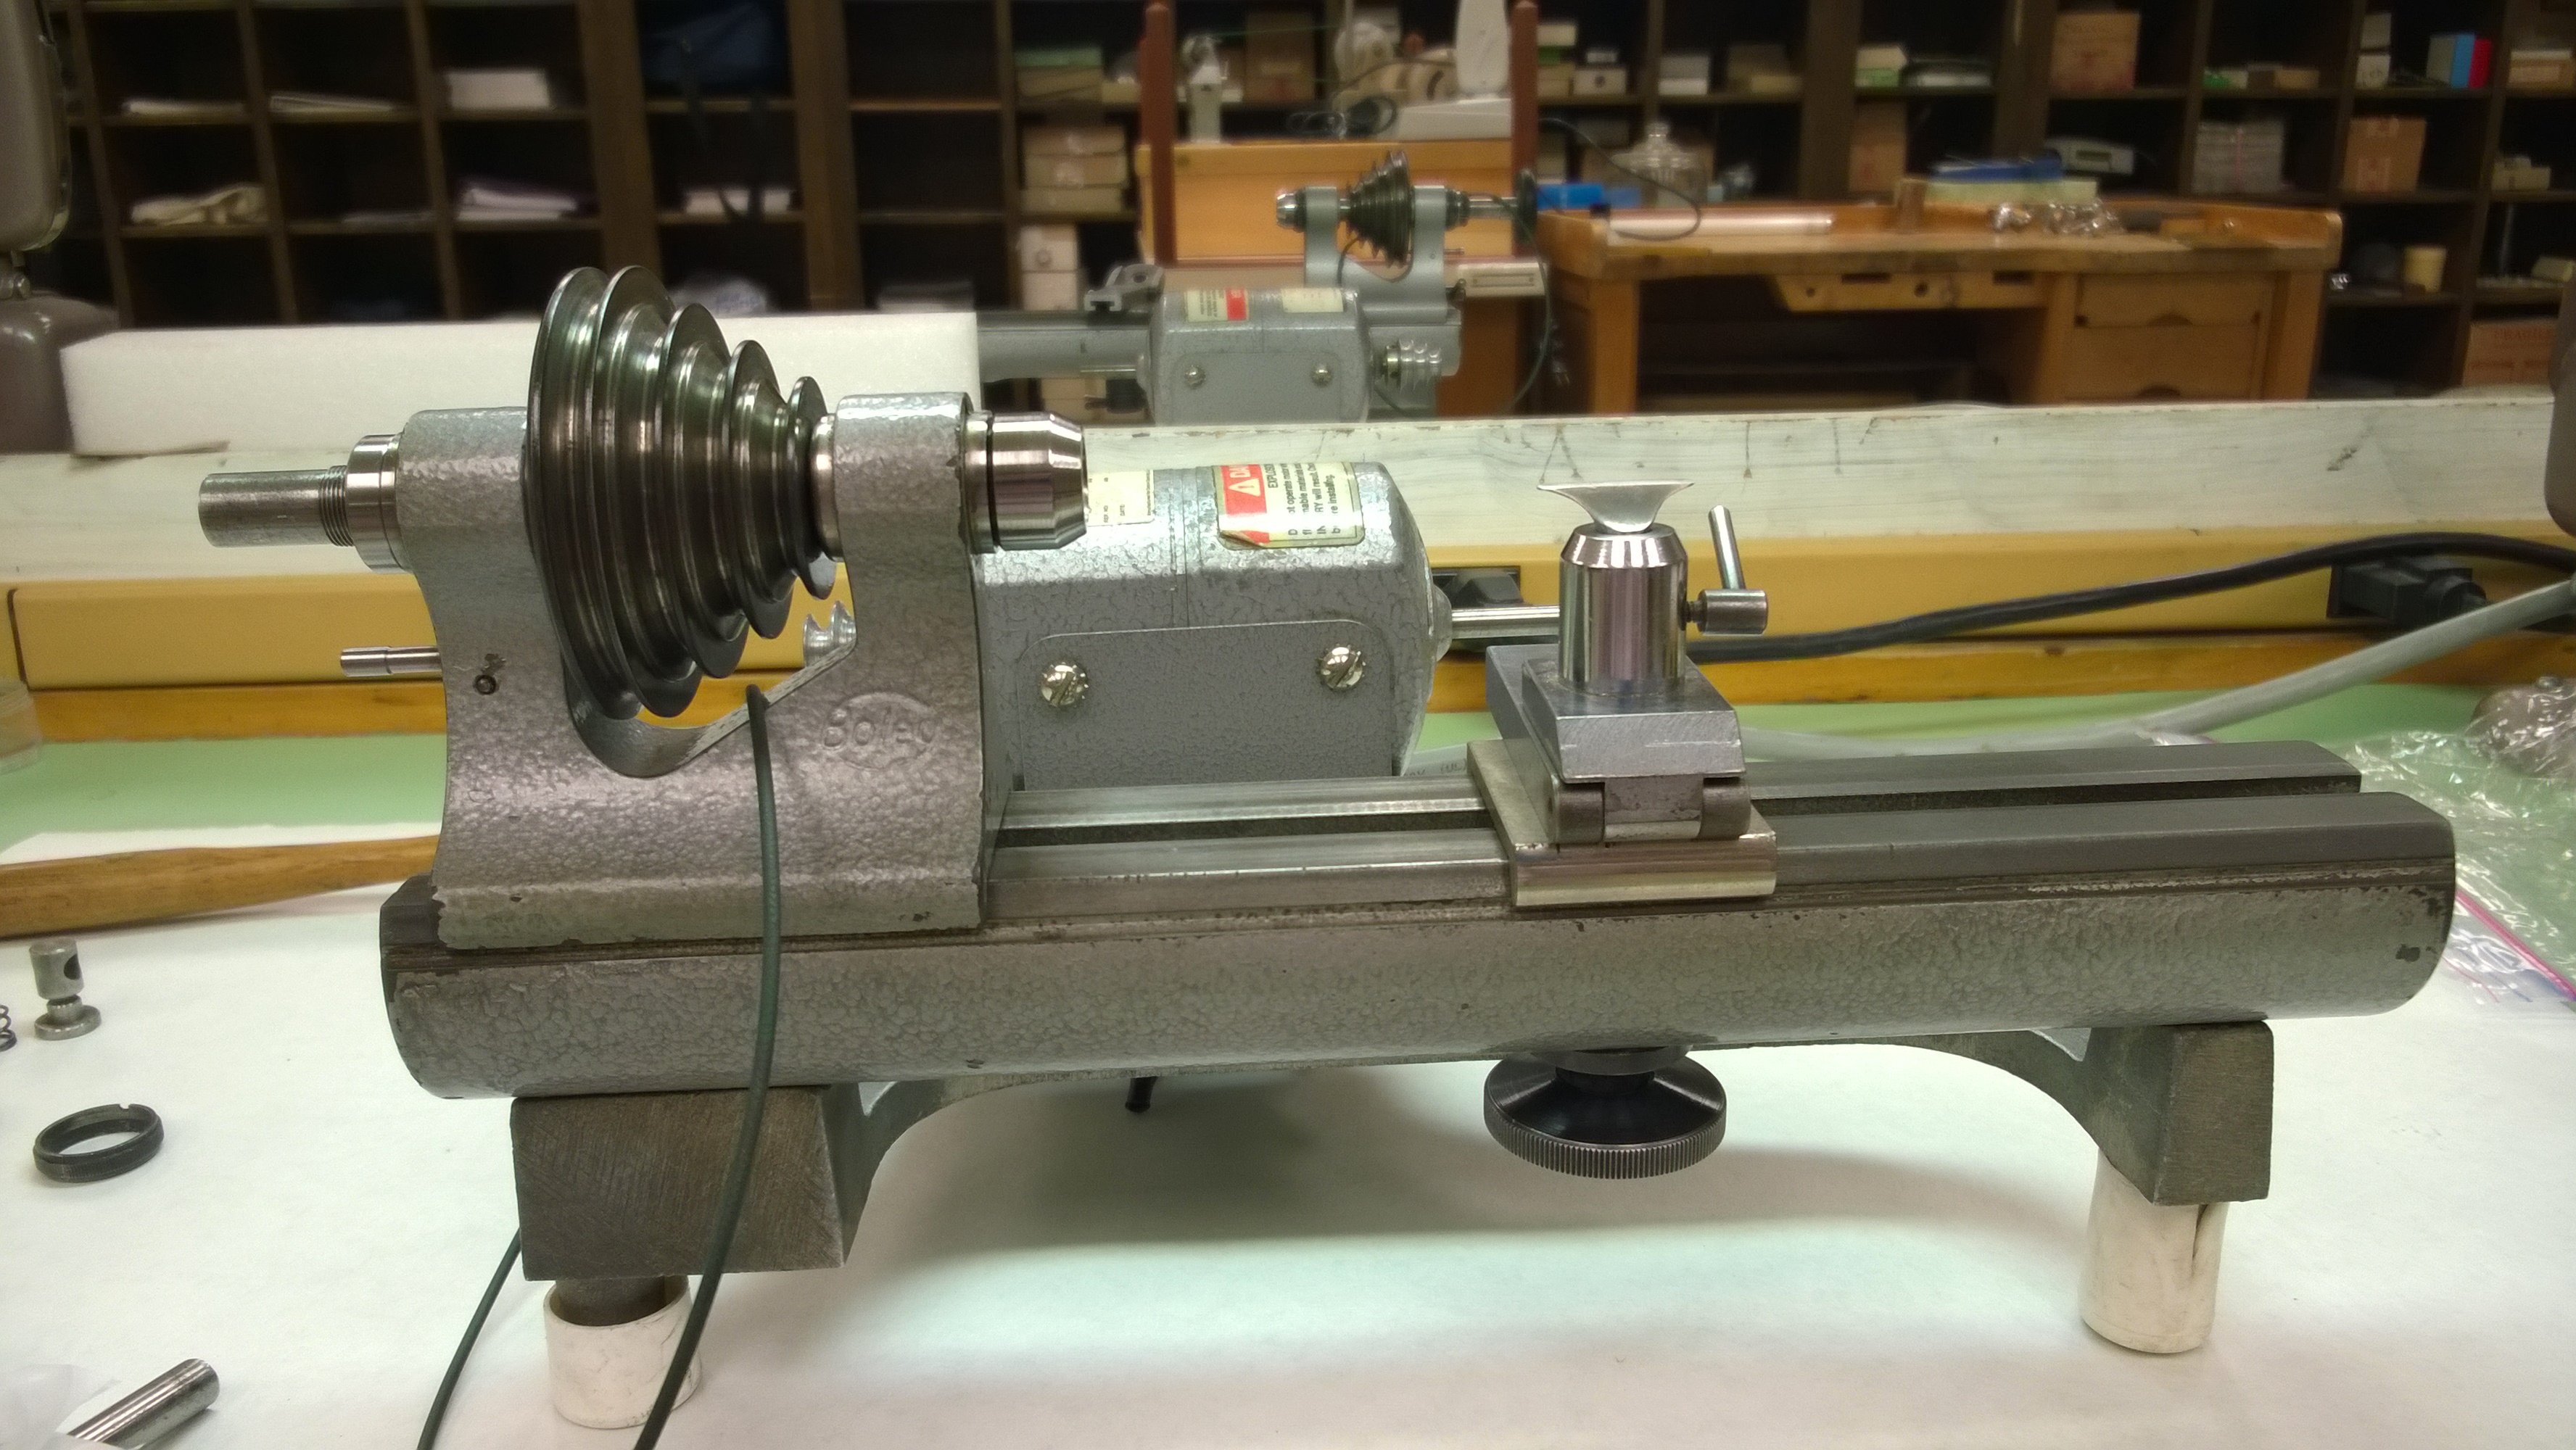
Once you have done all that, you are now ready to start using the lathe.
My next post will go up in a few days. I’ll go over some of the basics that I learned that were the foundation for some of the more advanced projects.

I just found your blog and it is very helpful to me. I am just getting started in watch and clock making, so all the info I can gather is very helpful. I have a lathe but I am still collecting the gravers and other tools. Thank you very much.
No problem! I’m glad you found it useful. If you are going to focus on clocks, you really need to check out Clickspring on youtube (http://bit.ly/1kwdXVa). His channel is amazing, inspiring and jealousy inducing.